


How to Create a Bullet Journal Vision Board
- Ralph Marston
Design your dream life by using visual tools to help you reach your goals. The use of visual tools, such as a vision board, can be very helpful in designing and achieving your dream life. It activates the creative right side of your brain and helps you see new possibilities.
Hi! It’s Kate from @journalwithkate on Instagram and today I’m here to share an easy and fun way to create a vision board in your bullet journal.
Collect
The first step is to put your thoughts on paper. Decide which areas of your life you’d like to focus on. What would you like to achieve within the next year or next few years? What does your dream life look like in pictures and photos?
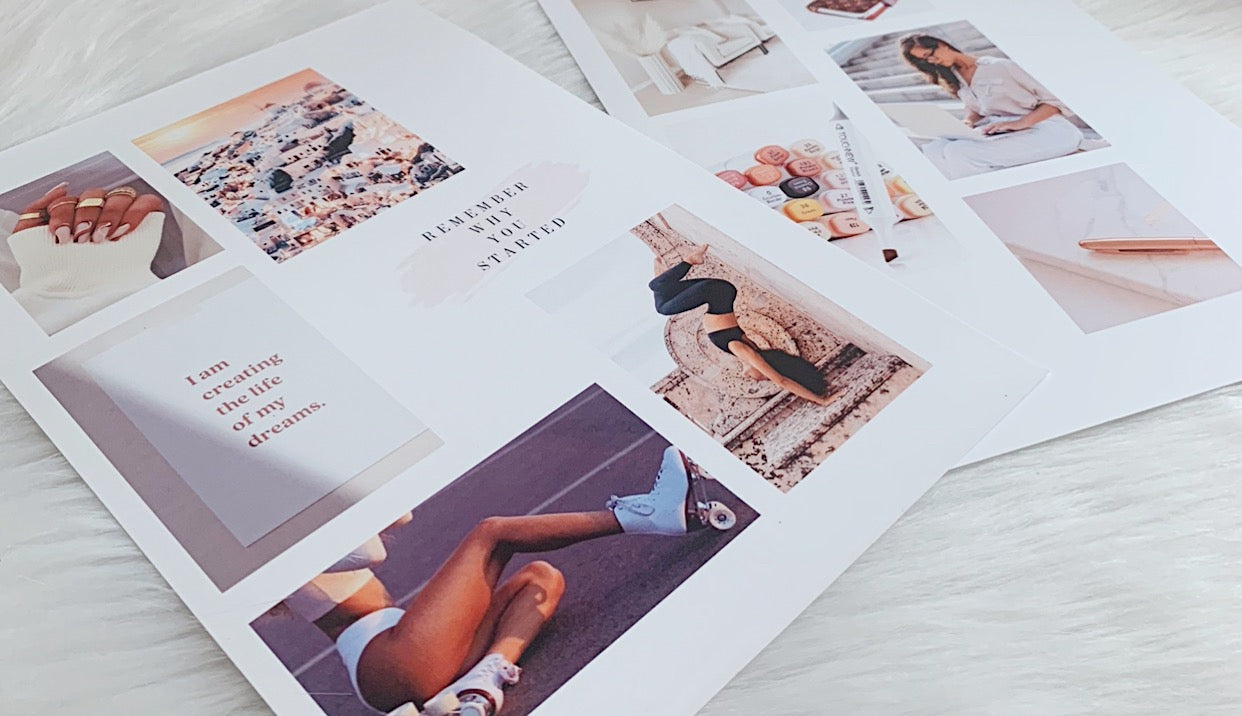
Next is collecting photos and images which represent your dream life. I’ve exclusively used Pinterest for this step, but you can gather your pictures from literally everywhere: from magazines, the internet, books, you name it! There are no rules! You can even choose to draw instead of using pictures.

Recommended supplies
- Archer and Olive Notebook: Here I'm using the B5 Morning Sun dot grid notebook. It's bigger than the usual A5. Perfect if you find yourself needing more space. It is the perfect size for a vision board. Click on this link or use code KATE10 to save money on your order! These notebooks are perfect if you’re looking for pages that don’t ghost or bleed!
- Pens & markers: I used fineliners in the sizes 0.05 and 0.8 for my famous border. For the abstract shapes I used Copic Markers (the colors E000, E17 and E70). You don’t necessarily need to use copics. You can use any marker.
- Archer and Olive Acrylograph pens: For this spread I’ve used the Gold Acrylograph pen from the Spring Vernal collection.
Start the fun part
Next up is creating the layout of your vision board. I knew I wanted a vision board with neutral colors/ brown tones. So I started by outlining some abstract shapes and coloring them in with my Copics. My famous border has become a staple in my spreads. I outlined it with the brown Copic Multiliners. Adding some gold lines over the abstract shapes was the finishing touch.

Add the images and photos
To decorate the spread even more I’ve used some circle page flags in three different brown tones. Lastly I pasted my Pinterest photos into the spread. I printed the images onto sticker paper, so this was a super easy step. And Voila: your vision board is done in a matter of minutes!
If you want to see how I created this spread step by step, watch this video.
I’m so pleased how this spread turned out! I can’t stop staring at it!

I hope you find this blog post helpful and you’ll start creating your own vision board. Visual goal setting has been a wonderful tool in my life and has helped me reach many goals! Now it’s your turn! What are some goals you’d like to achieve? Download a free printable version of this neutral layout here and create your own vision board!

I’d love to see what you create and what your vision board looks like. Use the hashtag #archerandolive or #archerandolivecommunity. Don’t forget to tag me on @journalwithkate and @archerandolive so we can see your work. Have fun!