


Hi friends, Adrienne from Studio 80 Design here today to share a fun project! I love creating simple and beautiful borders in my Archer and Olive Dot Grid Notebooks—the grid makes it SUPER easy to draw a border that’s even and symmetrical! Each border will start with a rectangle base drawn on the page with a Tombow MONO Drawing Pen 05 and a ruler. Then I will show you how to embellish and add to it to create three different and beautiful borders! Let’s get started!
Materials you’ll need:

Border 1
For the first border I’m going to use the MONO Drawing Pen 03 and draw a squiggly line that curves around the rectangle border all the way around the page. This is going to be a vine. Then draw in leaves around the vine to fill out the border!

Border 2
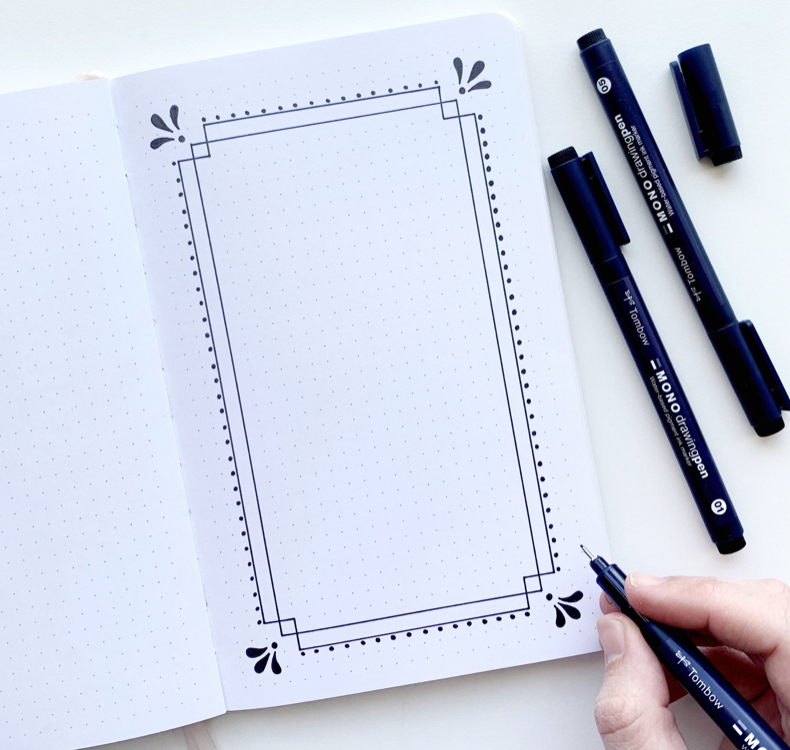
The next border will be more geometric! Starting with the rectangle border, use your ruler and MONO Drawing Pen 05 to draw another border on top. Extend the outside lines by one square all around except for the corners, where they will be inverted to the middle. Then on each corner draw some embellishments and add dots around the outside border!

Border 3
For the last border I’m going to add some florals! With the MONO Drawing Pen 03, draw flowers and leaves from the rectangle border to the edge of the page all the way around the border. Vary the flowers and leaves to give it variety. Then go back with the MONO Drawing Pen 01 to add in small details to the flowers and leaves.

Thank you so much for visiting! I hope you try out these fun borders in your Archer and Olive Notebook! For more inspiration like this make sure to follow me @studio80design!


1 comment
Designs are pretty nice especially the second one