

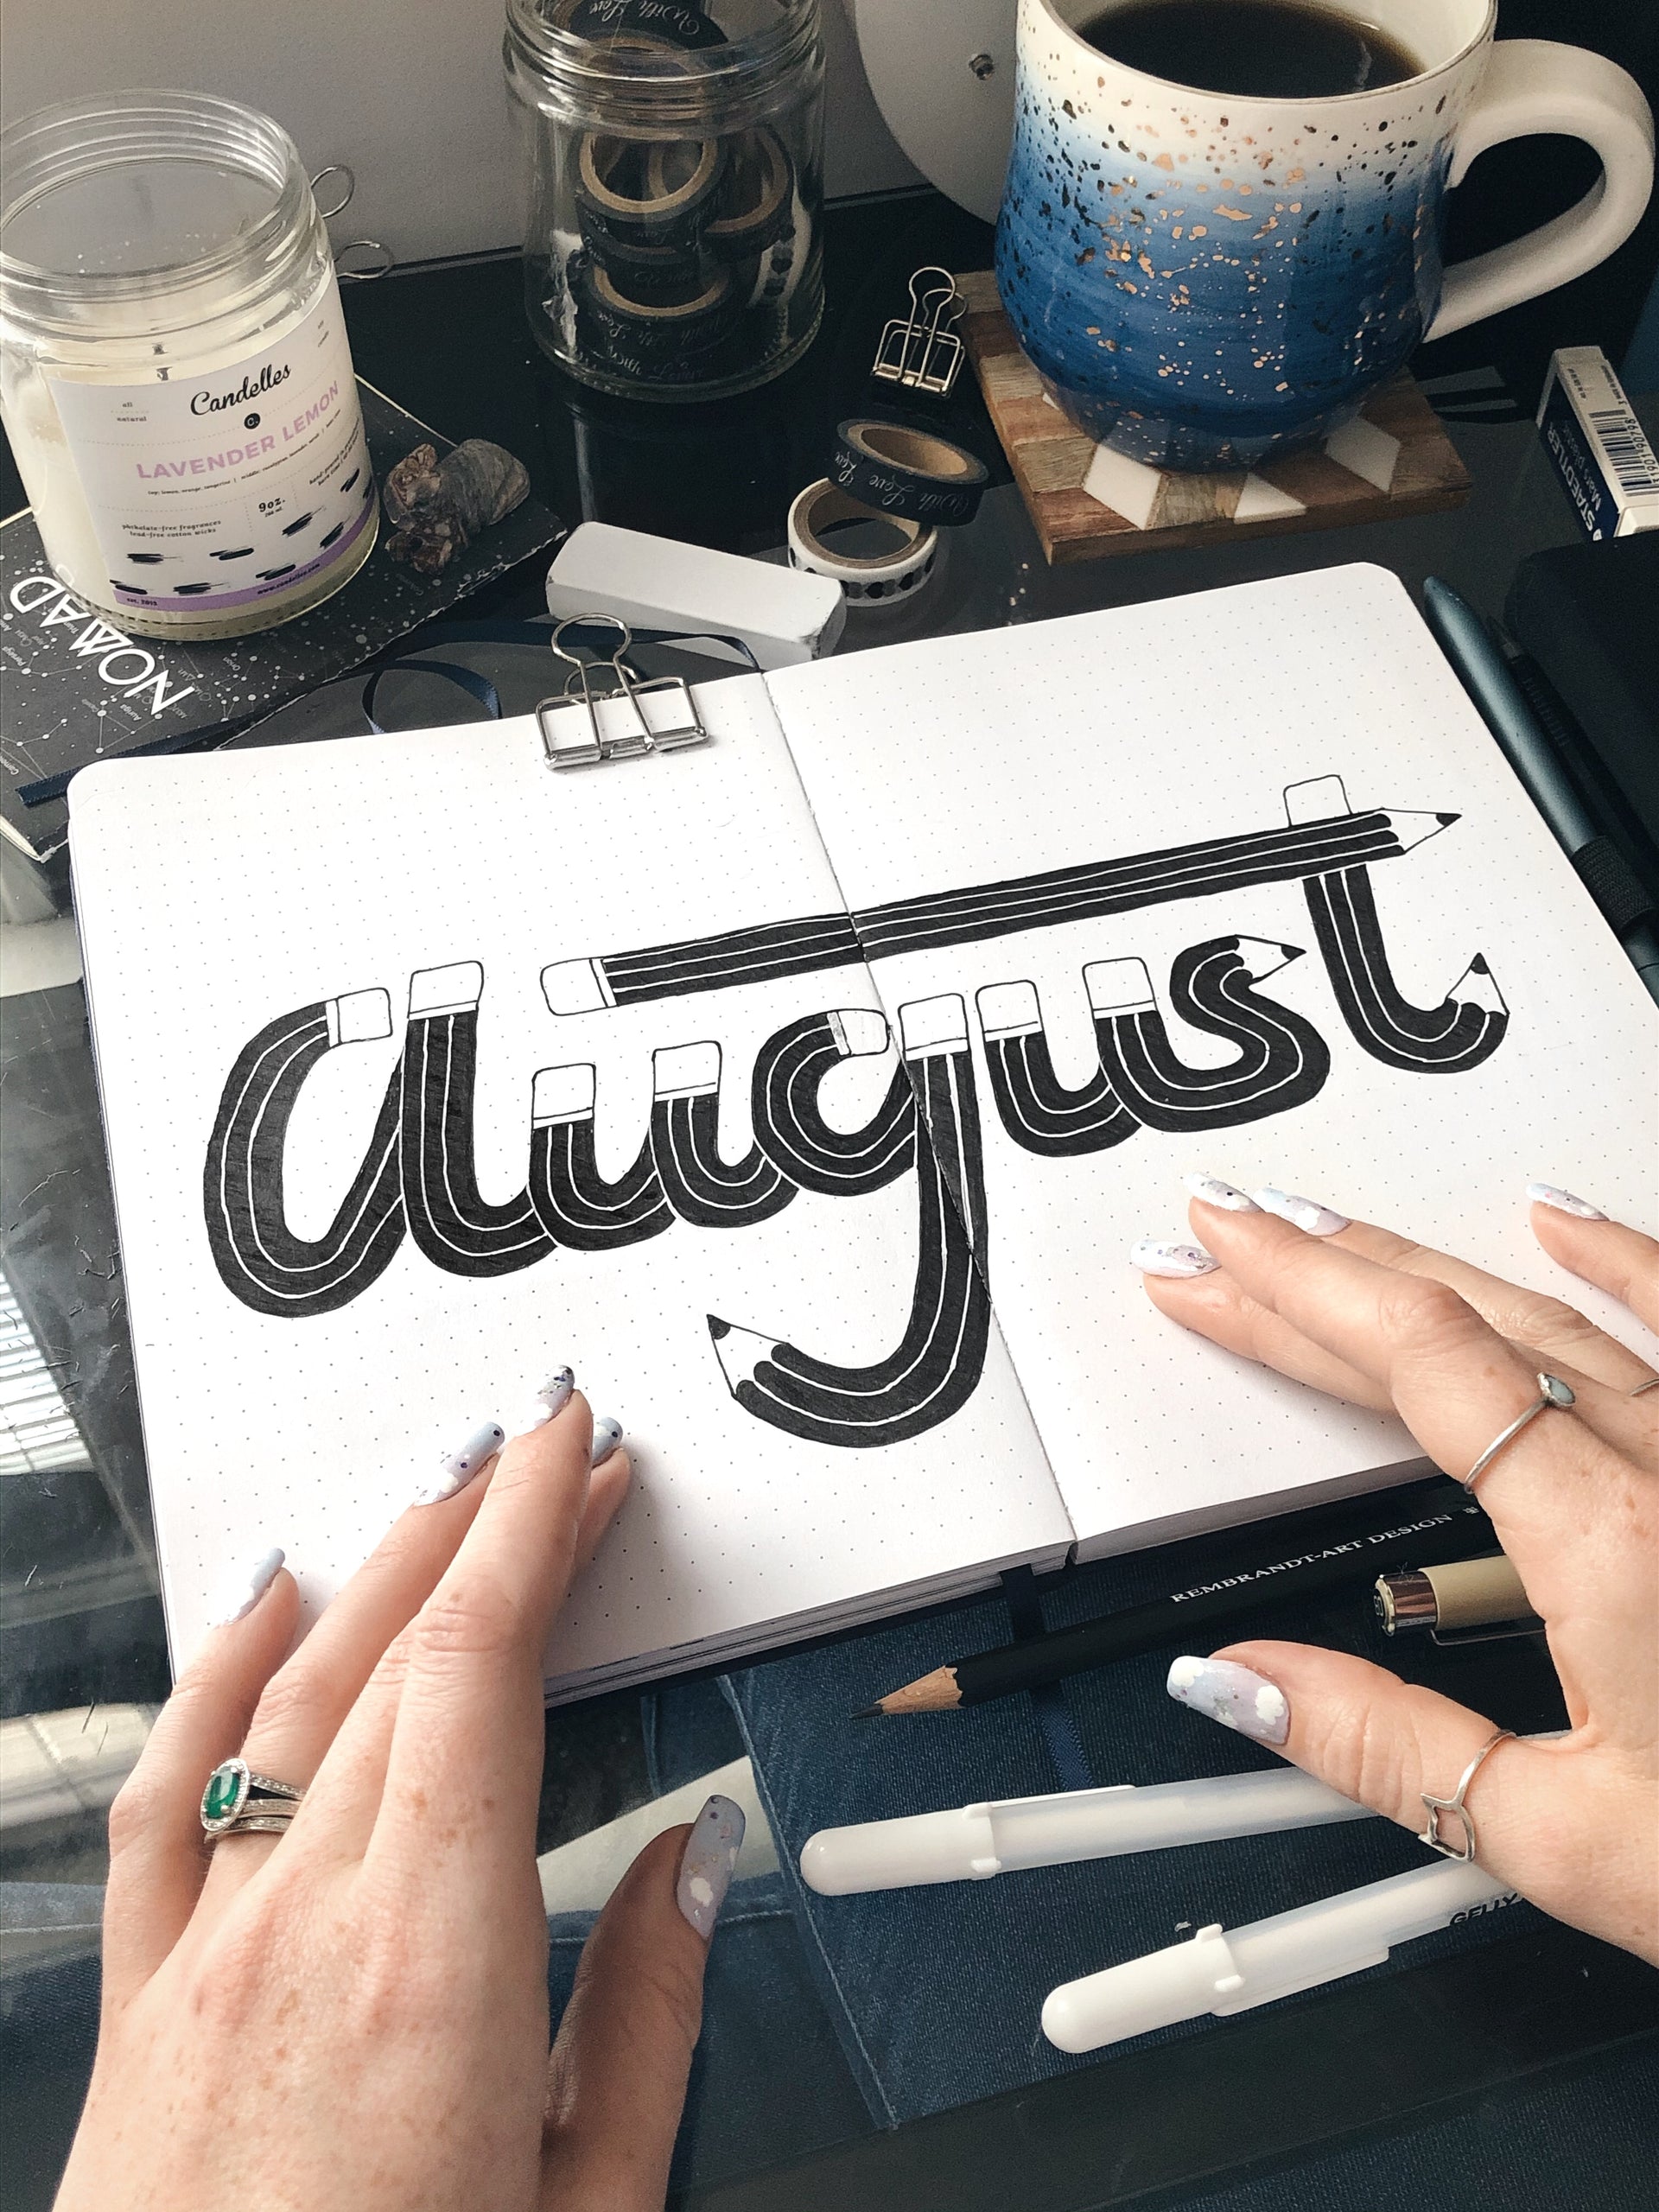

Hi friends, it’s @thegraytergood with a video tutorial for how I create my pencil calligraphy #bulletjournal monthly cover page for August! ✨ I just started bullet journaling this year and it’s been a great way for me to stay organized and be a little extra creative each week. And since it’s back to school season, I decided to turn this calligraphy into pencils!

YOU'LL NEED:
-
- Archer and Olive Journal - I'm using my Night Sky Dot Grid Journal, which is my bullet journal for the year
- Pencil - I prefer a mechanical pencil with 0.5 mm lead so that I can get those little details, but you can use almost any pencil.
- Pens – I used black gelly roll gel pens by Sakura in size 08, and the white gelly roll pens in size 08 for the pencil lines.
- Art Eraser - I love the eraser by Staedlar Mars, it’s white and doesn’t leave any color residue on your page. Plus, if your gelly roll lines are dry, it won’t smudge them! ;) You’ll also probably want the kind of small white eraser that you’ll find on top of your 0.5 mm mechanical pencil for erasing small portions of the page.
- Start by sketching out your chosen word in a script letter style. Pay close attention to the different strokes of the script and where they connect, and decide where you want your pencils to begin and end. If you want help with what script letters look like, search on google images or dafont.com for inspiration.
- Now you can start to add ‘weight’, or thickness to your letters. Try to make sure it’s even, or ‘monoweight’ through each stroke. To make all the pencils look cohesive throughout the word, try to make the erasers and sharpened ends the same width/height on each pencil. I was able to map this out and make all my erasers 2x2 because of the dot grid in my A + O journal.
- Now for the fun part – you get to color it in! I used my black gelly roll pen to outline everything, let it dry for about 10 minutes, then went over it with my art eraser to get rid of all the pencil lines before I filled it in. I used a gelly roll but you can use your favorite colored pencils, markers, etc, to make it your own.
If you have any more questions about this technique, be sure to leave them in the comment section below or DM me on Instagram - and don’t forget to tag me @thegraytergood and #thegraytergood if you post any recreations of my #bujo cover page or your pencilligraphy. Thanks for hanging out with me this week, and I’ll see y’all soon!


0 comments