


Hi there, it’s Vero from @verobujo on Instagram and YouTube, today we’re sitting down for some much needed relaxing watercolor painting.

This project is for those of us who want to paint, but sometimes can’t think of what to do! In this tutorial I will show you how to paint the leaves and if you feel like you want the final product without the actual painting, feel free to print out my freebie which is the fun painting below.

What you will need


- Round tip paint brush
- Water
How to use watercolor and paint the leaves
If you have never used watercolors before, then you’ve been missing out! They’re incredibly versatile and fun. I’m of the oppinion that there’s no wrong way to use them, so regardless of what you do, you’ll have fun!
First dip your brush in water and swirl it around the top of your Watercolor pan to get the paint pigment on your brush.
I start off by painting a curved line that will be our leaf stem, then move onto the apex leaf of the whole branch. I like starting with this leaf because it helps plan the size and shape of the rest of the leaves of the branch.

For the leaf start with a light hand, where the tip of your brush lightly touches the paper then as you move the brush begin to push down so that the stroke becomes wider, I like to give it a bit of a jiggle that to create movement on the leaf and then at the end start slowly lifting your paint brush up again to achieve the tip of the leaf.

This entire process should be done slowly to ensure that your edges are smooth.
To paint the subsequent leaves you will move down the stem and choose the spacing to your liking, I typically like having the leaves closer together. As they get to the middle of the stem, I try to make them slightly longer so that the overall branch is rounder in the middle. As we get to the bottom of the branch the leaves get smaller again.
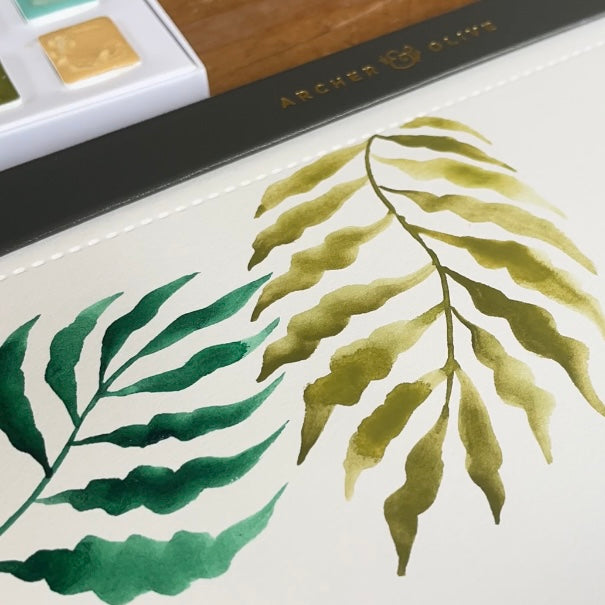
For the placement of the next branches, you could decide to either have them overlapping or not. In my video I started having them separate but then made a mistake somewhere so ended up making them overlap on the page. Either way achieves a beautiful look and both are very relaxing to do.

I alternated between the 6 different cool colors but you could choose to use only a few colors or even just one. By changing your percentage of water to paint pigment you would be able to vary the vibrancy of each leaf.
Don’t forget you can also mix colors together. While I don’t show it in my video, you can easily mix watercolors. I like to have a separate palette to do this because I don’t like mixing on my individual paint pans. I mean I do that occasionally as well! Simply dip your paint brush in one color and swipe it on your palette, then clean your brush and dip it in another color, then mix with the other one on the palette!
Remember to enjoy the process!
See the full video tutorial here:
I hope you enjoyed this tutorial, see you in the next one!


0 comments