


Hi friends, Adrienne from @studio80design here to share a tutorial on how you can create a fall leaf cover page in your bullet journal using the newly released Cool Fall Acrylograph Pens by Archer and Olive!
Materials you’ll need:
- Archer and Olive A5 Signature Dot Grid Notebook
- Archer and Olive Acrylograph Pens Cool Fall Collection + black .7mm
- Pencil
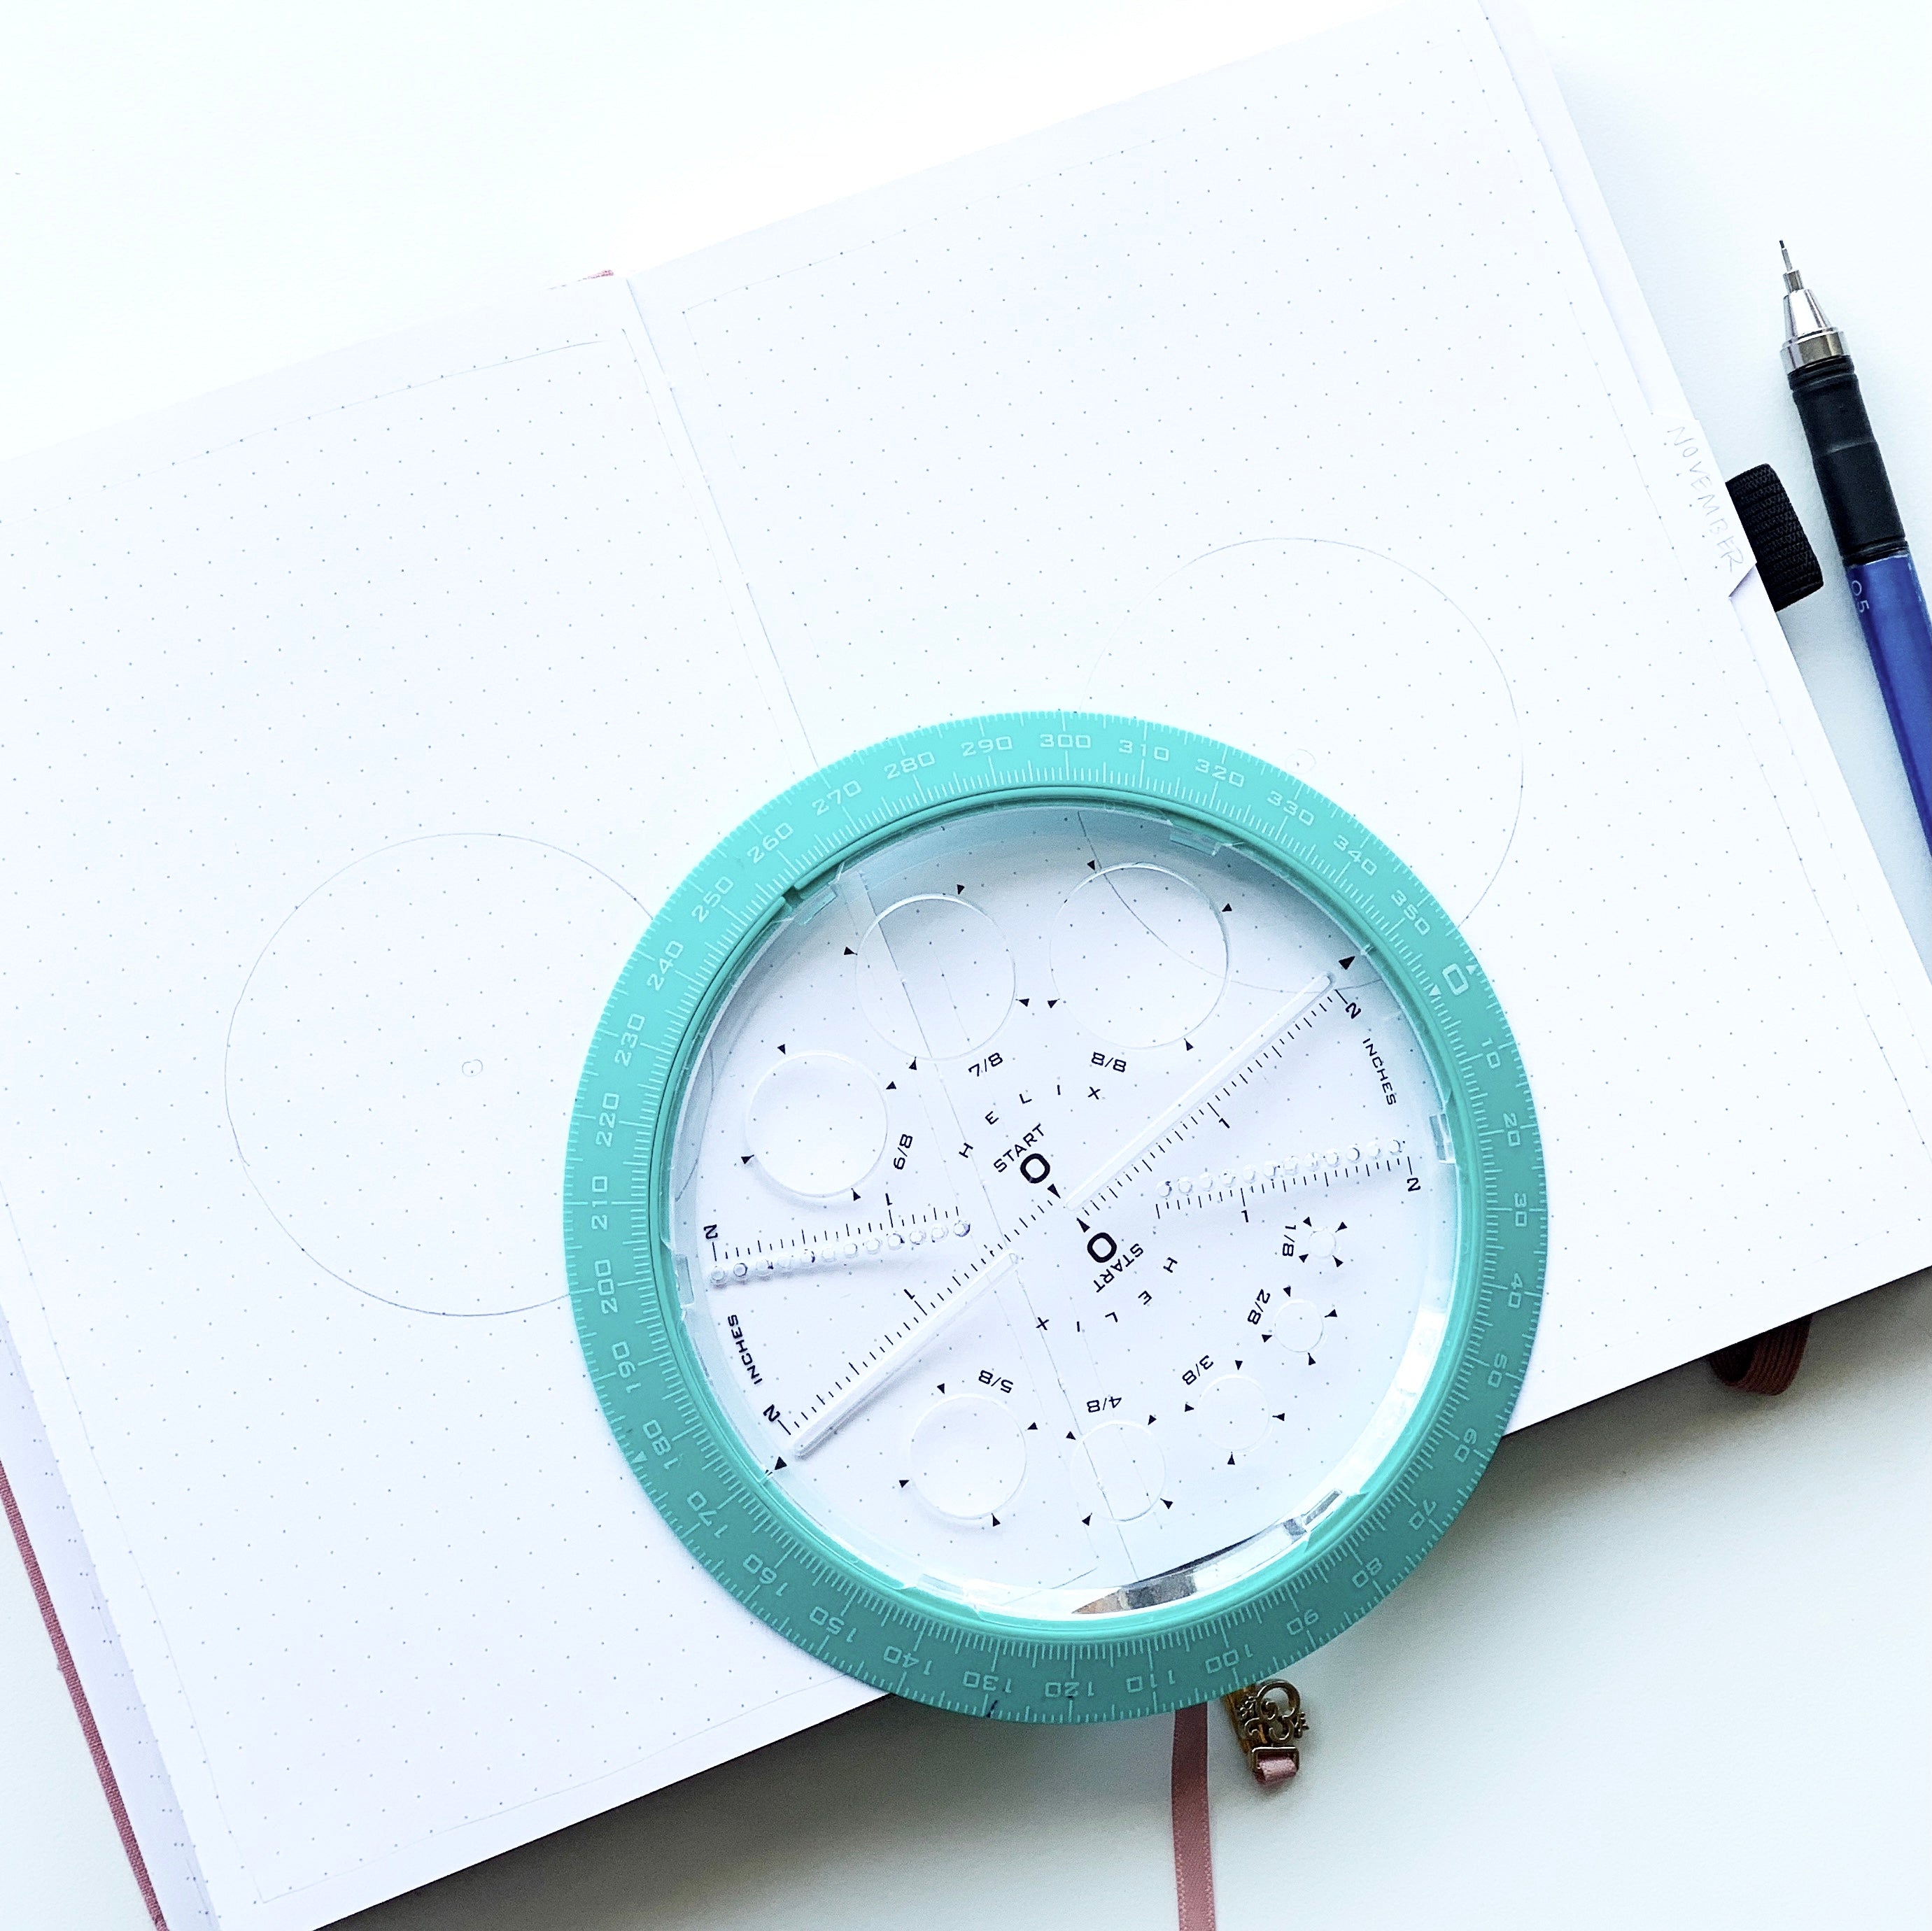
- Helix 360 Degree Angle and Circle Maker
Step 1
The first step is to draw two circles in the middle of the pages in your bullet journal using the Helix 360 Degree Angle and Circle Maker. Then I lightly drew a border outlining both pages.
Step 2
Use the black Acrylograph Pen to paint in the circles and borders of both pages.

Step 3
Using the Cool Fall Collection, start with the first color and draw leaves with stems on both pages, varying the direction of each one.

Step 4
Continue to work your way through all the colors of the palette drawing various shapes and sizes of leaves. You can also add berries in there! The Acrylograph pens are great because they are super opaque but they dry pretty quickly! I didn’t experience any smudging at all!

Step 5
Once you’ve drawn all the leaves in, go back with the Cool Fall Palette and add small details to the pages like lines on the leaves and dots to fill in the empty spaces on the pages.

Step 6
Grab the black Acrylograph pen again to write in the name of the month in the right page and a fun fall quote on the left side!
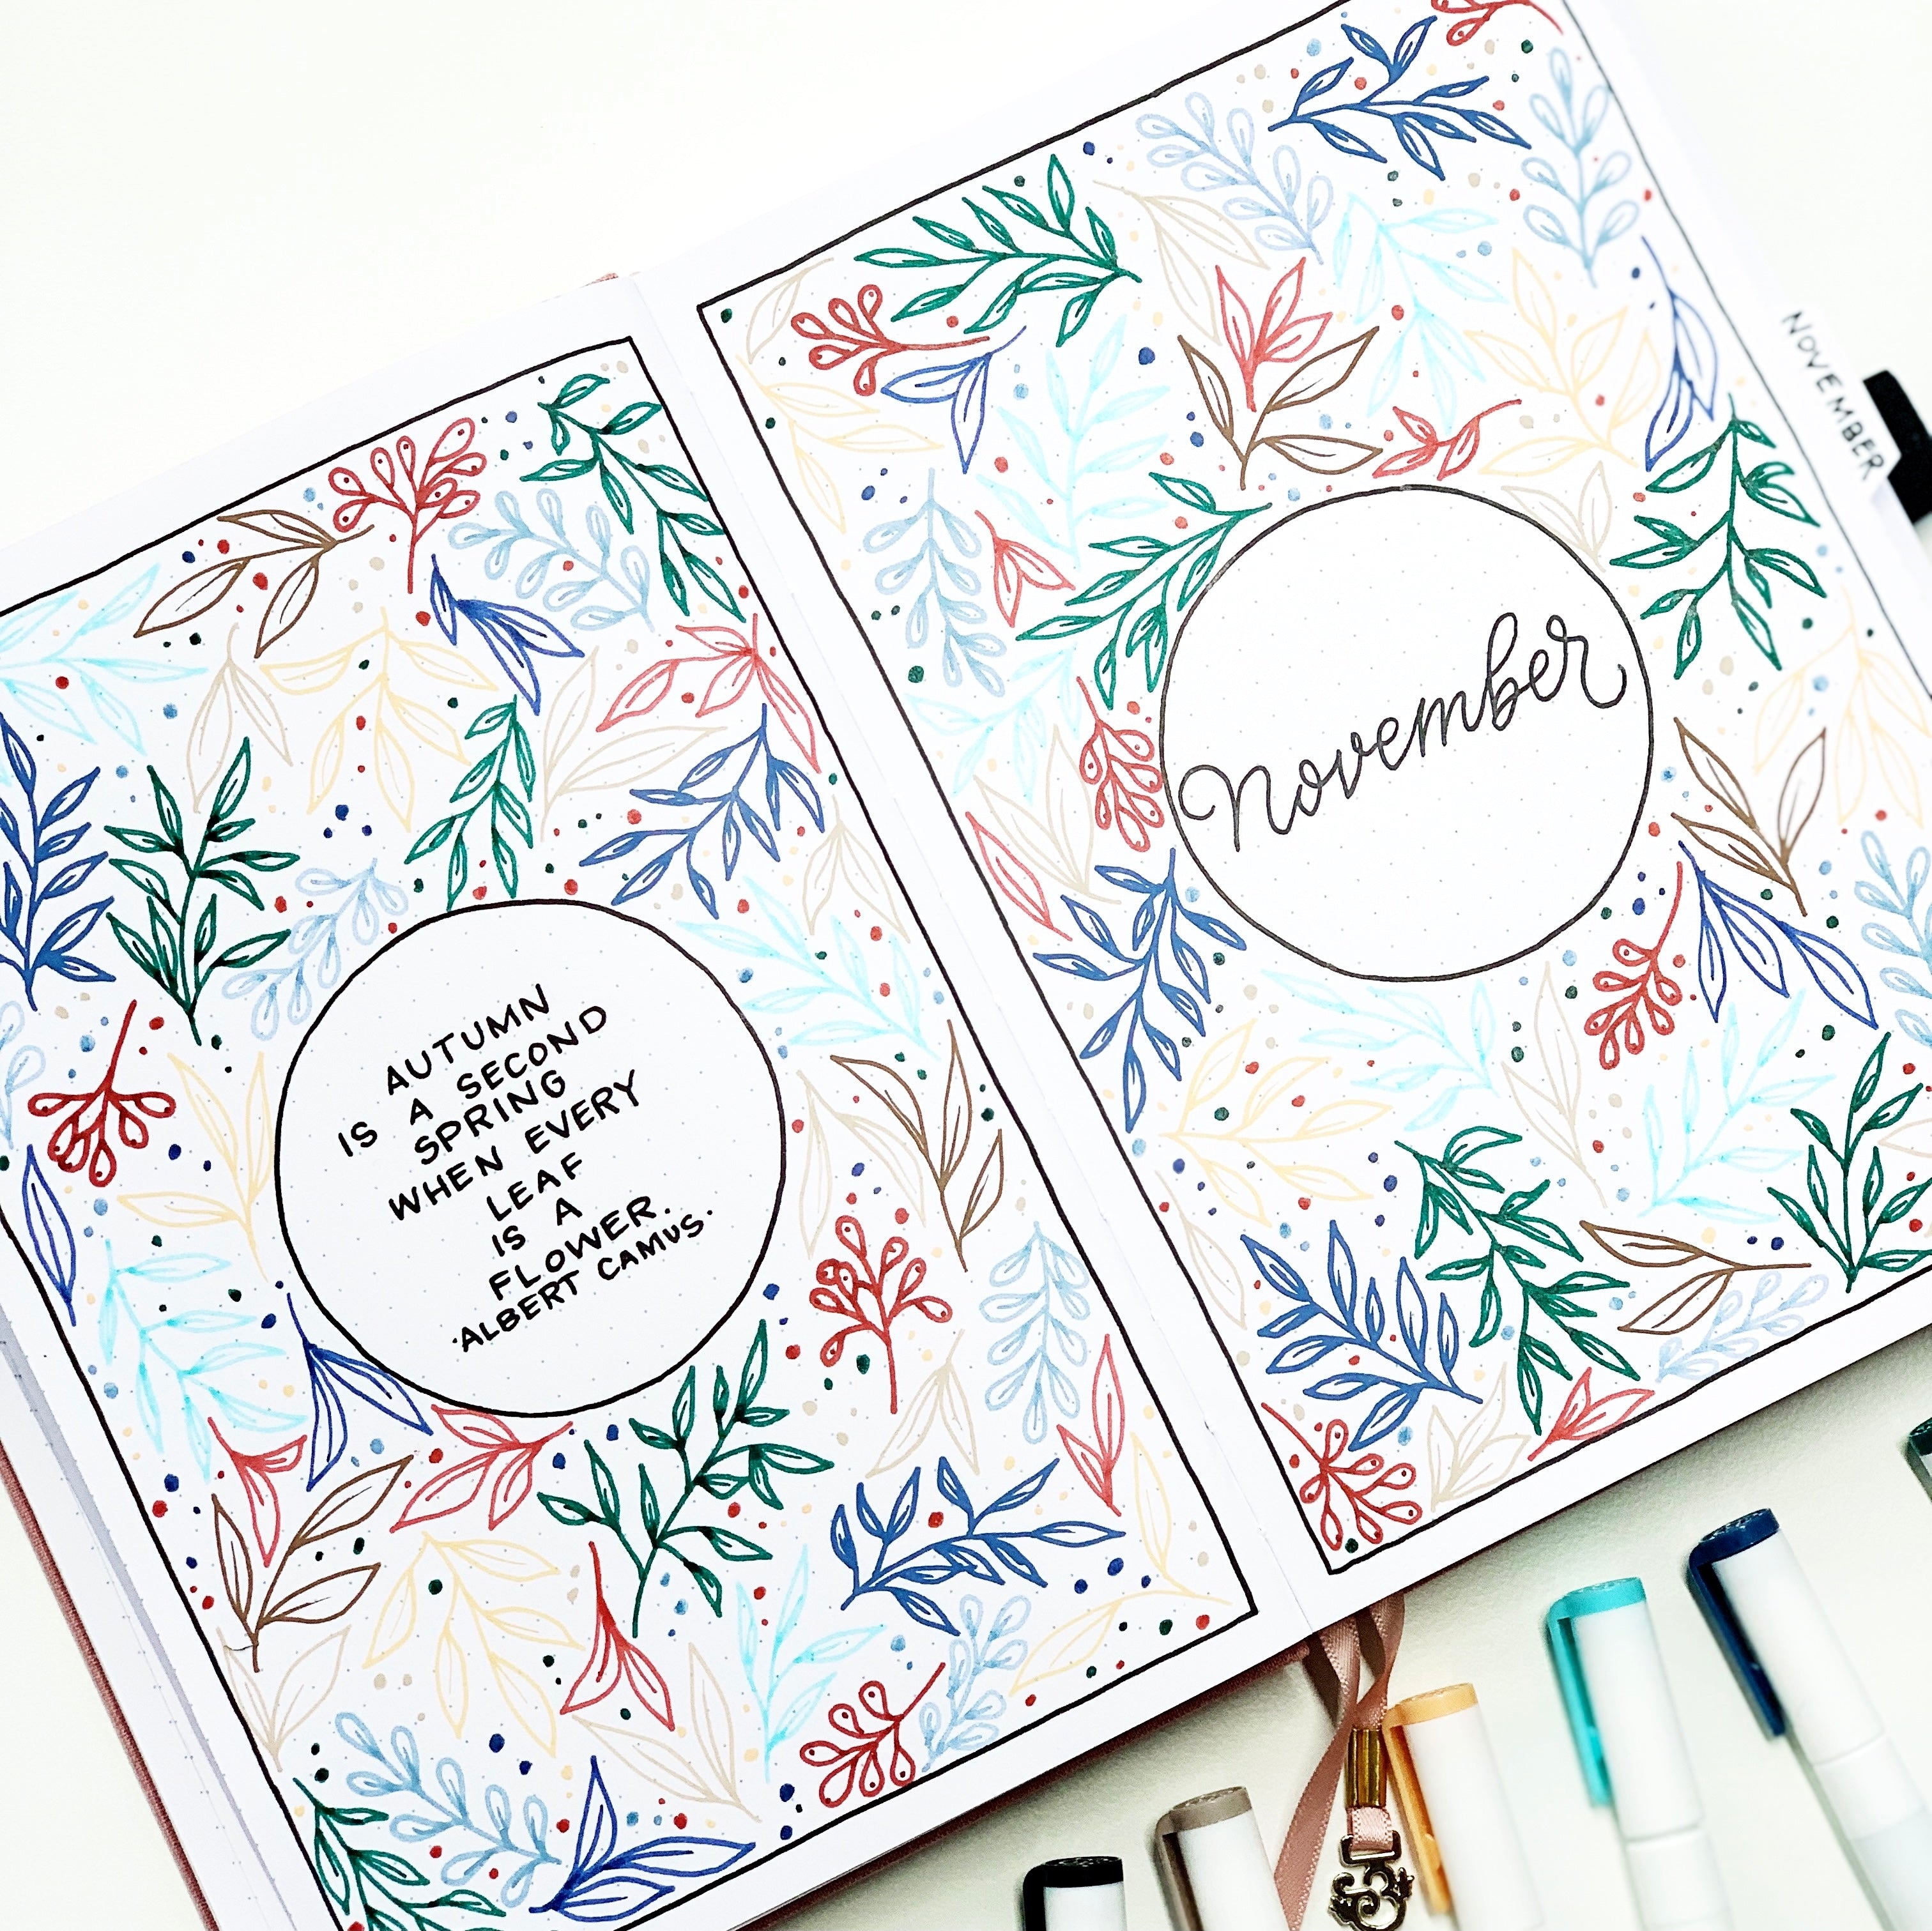
And that’s it! I love the look of the double page spread in my bullet journal! And I hope you try out the Cool Fall Acrylograph Palette, you’ll love it! For more inspiration like this, make sure to follow me @studio80design!


0 comments