


Hi, everyone. I’m Quinn from zquinns_art, and I tend to be very crafty along with being someone who enjoys bullet journaling. I, therefore, like to combine the two whenever I can, and quilting allows me to do just that!
I’m still fairly new to quilting, but by far my favorite part of the process is piecing the design together. Over time, I found out that dot grid paper is actually the best for creating designs for my quilt. It has a set size, making it easy to translate the design using a scale. The lack of a set grid also makes it easy to get more creative with shapes! That said, it is still easier to create designs with straight lines, particularly triangles, squares, and rectangles. For this blog, I will be focusing on these types of designs, but know that you can use it even with curved shapes!
Supplies:
- Journal- I’m using an A5 journal with kraft paper, but any color paper will be fine. Just make sure to get a dot grid book! I like the craft paper because it’s a nice neutral color and lets me color both white and black.
- Acrylographs- I use colors from a variety of the different packs, but the Warm Fall is my favorite. You can also use different markers or pens to color.
- Pencil or Pen
- Ruler (if desired)- or any other way to make straight lines
Find or Design a Pattern
There are so many great quilt designs out there to try out! You can check Pintrest, Instagram, local sewing stores, or even book thrift stores. I like to go to Half-Price books and look in the crafts section to find cool new quilting patterns to use. Or, you can be like me and try to design your own pattern.

I’ve recently been creating a series of flower-based designs. I usually start my design with a sketch of the actual flower in pencil, then I go over it with darker lines to make the flower more geometric in style. This will translate better to cutting and piecing of the fabric. I like to use the dot grid as it makes it easy to approximate the measurements and create uniform lines. One suggestion when you start designing is to create a border for yourself in which to work: since I am making a square pillow, I started with a square outline.
Decide Size of Piece and Grid Spacing

Once you’ve chosen or created your design, it’s important to decide the size of your piece and how you want to correlate it to the size of the dot grid. For example, the pillow I am creating will be 16x16 inches, so for every dot grid space, there will be one inch of fabric. I like to write down a key to the side so I don’t forget my sizing. This is very important for larger projects such as a queen-sized quilt where the whole piece is 90x90 inches. There aren’t 90 squares on the grid length or width-wise, so it’s important to scale the drawing down.
Choosing Colors
- If you’ve already chosen the fabrics you want to use: Choose colors that best correspond to the fabrics you want to use. While your fabrics may have patterns on them, it is best to use solid colors when filling in the design. It means that you will be able to see the color contrast. I like to use acrylographs because they have good coverage AND you can draw over them again if needed.
- If you haven’t chosen your fabrics yet. Choose colors that you think will go well with the project. I chose greens, browns, and purples for my project because I want them to match my bedroom, but the colors are your choice. Just make sure to not choose colors that are too close in hue. I like to make multiple sketches so I can test out different ways to lay out the color on the design.
Create a Fabric Key

Once you have your design finished and colored in, it’s important to create a fabric key as you buy your fabrics for the project. What this consists of is labeling and identifying which color you want to represent which fabric in your drawing. You can either describe the fabric itself OR you can cut small swatches as a visual reminder. I’m partial to describing the fabric as I don’t like my journals to get too bulky.
This is an important step so that you don’t forget which fabric you want to use and where in the design you want to use it. It is also very helpful for the next step.
Decide Your Cuts and Create a Cutting List
Once you have the design down, you can start cutting the fabric! But, before doing this, I like to add another step. I go back through my design and decide how I want to cut my fabric: which do I want to be multiple pieces and which I want to stay as solid as possible.
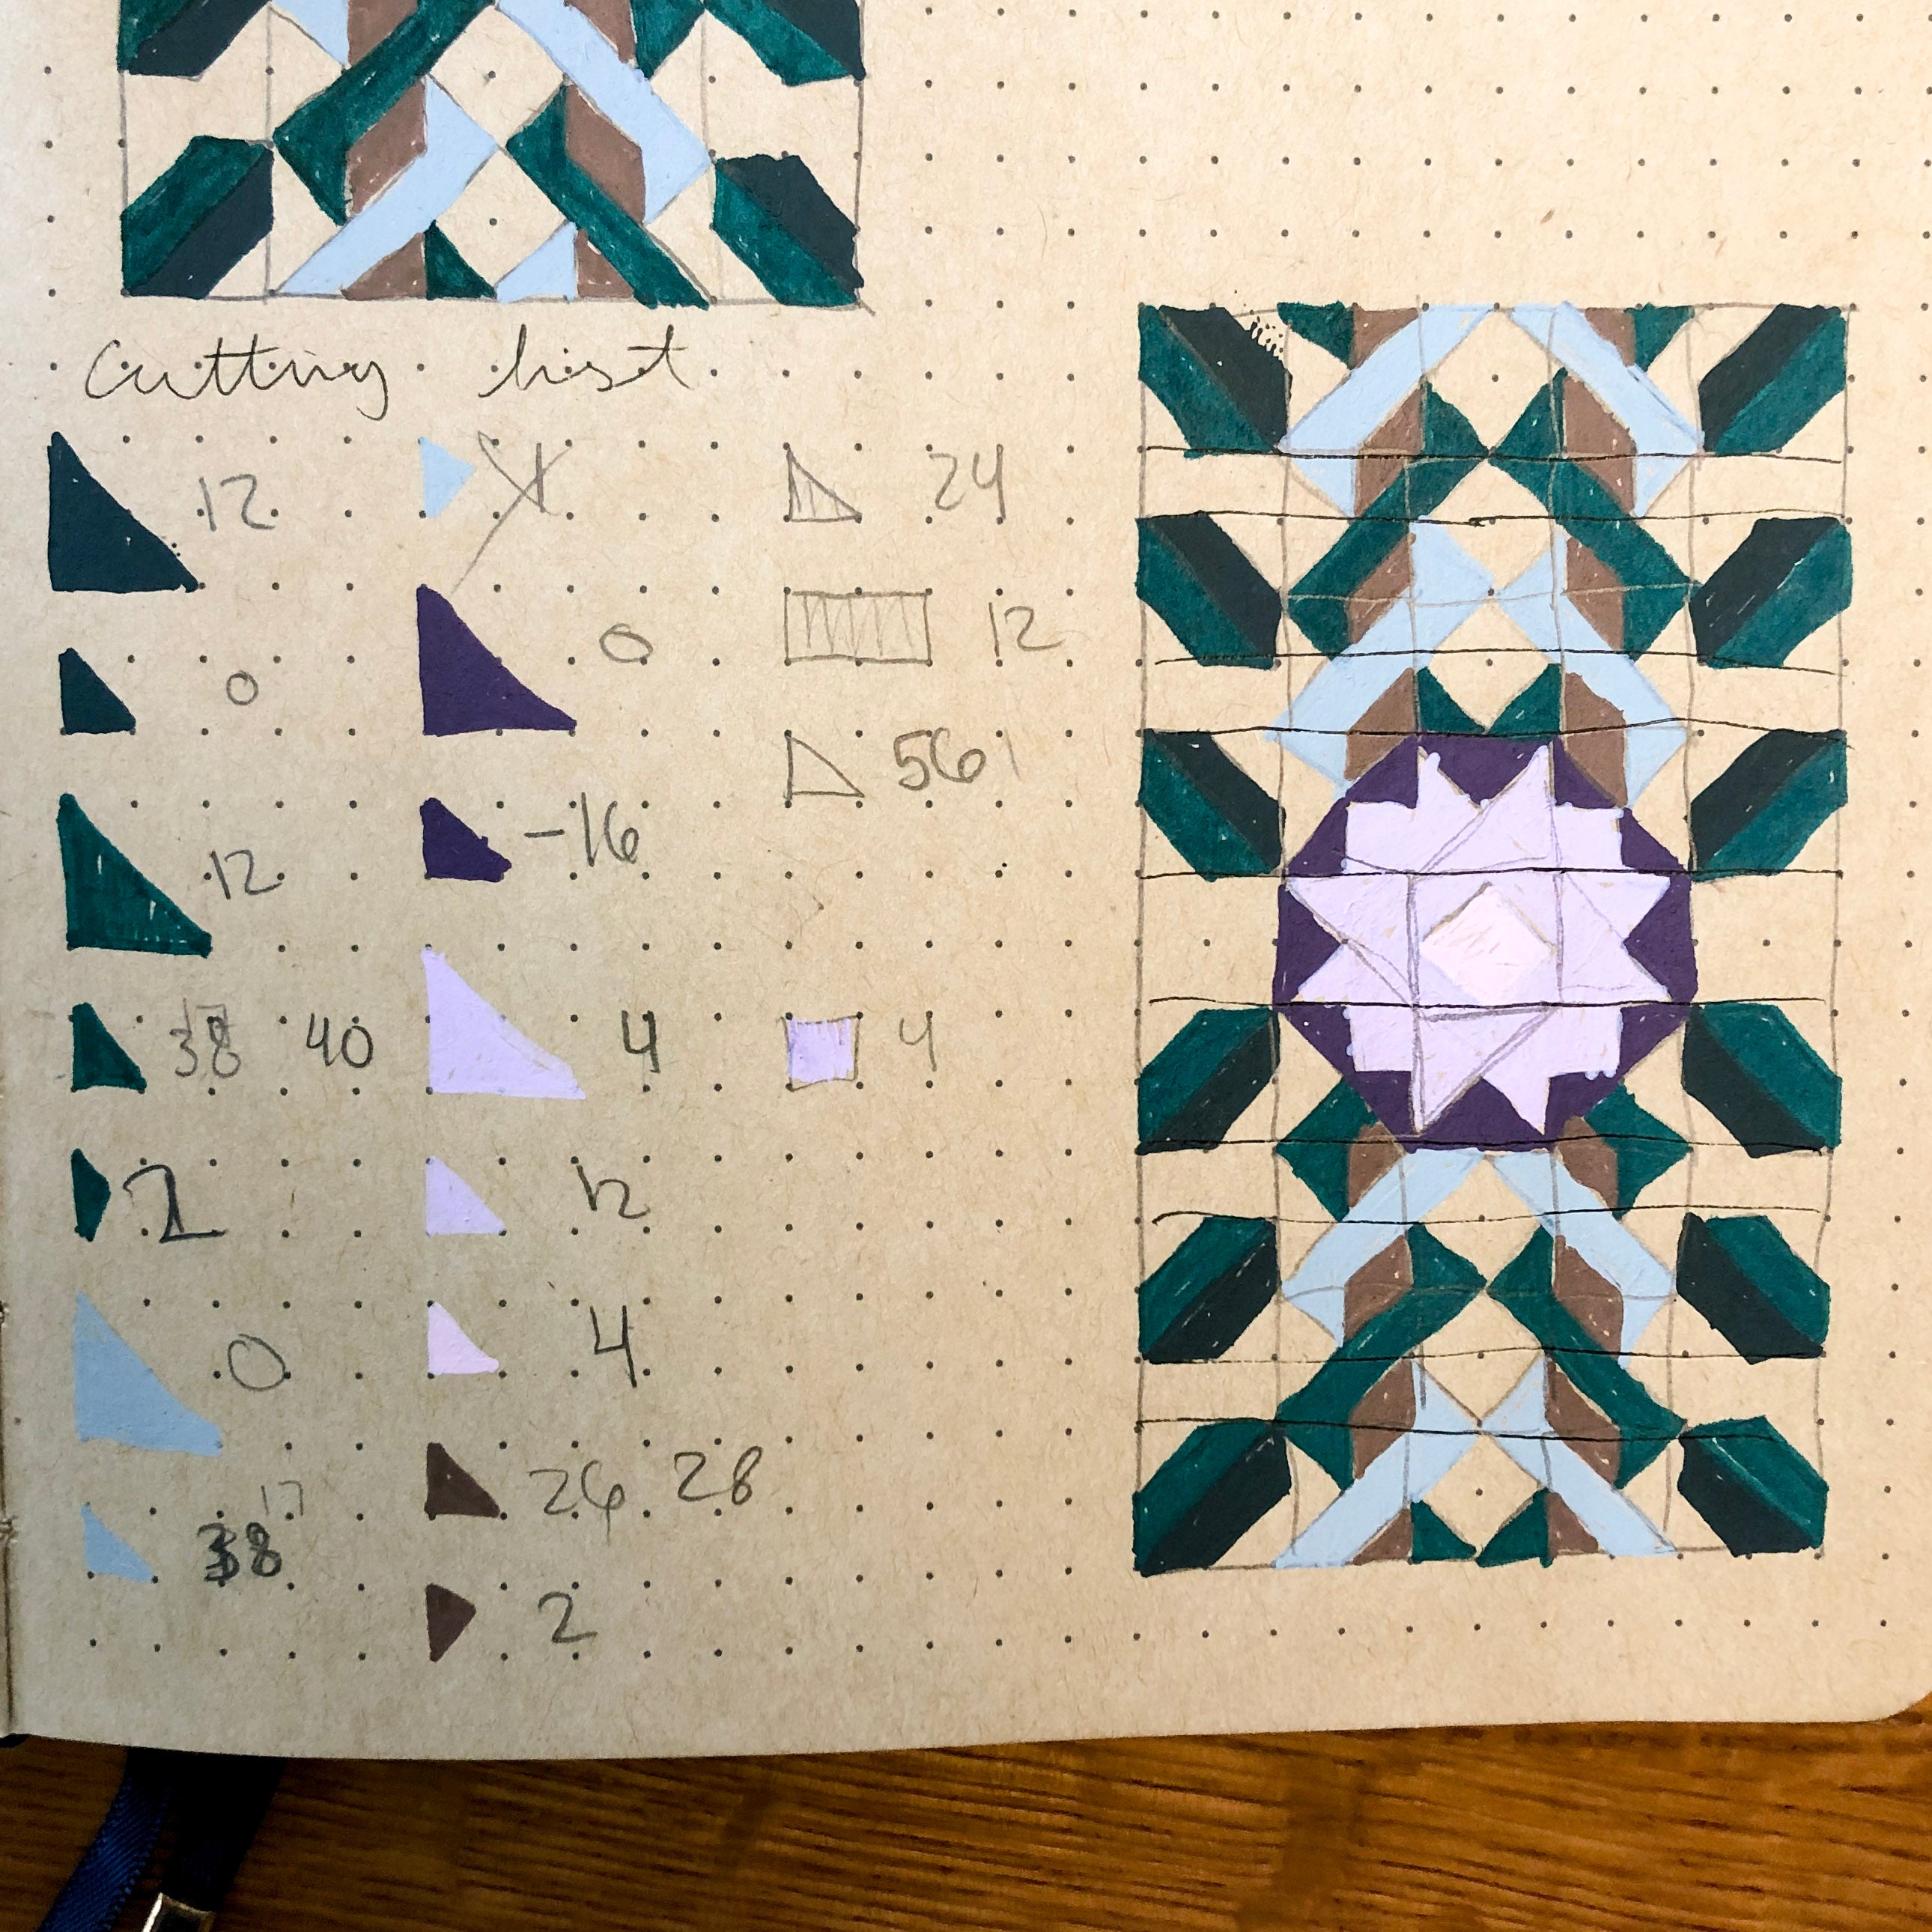
With those decisions made, typically with a pencil drawing overtop the final design, I like to make a cut list. This is just a list of the shapes and sizes of fabric that I will need for the project and how much of each I will need to cut. That way, when I start cutting my fabric, I can do it all at once to keep consistency in my cuts.
*Just a reminder about quilting: you always want to add a quarter-inch border to each piece you cut for a seam allowance
Be Willing to Adapt (make multiple designs)

The above photos show my final sketch of the design for my first quilt and the finished product of my quilt. I went through many designs before reaching the point where I would even start on the project (it took me three years just to start). But having a dot grid to sketch and design is very helpful in this process.
The most important thing to remember, however, is that things will change! Even as you are piecing or cutting out the fabric, you will notice that the sizing is wrong or the colors look too similar. So always be willing to adapt and change your design from the initial sketch to the final piece. This is just a tool for helping you in the process of creating.
—
I hope that you found these tips helpful in your quilt designing! Whether you are using this to make a quilt or just making designs for a weekly spread, I would love to see your creations! Feel free to DM or tag me or Archer and Olive on Instagram.
I’ve also made a video to show my process of making a flower sketch into a quilt design if you’d like to see my process!
AND I have a printable of my final iris pillow design if you’d like to make it, too. Happy crafting!


0 comments