Floral Border Tutorial Using Warm Fall Acrylographs

Floral Border Tutorial Using Warm Fall Acrylographs

Hi friends, Adrienne from @studio80deisgn here to share a tutorial on how to create a floral border using the Warm Fall Acrylograph Collection! I absolutely adore this palette and love the colors together! Tools you’ll need: Archer and Olive A5 Vintage Bee Kraft Paper Dot Grid Notebook Archer and Olive Acrylograph Pens Warm Fall Collection .7mm Tip Ruler Tombow MONO Graph Mechanical Pencil Tombow MONO Drawing Pen 01
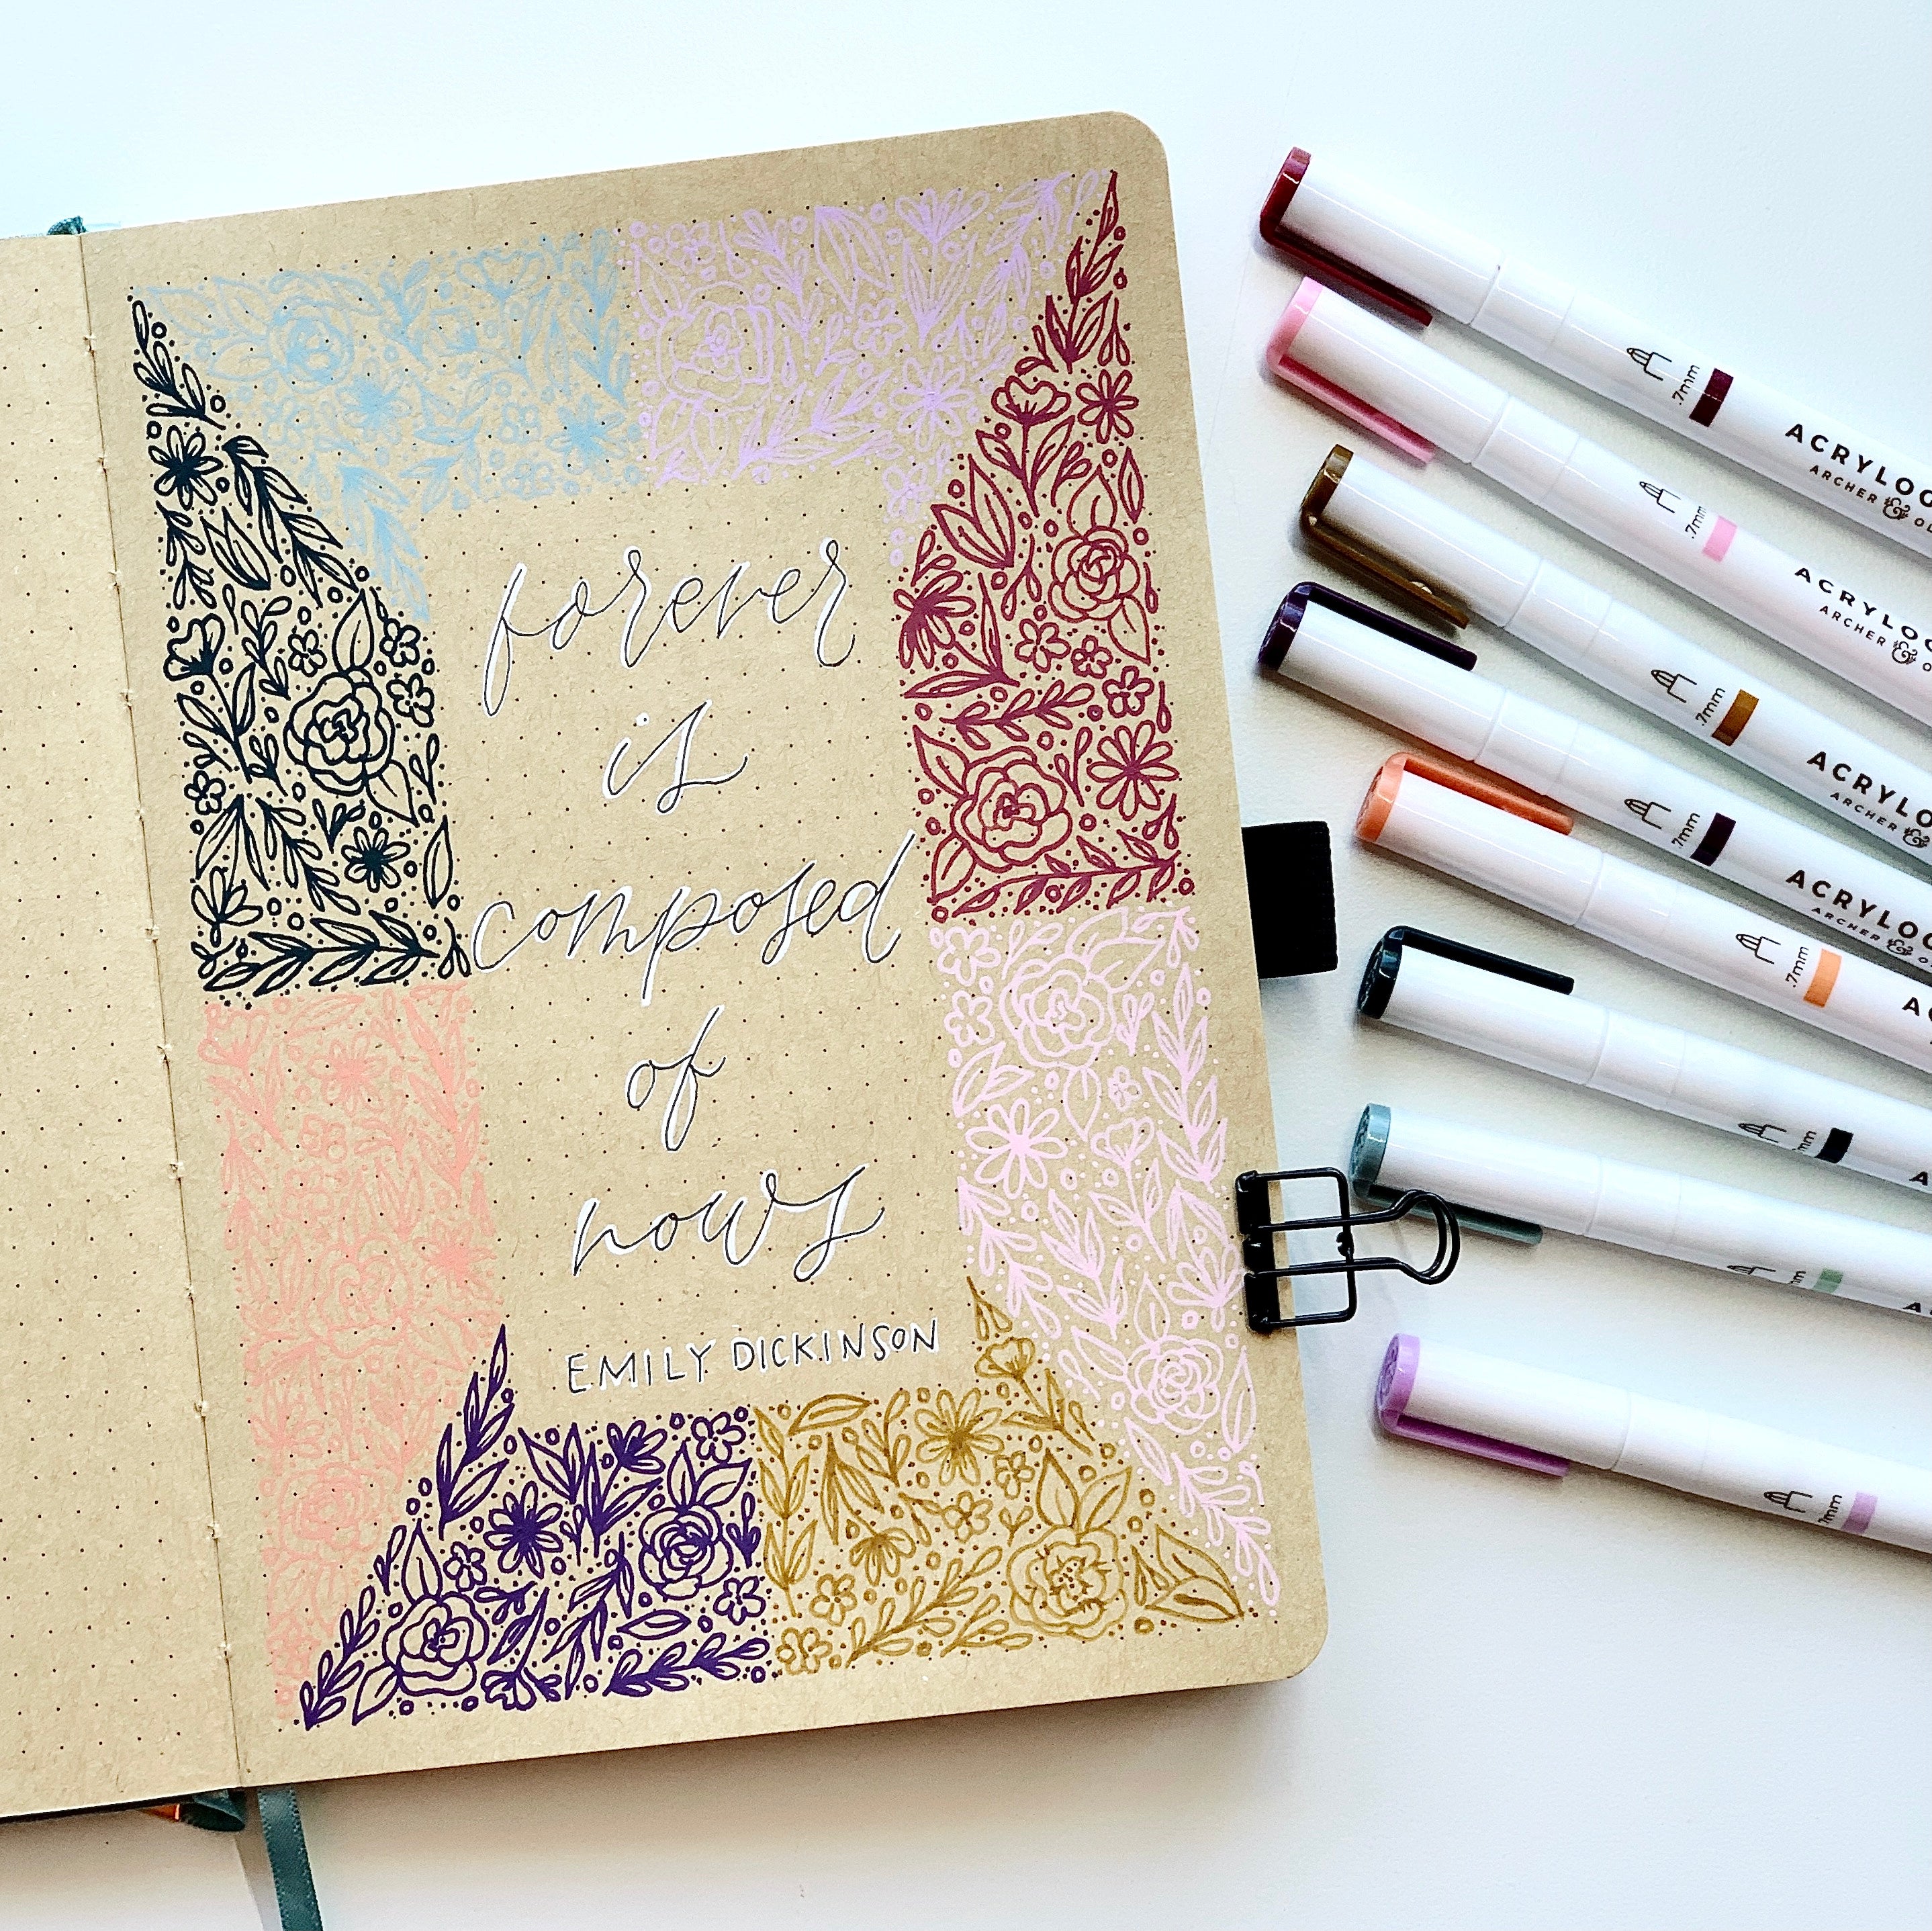
   Step 1 The first step is to draw out your border with a rule and pencil. I drew my border seven squares thick on all sides. Then I divided it up into eight sections. I’ll be using the Warm Fall Acrylograph palette so each section will get it’s own color.   Step 2 Once your border is sectioned off, it’s time to start drawing flowers! You can practice doodling flowers on another sheet of paper first if that helps. Once you’re happy with your flowers, start by drawing the largest flowers first and then fill in the spaces with smaller flowers, leaves, circles, and dots!   Step 3 Continue to draw florals in the border around your page! Make sure each section gets its own color and stays within the border boundary! Step 4 After your flower doodles have completely dried, use an eraser to erase an pencil marks from drawing the border.   Step 5 I used the white Acrylograph pen to write a quote in the middle of my page. Then I used a Tombow MONO Drawing Pen to write on top to help it pop on the page!   And you’re done! I hope you enjoyed this tutorial and you give it a try! For more inspiration like this, make sure to follow me @studio80design! And to save some extra money on all your Archer and Olive supplies, use code STUDIO10 at checkout for 10% off!  

Hi friends, Adrienne from @studio80deisgn here to share a tutorial on how to create a floral border using the Warm Fall Acrylograph Collection! I absolutely adore this palette and love the colors together!

Tools you’ll need:


Step 1

The first step is to draw out your border with a rule and pencil. I drew my border seven squares thick on all sides. Then I divided it up into eight sections. I’ll be using the Warm Fall Acrylograph palette so each section will get it’s own color.


Step 2

Once your border is sectioned off, it’s time to start drawing flowers! You can practice doodling flowers on another sheet of paper first if that helps. Once you’re happy with your flowers, start by drawing the largest flowers first and then fill in the spaces with smaller flowers, leaves, circles, and dots!


Step 3

Continue to draw florals in the border around your page! Make sure each section gets its own color and stays within the border boundary!


Step 4

After your flower doodles have completely dried, use an eraser to erase an pencil marks from drawing the border.


Step 5

I used the white Acrylograph pen to write a quote in the middle of my page. Then I used a Tombow MONO Drawing Pen to write on top to help it pop on the page!


Learn how to create a floral border using the Warm Fall Acrylograph Set with Adrienne from @studio80design!


And you’re done! I hope you enjoyed this tutorial and you give it a try! For more inspiration like this, make sure to follow me @studio80design! And to save some extra money on all your Archer and Olive supplies, use code STUDIO10 at checkout for 10% off!


0 comments

Leave a comment

Please note, comments need to be approved before they are published.

I'm Looking For...

View all
Pens
Pens

Pens

Notebooks
Notebooks

Notebooks

Shopping Bag
Shopping Bag

Shopping Bag

Washi Tape
Washi Tape

Washi Tape

Notepads
Notepads

Notepads

Planners + Accessories

Planners + Accessories