Hey you! Yes you! Fellow bullet journal enthusiast!! Are you ready to spice up your bullet journal set ups with fancy handlettering? This blogpost is for you then! I have a huge surprise for you in store!
Hi! It’s Kate from @journalwithkate on Instagram and with this blogpost I’m encouraging you to start practicing your hand lettering! Archer and Olive recently released CALLIOGRAPH pens. I quickly fell in love with these pens! This release inspired me to create a HANDLETTERING workbook with the ENTIRE ALPHABET! Yes I said it! A completely FREE workbook you can print so you can start practicing today! Keep on reading and download your free workbook down below!

Are you ready to start practicing with me? I’ve used the following supplies:
- Archer and Olive Notepad: Here I'm using the B5 Notepad for practicing the basic brushstrokes. Click on this link or use code KATE10 to save money on your order! These notebooks are perfect if you’re looking for pages that don’t ghost or bleed!
- Printable workbook: download your FREE workbook and start practicing by tracing over the letters of the entire alphabet. Keep on tracing every day until you develop muscle memory. Then take your practicing journey to the next step by practicing directly in your journal!
- Pens: The new Calliographs brush pens!
Broad vs. Fine brush

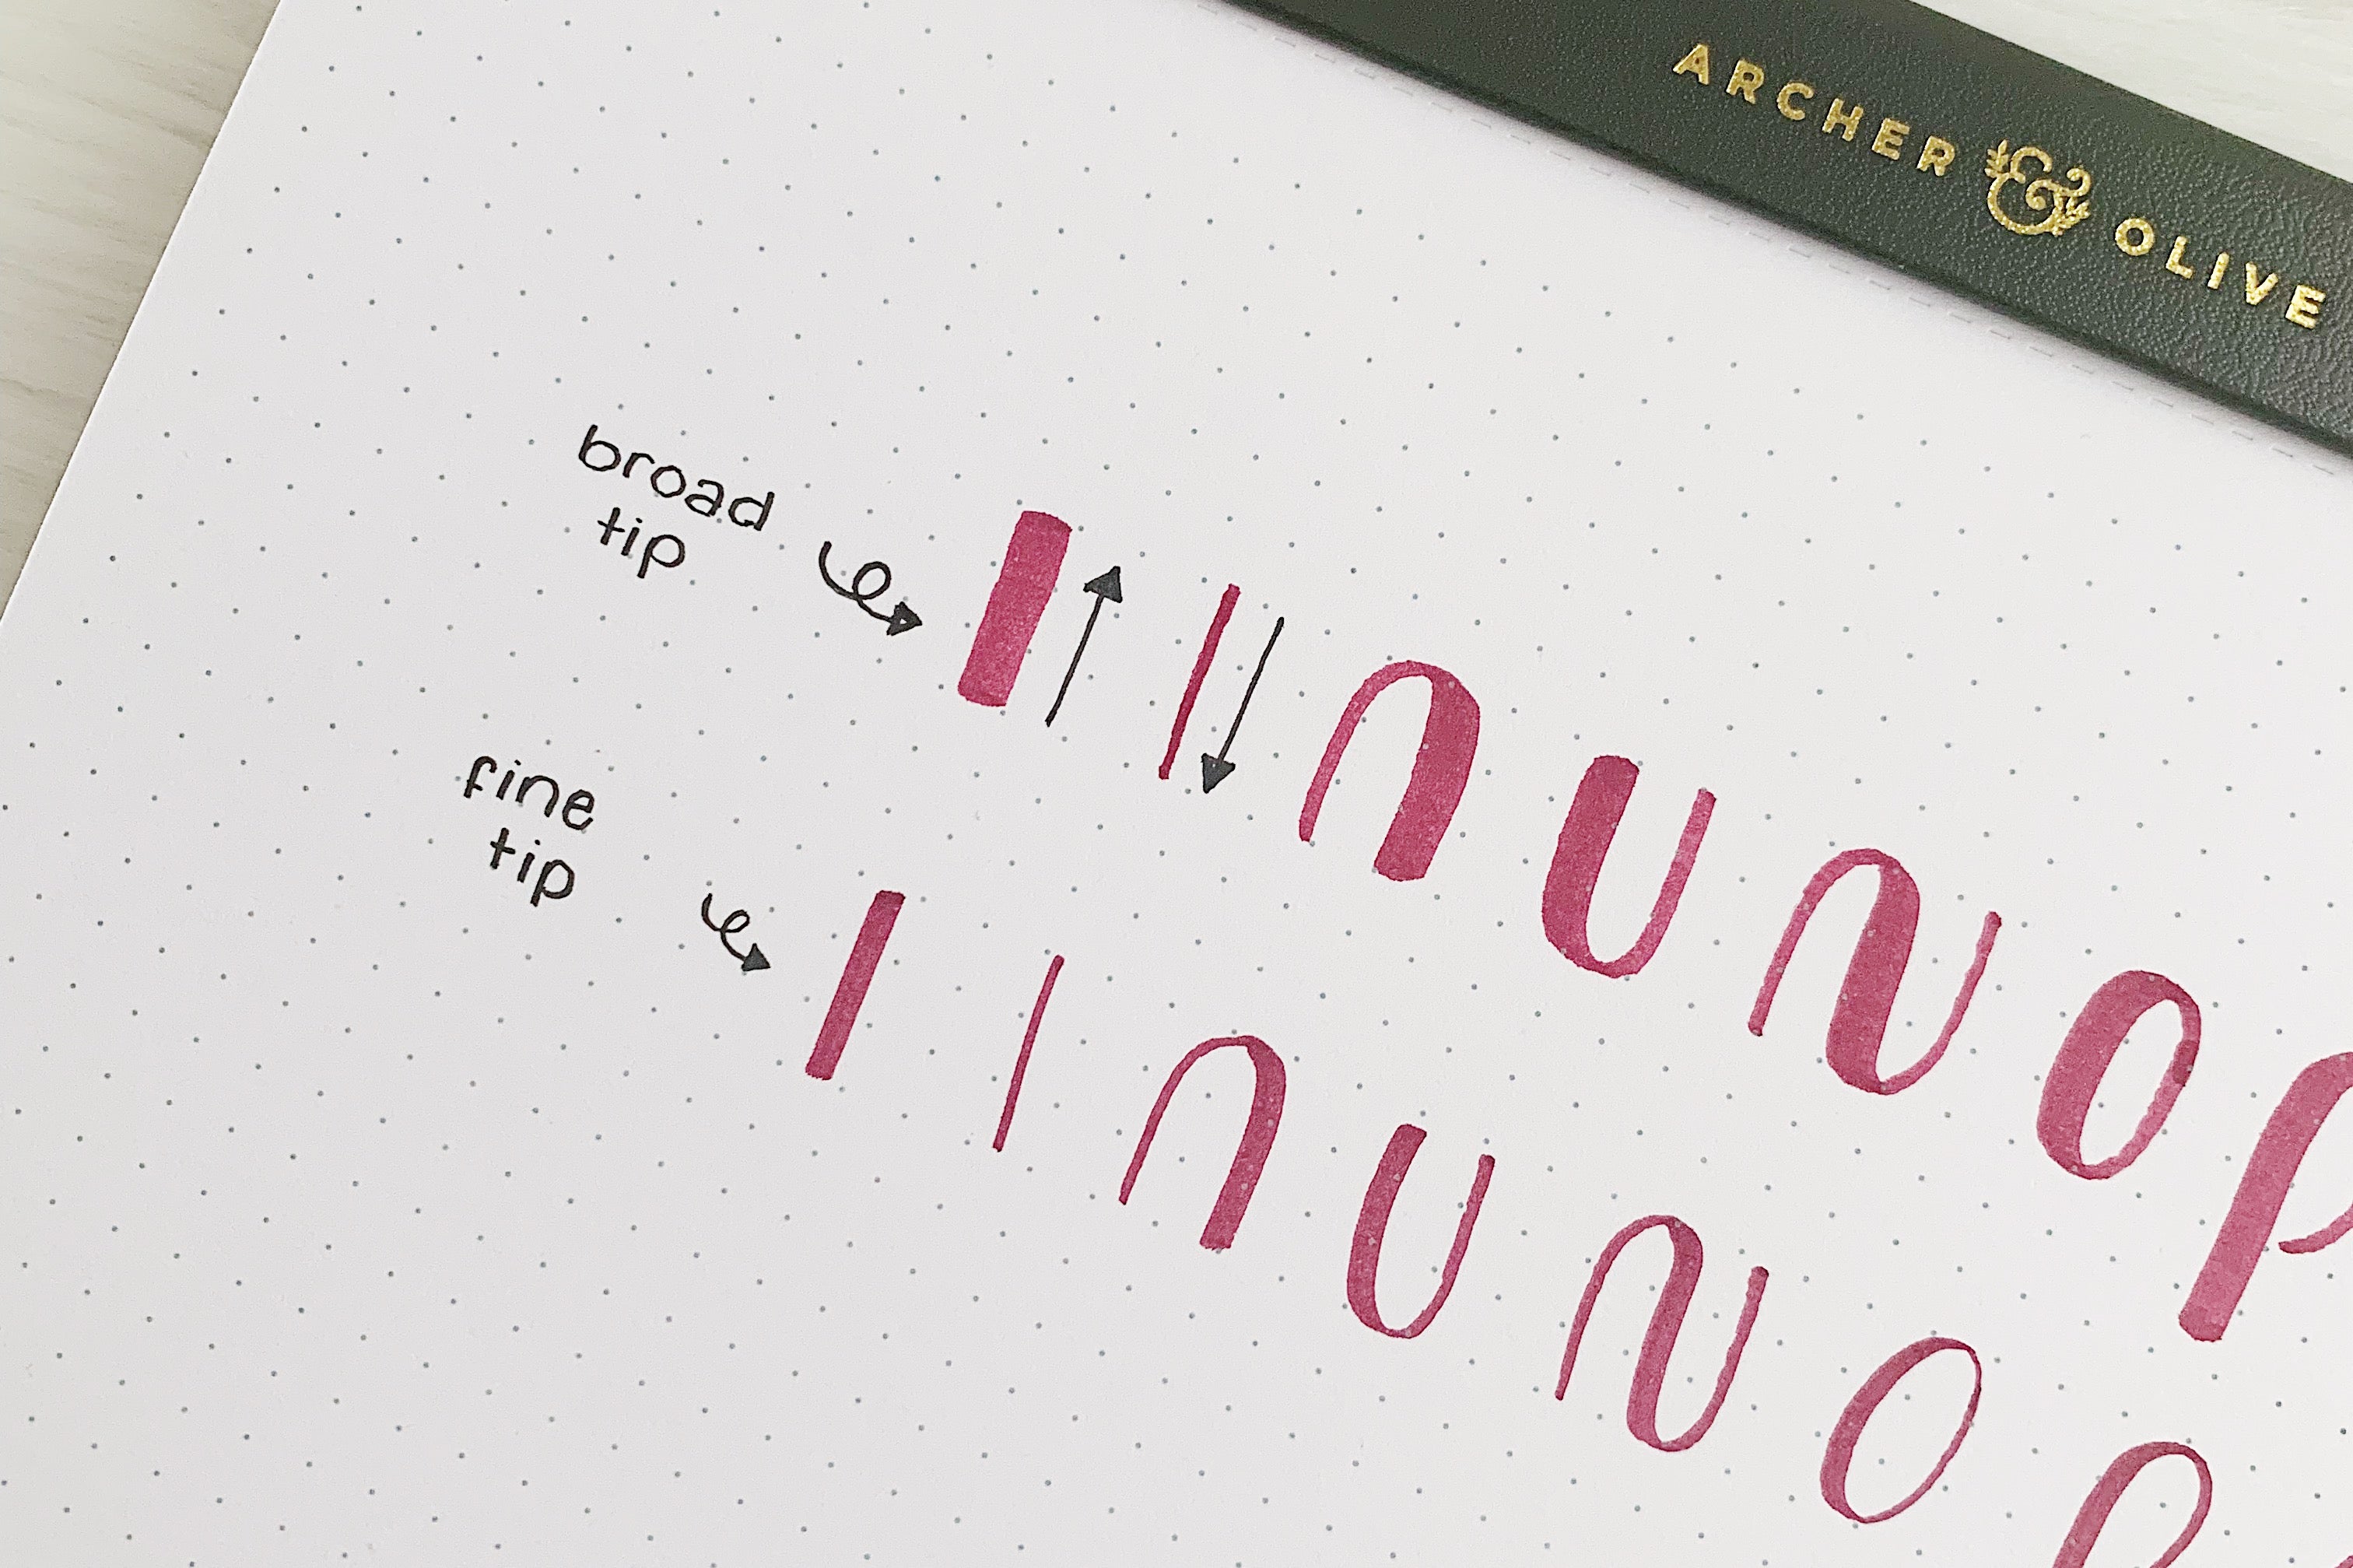
The Calliographs are dual tip brush pens: a broad brush on one side and a fine brush on the other side. The fine brush is smaller and stiffer and therefore easier to control. I always recommend beginners to start practicing with a fine brush pen. It feels really stiff and the brush strokes are easy to control. The broad side has a larger, more flexible brush tip. This side will give you larger and thicker lines. Because the broad tip is more flexible it’s harder to control.

Getting started

Start by practicing the basic brushstrokes to create muscle memory. Once you’ve got a feel for the thicker upstrokes and the finer downstrokes continue practicing by tracing over the letters of the alphabet in your workbook. Please please please try to practice each day. Even if it’s for five minutes. You’ll start to develop muscle memory and hand lettering will eventually feel like second nature!
Some tips for brush lettering:
- Slow down! Write slowly and pick up your pen after each stroke.
- Use light pressure for the upstrokes (when you’re moving the pen upwards) and heavy pressure for the downstrokes (when you’re moving the pen upwards).
- Try to keep each downstroke uniform in thickness.
- The goal is to create consistency with your letters.
- Practice every day or as much as you can.
- Have fun!

Basic brush strokes
The first thing I’m going to show you are these shapes we call basic brush strokes. These strokes may seem unrelated to modern handlettering but I promise they make sense. These strokes are shapes that we can use to combine to draw our letters in modern handlettering. From left to right we have the:
- downstroke (thick)
- upstroke (thick)
- overturn
- underturn
- compound curve
- oval
- loops
When we are doing modern handlettering with a brush pen we are typically going to draw a thicker stroke when we are doing a downstroke. When we are drawing an upstroke, this stroke is going to be thinner. We can create thicker and thinner strokes by applying more or less pressure to the tip of our brush pen.

Watch this video and start practicing with me.
See how I’m using light pressure for the thinner upstrokes and heavy pressure for the thicker upstrokes! Now it’s your turn! Download your FREE Handlettering Workbook with the entire alphabet here. The workbook will be an instant download, and you can print it at home or a local printer store or library. Set your printer scaling to “Fit Page.” Once you’ve printed your worksheet, you’re ready to get your practice going!
I hope you find this blog post helpful and you start practicing brush lettering today! I’d love to see what you create and how you use your Handlettering Workbook. Use the hashtag #archerandolive or #archerandolivecommunity. Don’t forget to tag me on @journalwithkate and @archerandolive so we can see your work. Have fun!


6 comments
I’m just starting to learn to do hand lettering and I’ve been looking everywhere for a fee printable guide or something thankyou
Thank you so much for this! I would like to improve my handwriting and I strongly believe this will assist me.
You can find the download by clicking “Download your FREE Handlettering Workbook with the entire alphabet here.” In the second to last paragraph or the final image showing the workbook!
This is great. Thank you!
Is the download button for the book missing! Or am I missing it?
I just started doing hand letting and would love to know more.