


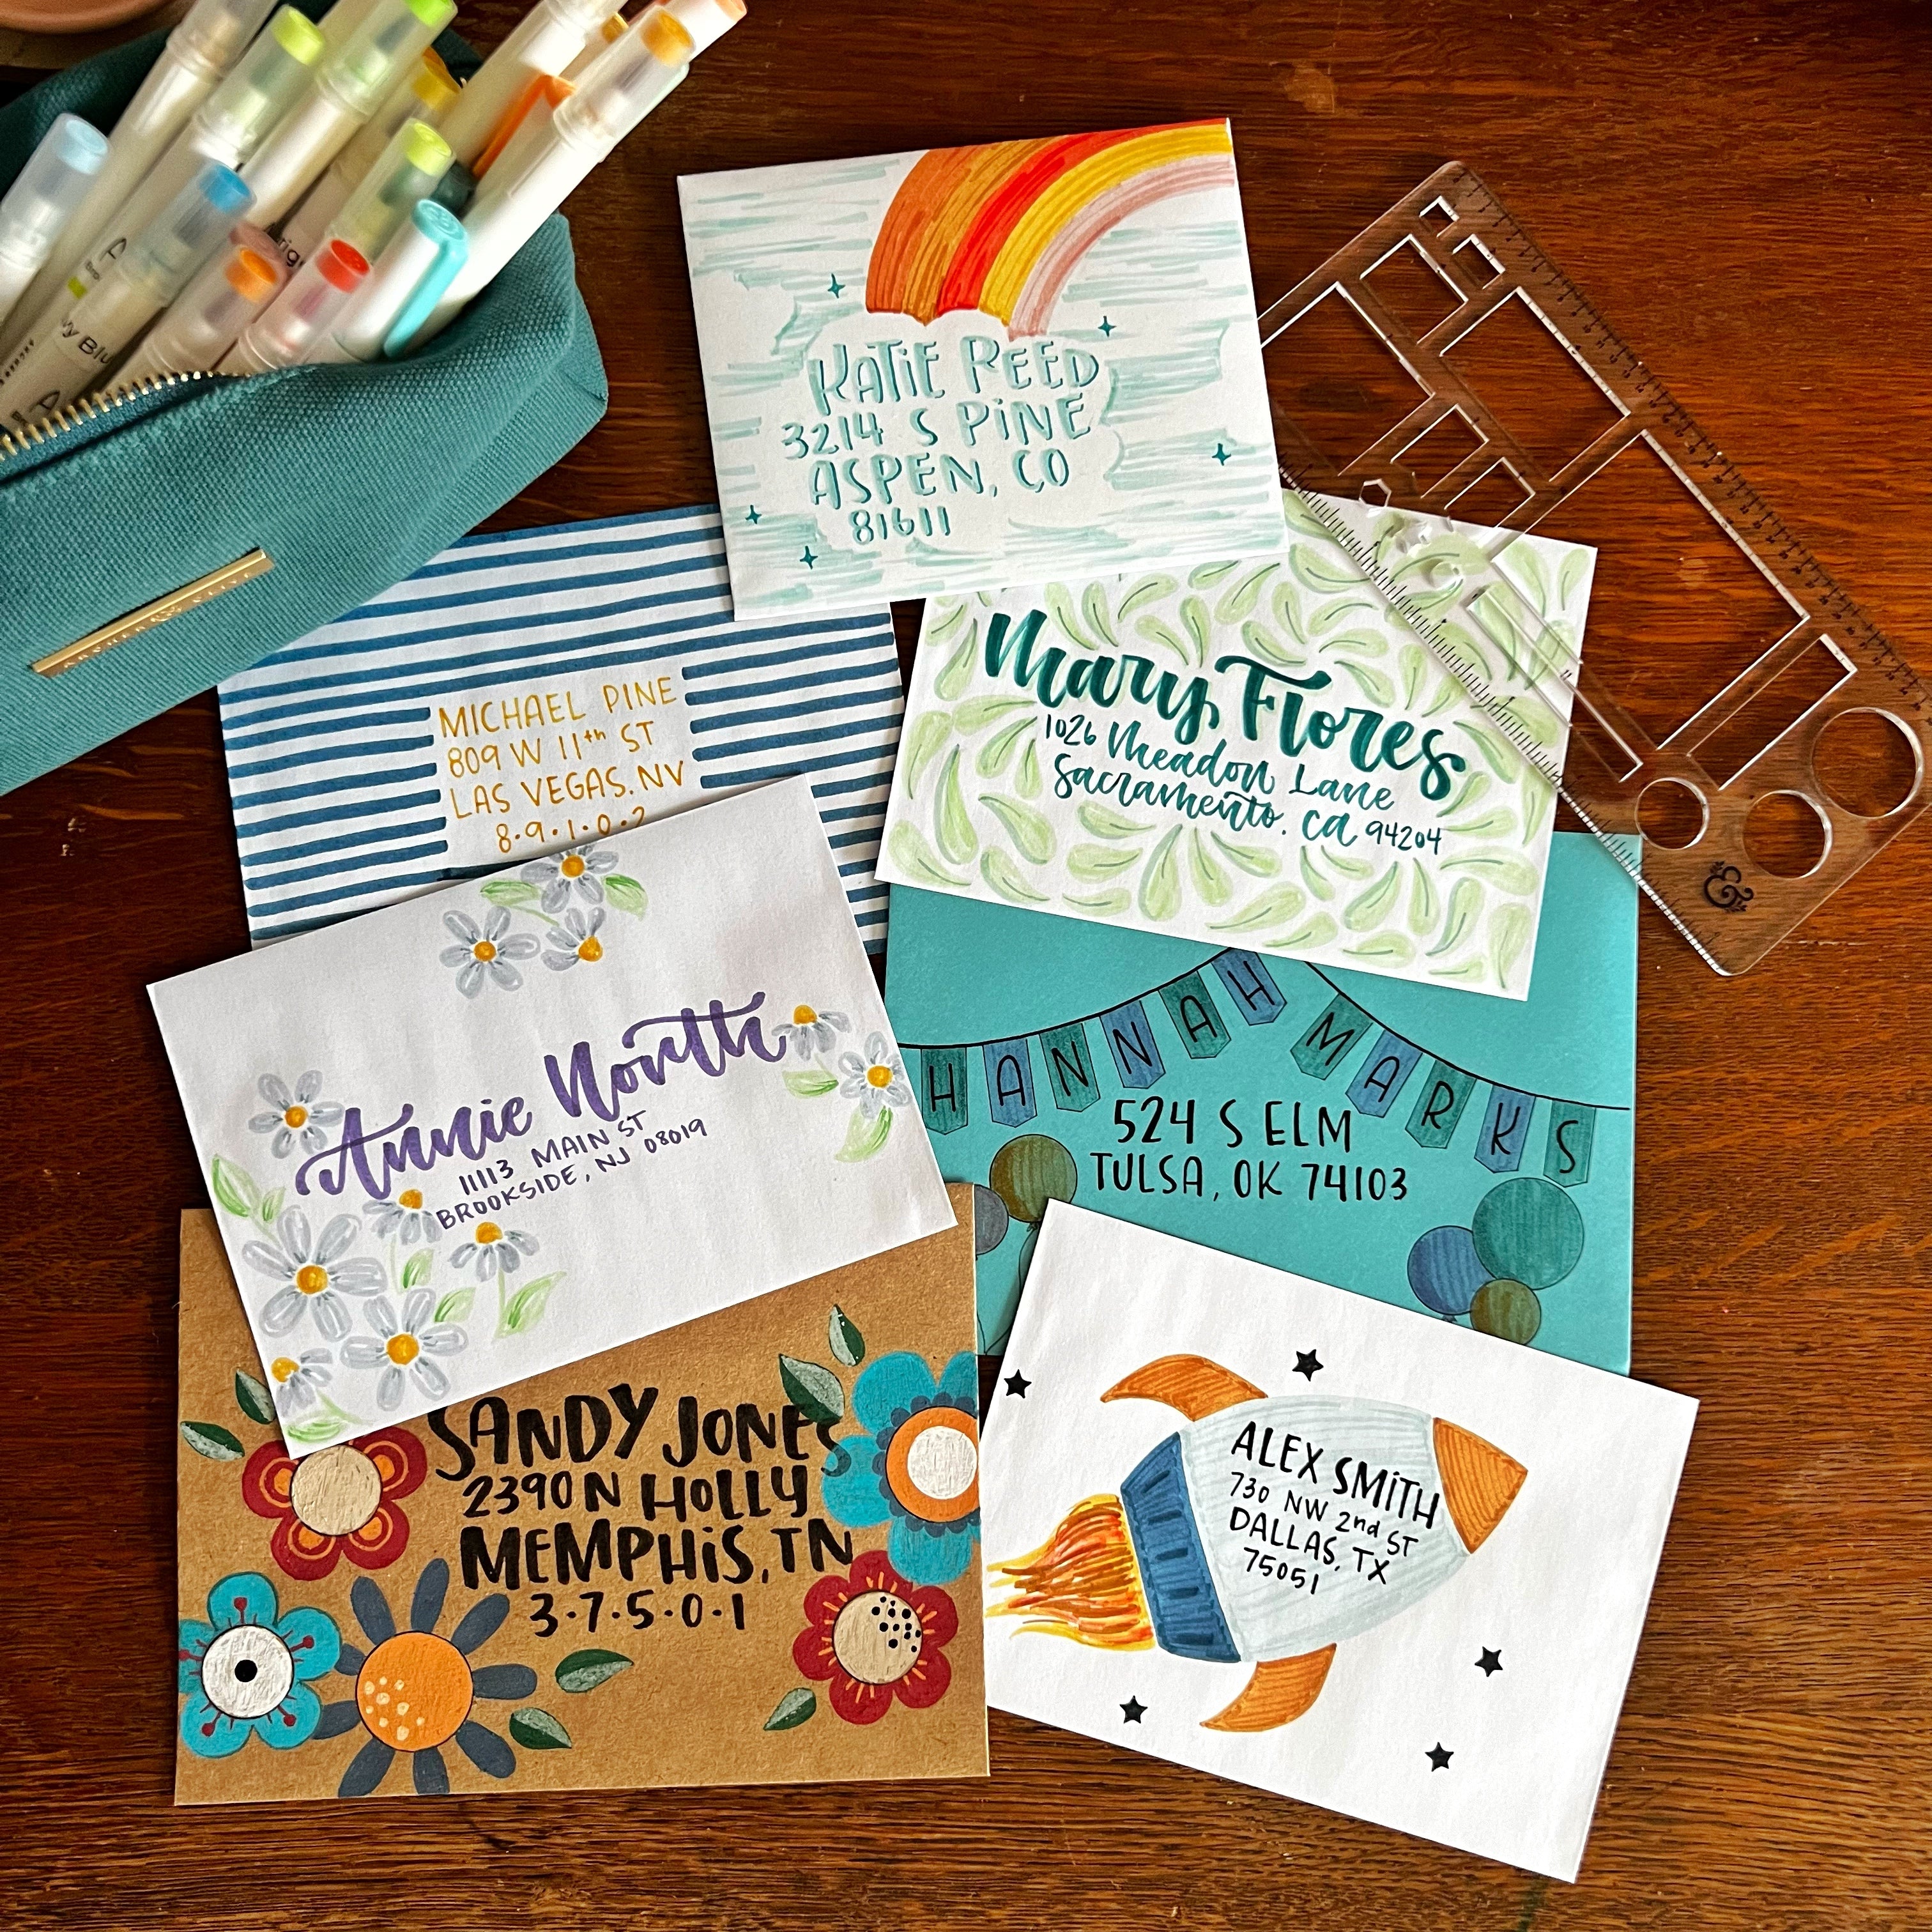
Hey there, Friends! Sarah here, from the Archer and Olive Ambassador team and SHEdesignsKC over on Instagram. One of the goals I set for myself this year is to send more snail mail. I love mail! I love sending a cutesy little card, uplifting note, or just a simple “Hi, friend!”. And I LOVE receiving mail too! Haha! My obsession for the last couple of years has been envelope art. The only thing more exciting than finding happy mail in your mailbox is happy mail that is fun even on the envelope! Plus, I imagine it probably makes mail carriers smile to see something a little more playful than a plain, white envelope. So today, I’m going to share a few fun and easy examples of envelope art that I hope you’ll enjoy experimenting with! Snail mail is about to get even cooler!
And one quick note before we dive in, all the names and addresses I have used here are fictitious, so have no fear about the privacy of these make believe people. :)
Supplies used

Today I’ll be using a selection of random envelopes I have collected. I also created a free printable envelope template if you don’t happen to have a blank envelope handy. To assemble the envelope, cut it out around the exterior (do not cut on the light gray fold lines). Fold in the two smaller side flaps, then fold in the larger flap, which will form the back of the envelope. Use your preferred adhesive to adhere the back against the two side flaps. Fold down the top flap, which will be the closure.

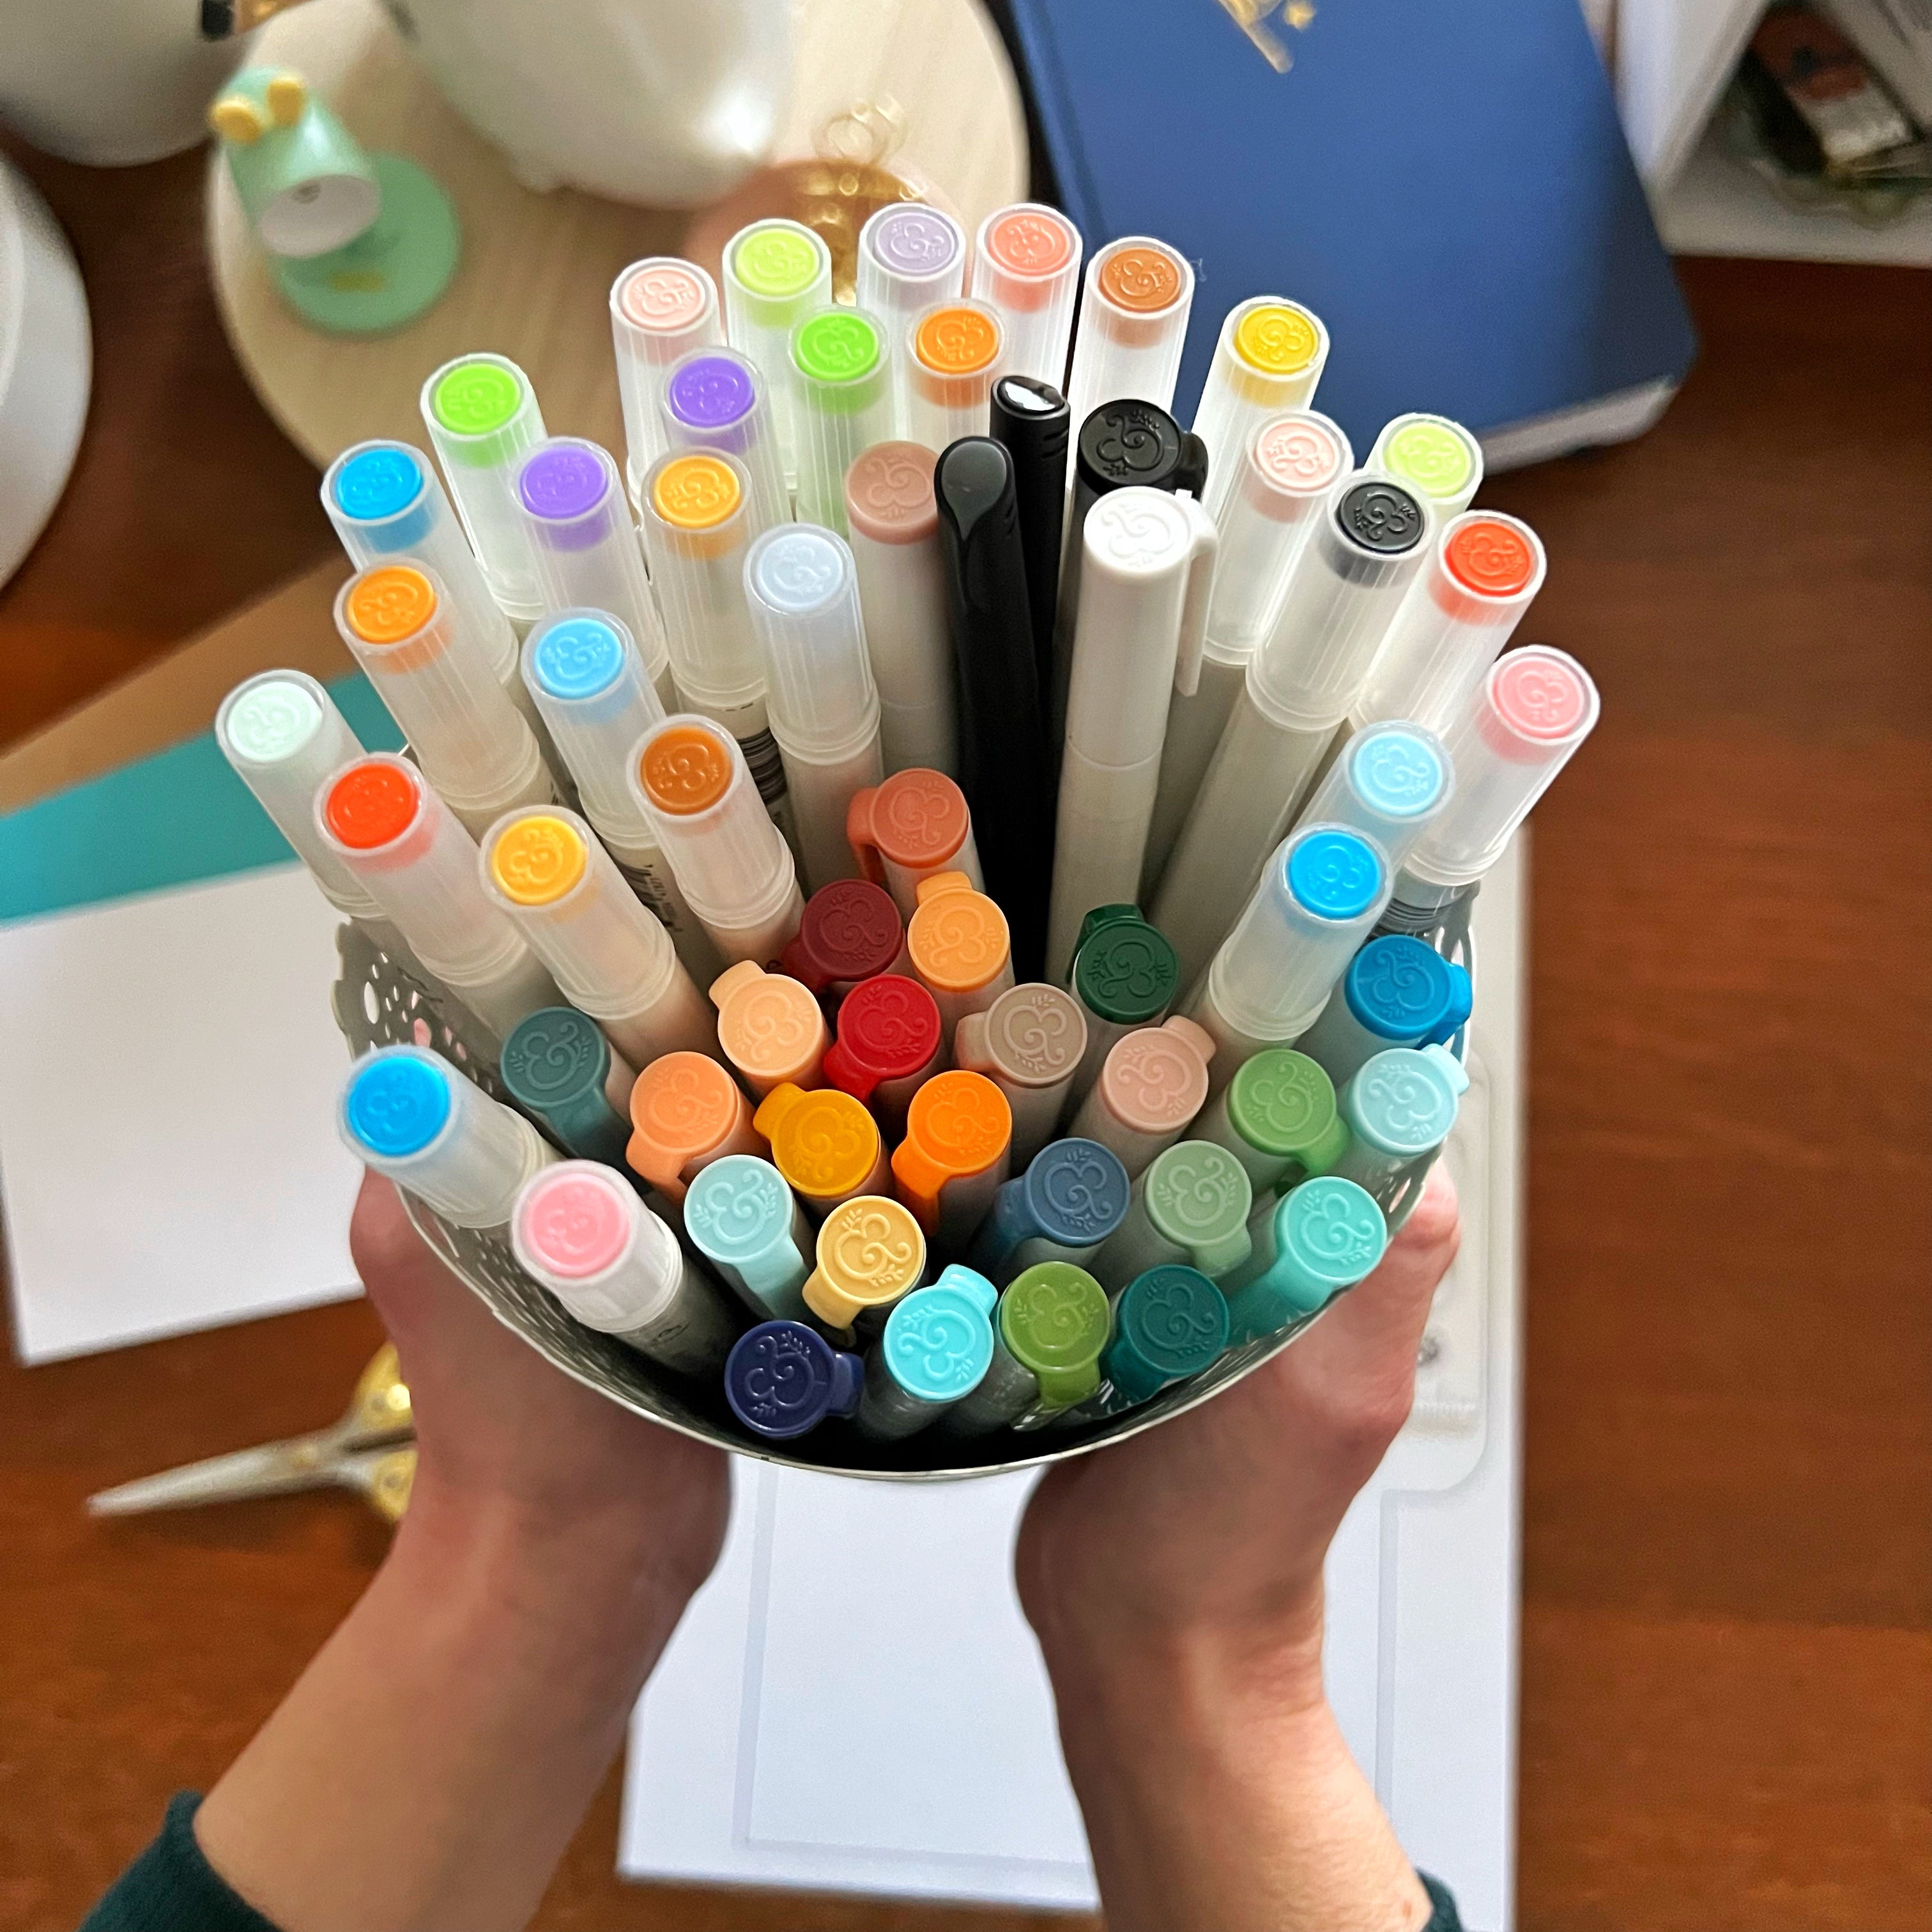
I’ll also be using the following supplies:
- Archer & Olive Calliograph pens
- Archer & Olive Acrylograph pens
- Archer & Olive dot grid stencil
- Pencil and eraser
- Roller tape
- Scissors
If you’re picking up any of these supplies from Archer & Olive, I’d love for you to use my affiliate code, SHEDESIGNSKC10, to save 10% on your purchase. I get a small commission, and you save money! Win-win!
Design 1 - Rainbow Sky
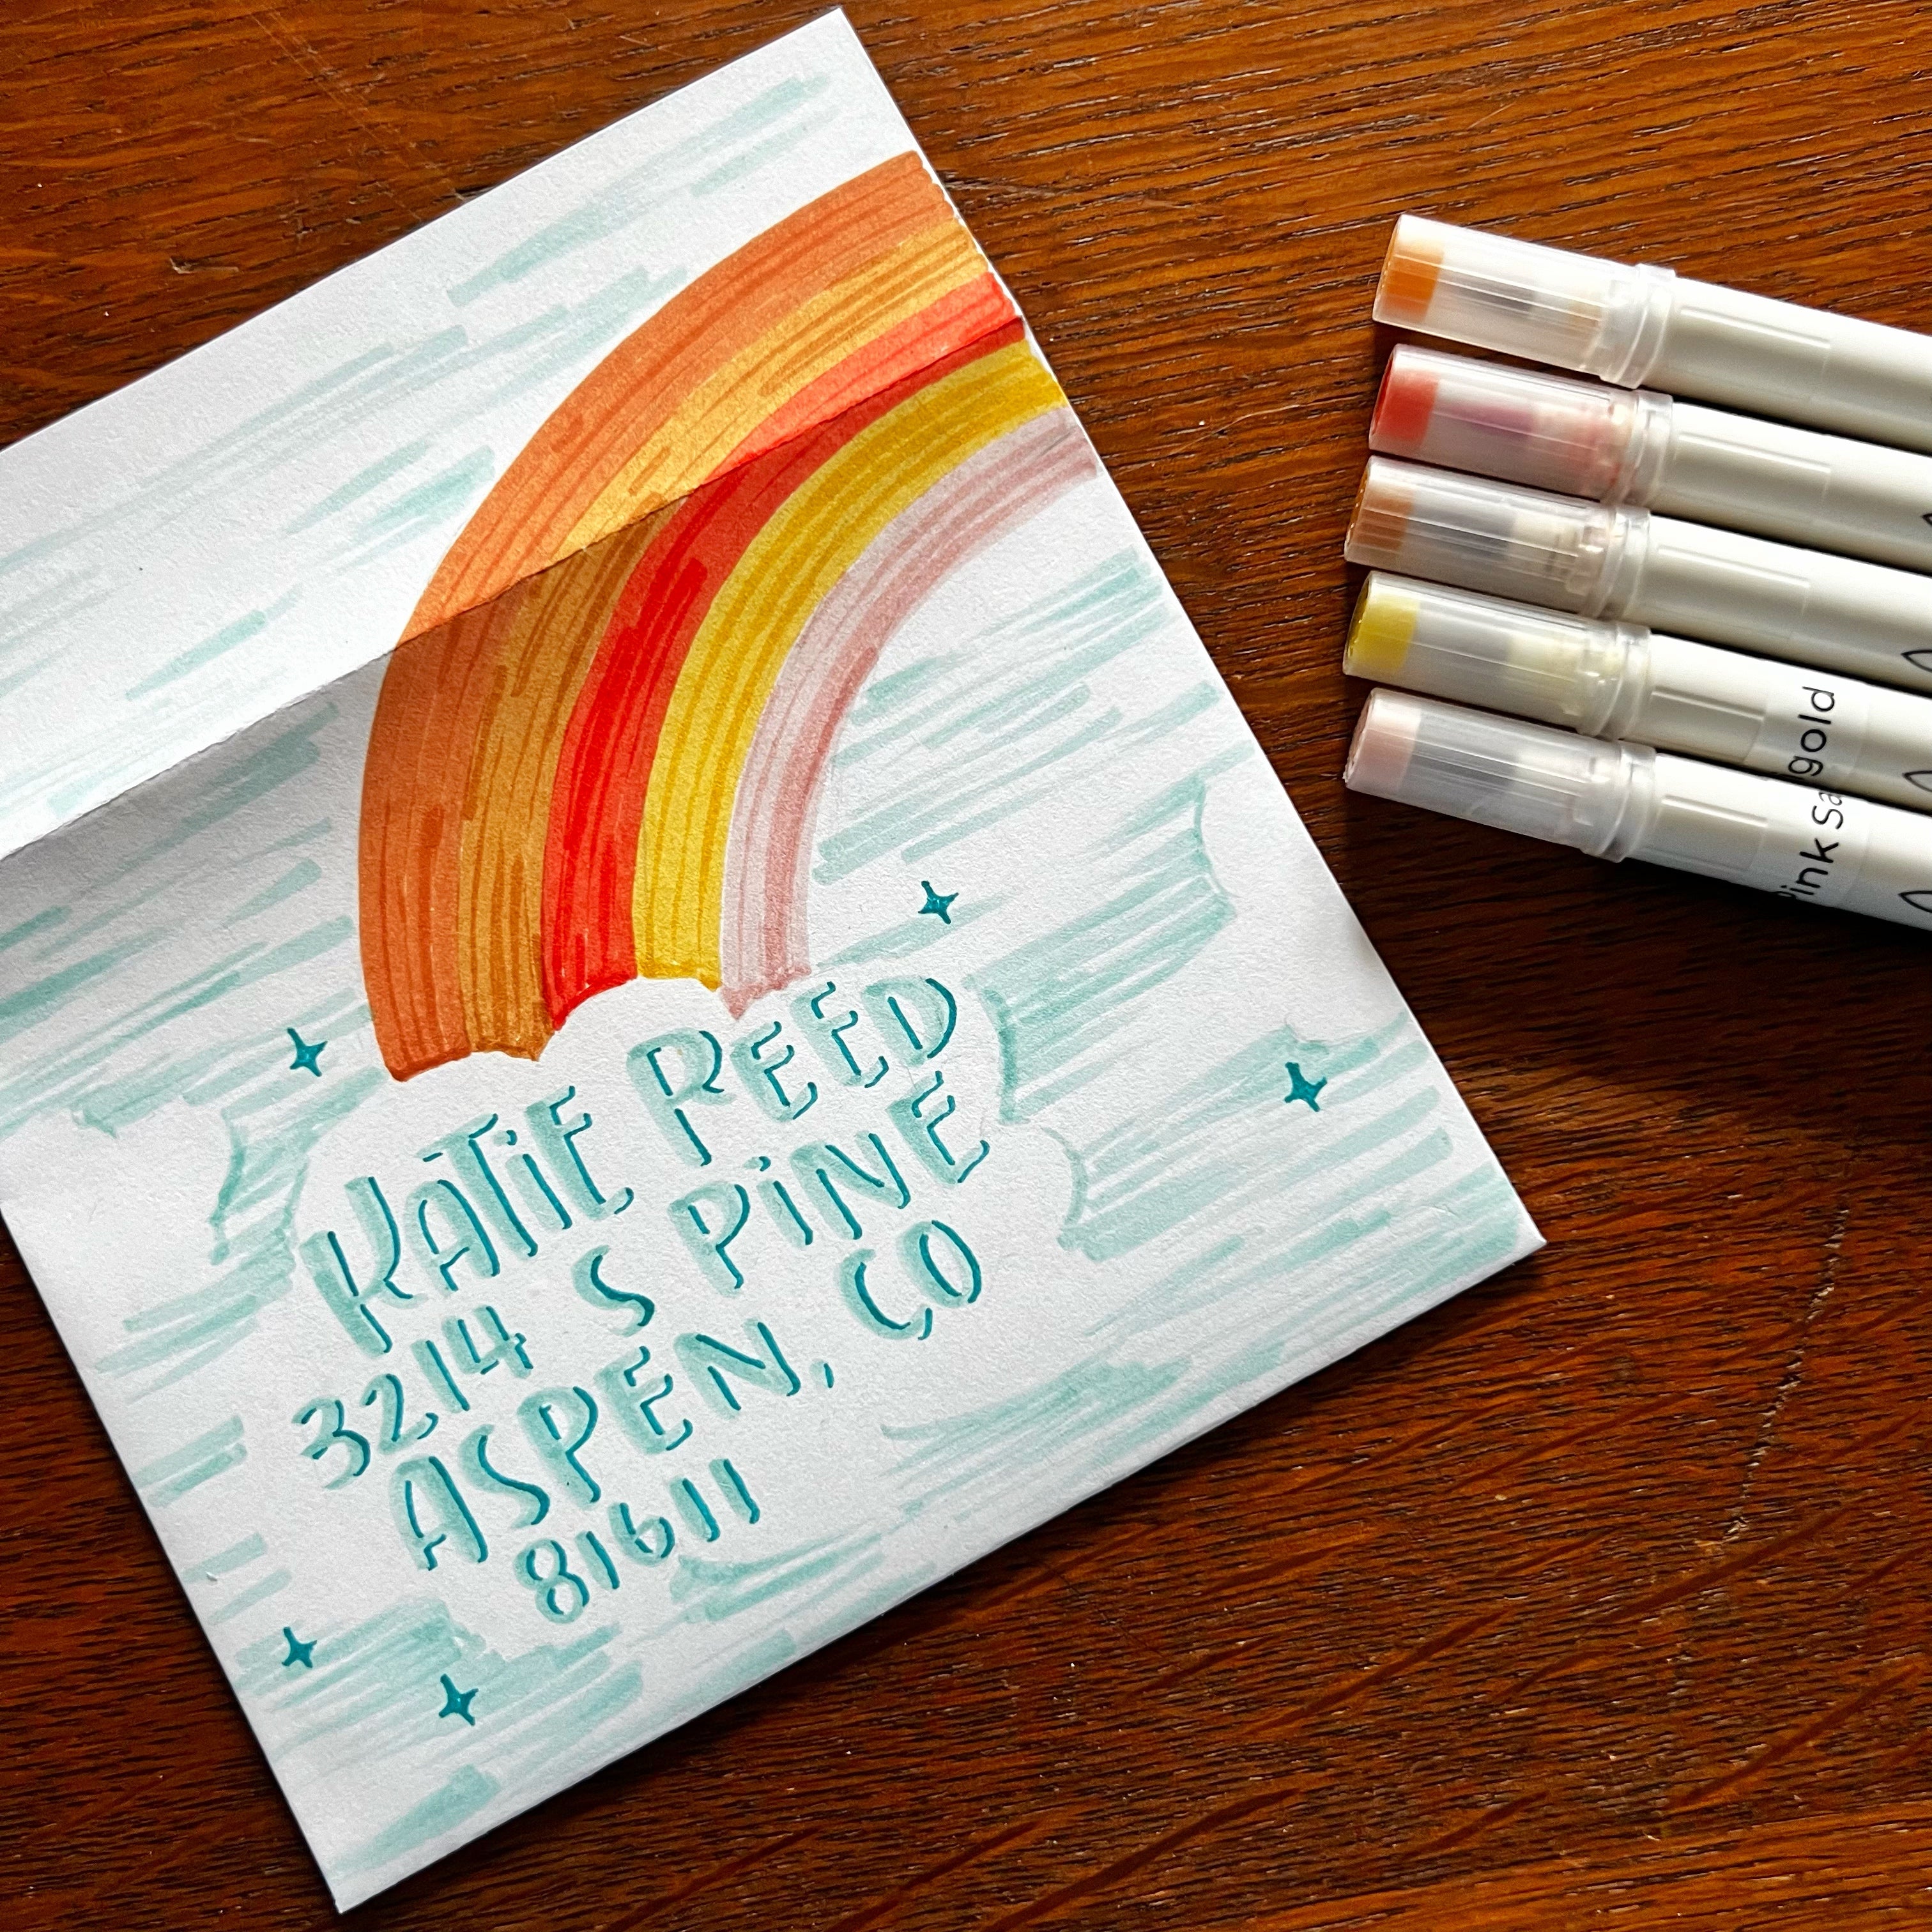
Anyone else love to doodle rainbows? They’re just so cheerful! This is a simple doodle that will make your envelope really pop. My vision for this decoration was a partial rainbow, ending around the center point of the envelope. At the base of the rainbow, I wanted to draw a large cloud where I would put the recipient’s name and address. I almost always do a light pencil sketch before I go in with markers to make sure the composition looks nice. I used my Archer & Olive Calliograph pens to color in my rainbow, and then wrote out the recipient’s details. Since the white cloud wasn’t really popping on the white envelope, I did some messy scribbles in a light blue to give some contrast. I added a drop shadow to the name and address with the finer brush tip on a darker shade of Calliograph pen. One addition that I I think is very fun, is to extend the design onto the flap of the envelope and even onto the back. I added some of that detail to this design. This came together so quickly and is still something extra special and unique.
Design 2 - Stencil Fun
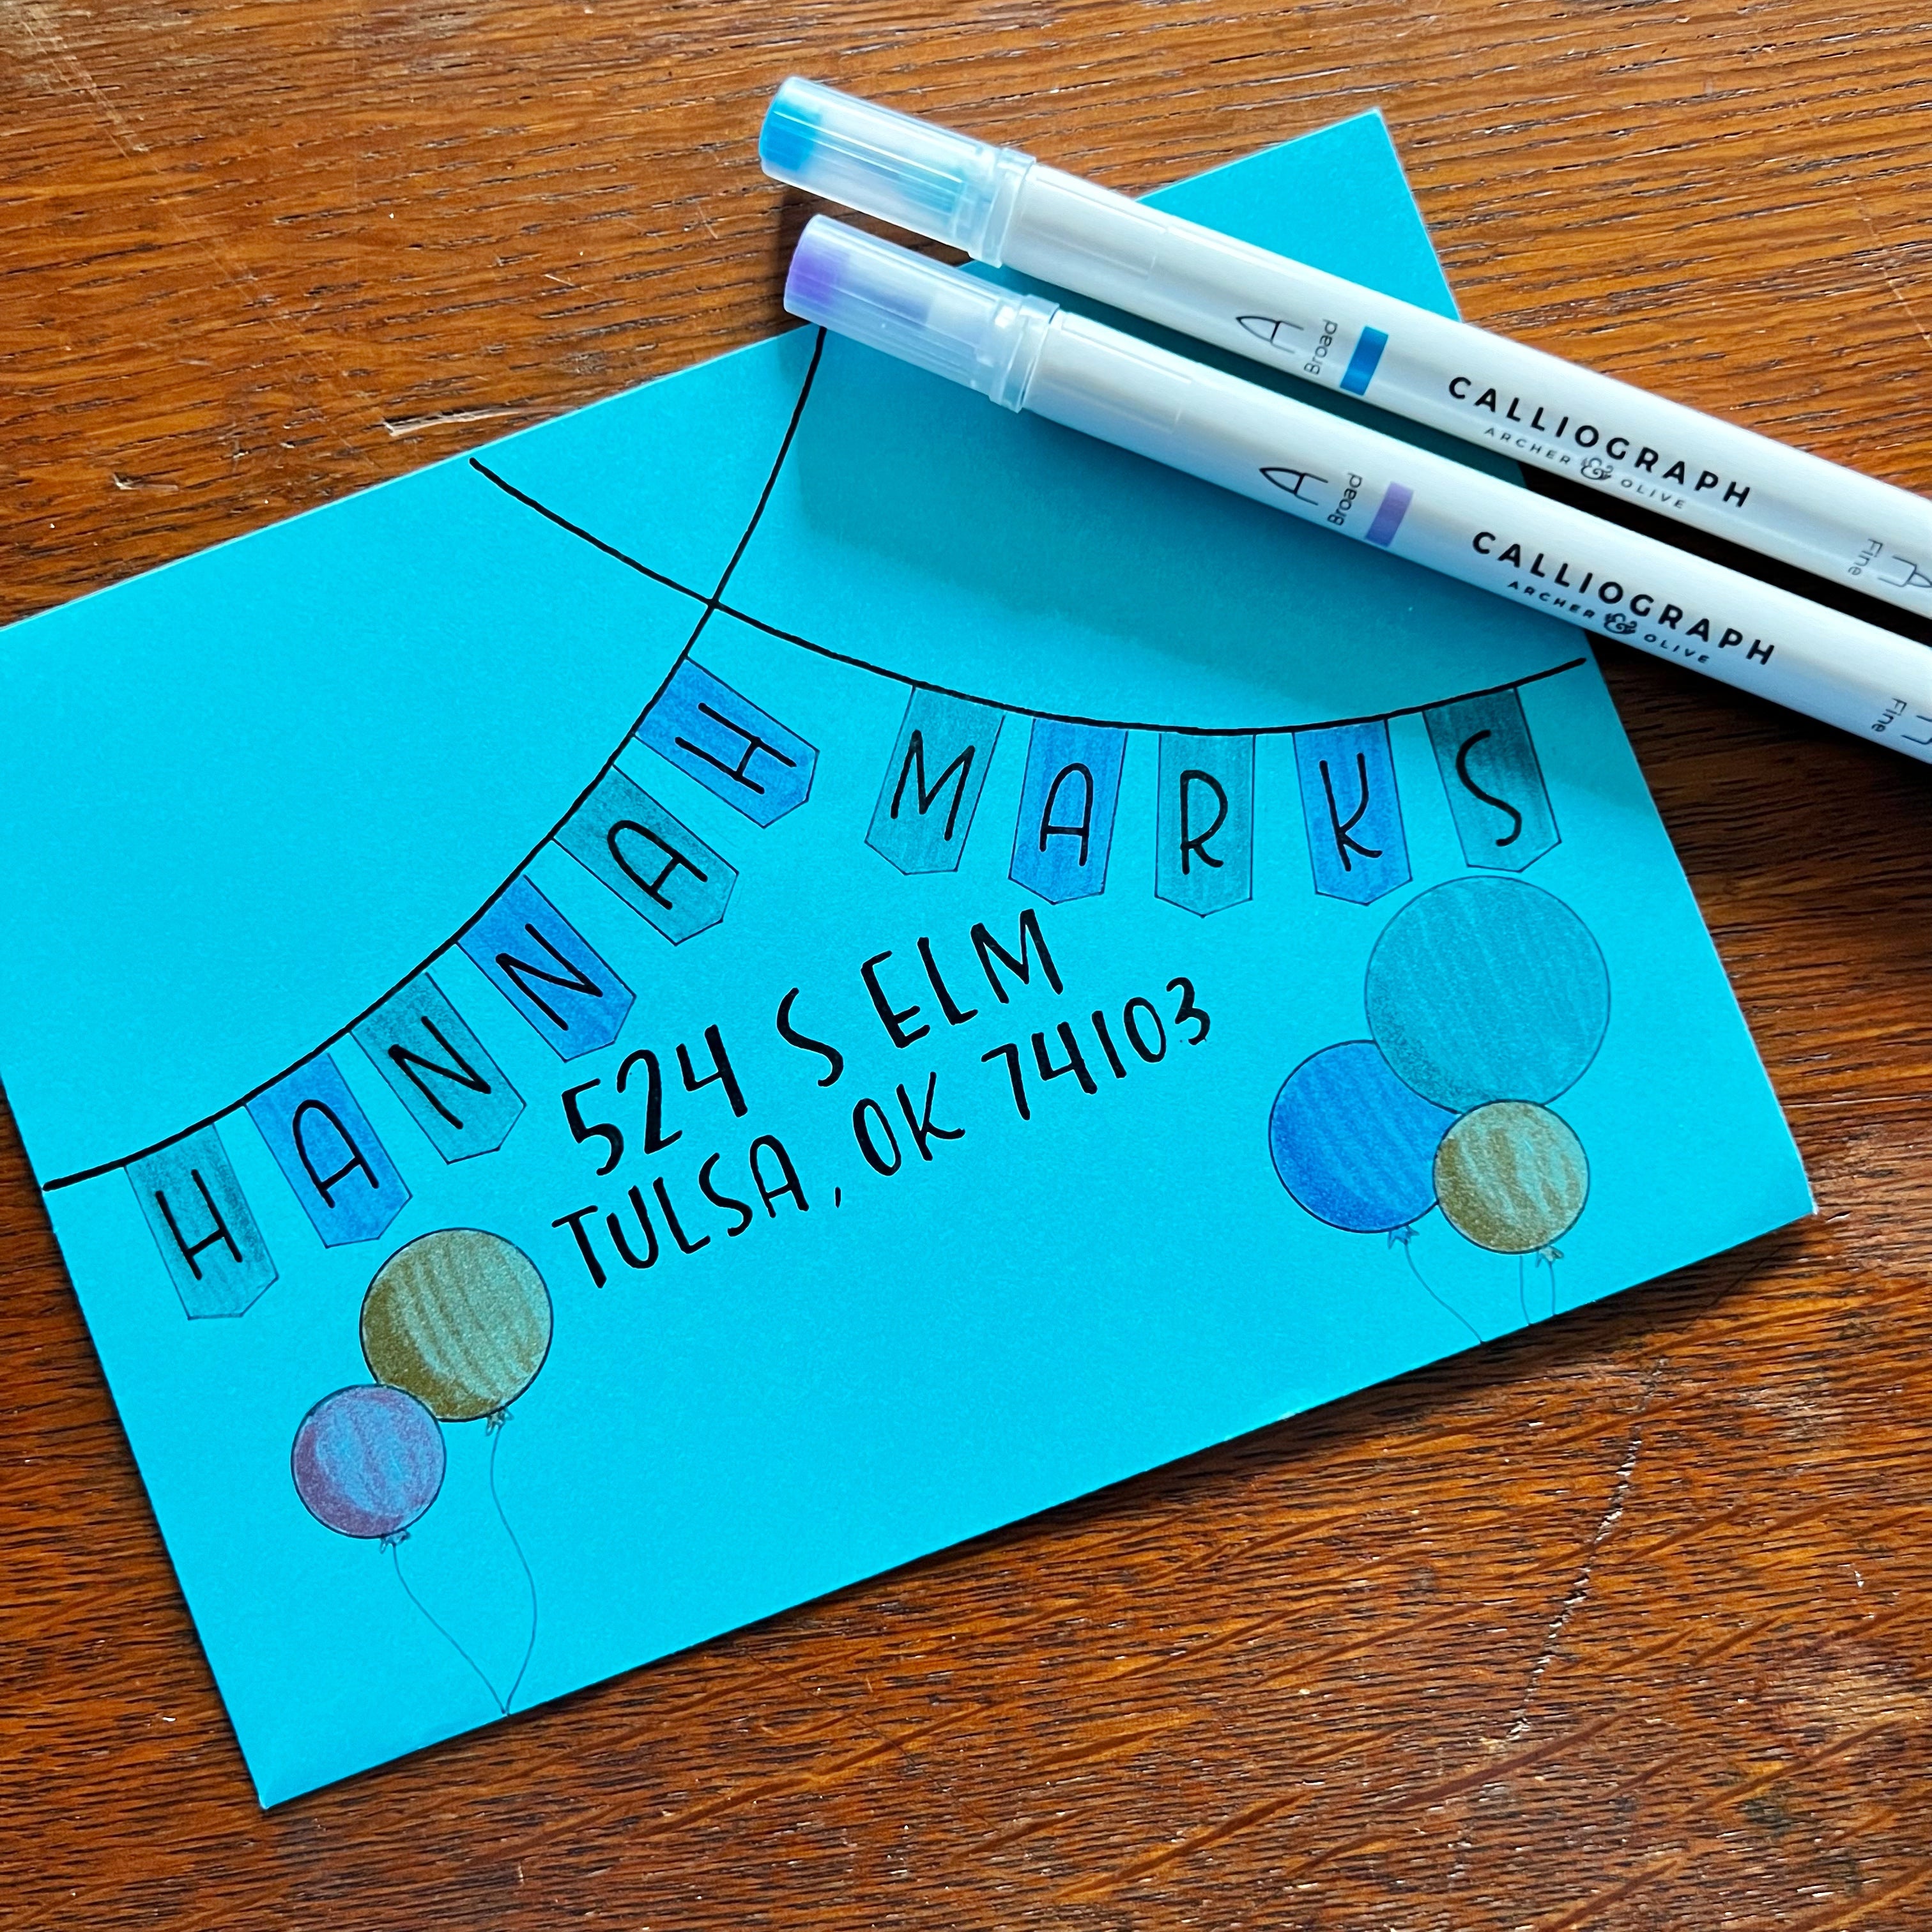
If doodling isn’t your thing, use a tool to help you! Stamps could be really useful here, as well as stickers! I’m going to use a stencil for this next decoration. The Archer & Olive dot grid stencil has so many great elements you can use in a creative way. I wanted to use the little flag shapes to create a banner for the recipient’s name on this envelope. I also used the circles on my stencil to create a couple of little balloon clusters to add to the festive look. I used my Calliographs to color everything in, layering a little bit in areas where I wanted to create some shading. I grabbed a black Acrylograph to write the recipient’s name on the banner and fill in the address. This would be a great look for a birthday card envelope!
Design 3 - Retro Floral
Okay, I know I said I love to doodle rainbows, but I REALLY love to doodle flowers. I wanted to make a semi retro looking flower doodle for this envelope, because I thought that style would lend itself to layering colors and being generally, very groovy. :) I used my dot grid stencil for the circles for the centers of my flowers, and then started coloring in my petals. I used my Archer & Olive Acrylographs here because they are excellent for layering and very opaque. This design is so playful and gives you a chance to use a lot of creativity with adding detail to the flowers. Also, how amazing do these Acrylographs look on this kraft paper envelope?! I love how the look came out!
Additional Tips
As I’ve been doing envelope art for a couple of years now, here are a couple of additional tips I’ve picked up along the way:
- Consider keeping the return address on the front of the envelope. I know how tempting it is to leave the front of the envelope all clean and pretty with your decoration, and to put your return address on the back of the envelope. I love that look myself, and have sent many pieces of mail that way. However, I have since spoken to the good folks at my local post office and have been informed that mail is more likely to be returned if the return address is not present on the upper left hand corner of the front of the envelope. A lot of the sorting of mail is done by machine and they can get confused when the predictable components of an envelope aren’t in their designated spaces. Or, just throw caution to the wind and put the return address on the back! You do you!
- Keep legibility in mind. Remember that machines and people have to be able to read your envelope for it to be delivered correctly! Sometimes I get so playful with my lettering and realize I need to reign it in so that it actually arrives at its intended destination!
I really hope you enjoyed this look into a few samples of playful envelope art! If you’d like to see me actually creating each of these designs, check out the YouTube video here!
If I’ve inspired you to add a little personality to your own mailbox, please be sure to tag @archerandolive along with myself so we can see your amazing creations! Use the hashtags #aoshare and #archerandolivecommunity so our whole community can be rooting for you! Also, be sure to stop by and say hi over on my Instagram @SHEdesignsKC. I’d love to know which look I shared here is your favorite! Talk to y’all soon!


0 comments