


Hello Friends! It’s Amanda aka @shenoteditall on Instagram from the Archer and Olive Ambassador Team. Today I’m going to show you how to make an incredible, DIY, customizable sleeve for your journal to help keep it protected while you’re on the go!
As someone who travels quite a bit with her journals I began noticing that the edges of my journals would become worn or discolored from being constantly packed in various bags. One day, a few months ago, I was packing for a trip and slipped the current book I was reading into a book sleeve to keep it safe. As I held it in my hands I thought, huh, I wonder if this book protector concept would work for journals too. Viola! An idea for a bullet journal sleeve was born!
The only problem is I have no idea how to use a sewing machine. Sad but true. It’s on my bucket list to learn how to use a sewing machine, until then however, I’m pretty good at hand sewing and decided to come up with an easy journal sleeve tutorial almost anyone can do! This will be especially handy for the funky sized journals, because, while an A5 Journal Sleeve can definitely be useful, a journal sleeve for your B5 or Pocket sized notebooks (among others) are much harder to find!
Here’s what you’ll need:
- About ½ yard of your fabric of choice. I like to use felt because it’s sturdy and the edges don’t require any finishing
- Materials to decorate the exterior. I use small felt appliqués, but your options are endless.
- Embroidery floss
- An embroidery needle
- A piece of paper and a pencil or a pre printed pattern for the decorations (I have a printable later in this post to help if you need it!)
- A large button
- Scissors
- A ruler or measuring tape
- round head sewing pins
- Whatever journal you plan on making the journal sleeve for
Ok, lets get started!
First off lets gather all your supplies together in a well lit space. A simple journal case can be done fairly quickly, maybe in as little as an hour, but a sleeve with more complicated decorations may take you a chunk of time.
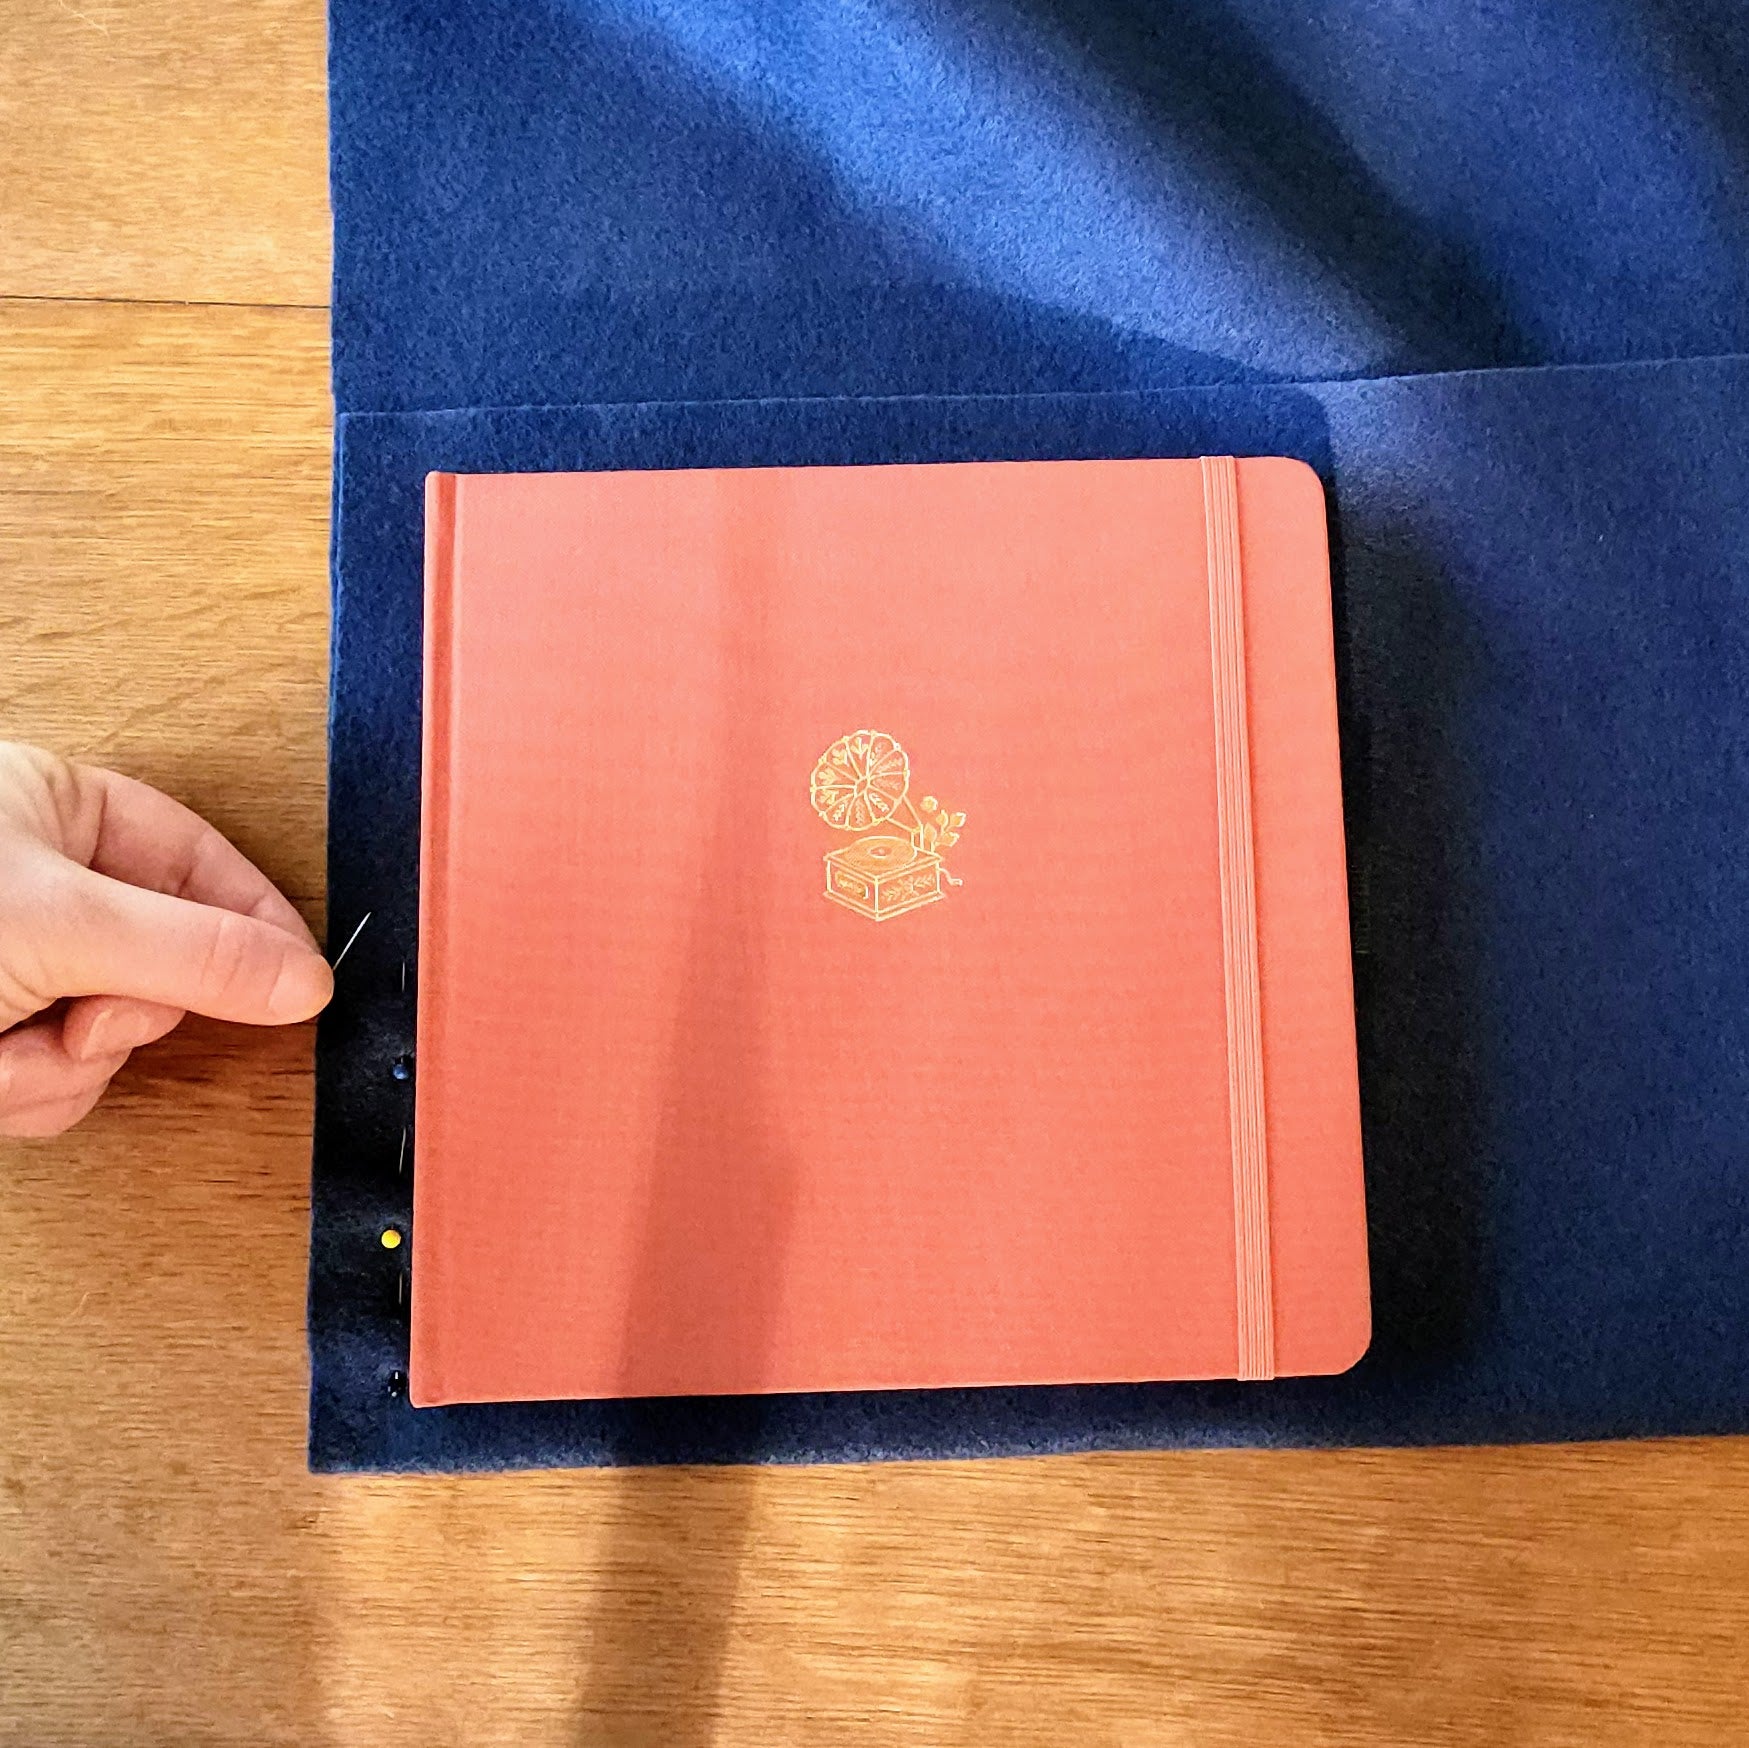
For my example today I am going to be using an 8x8 square journal from Archer and Olive.

Step 1: Measure your fabric.
I suggest folding the fabric over at this point so that the bottom of the journal sleeve will be a fold and you only have to sew on two sides. Felt is a sturdy fabric and more than capable od supporting a journal or notebook with a fold. Next I like to lay my journal on top of the fabric to make sure I have the correct amount on all sides. I try to give myself the following extra space on each side of the journal:
Bottom: ¾ inch
Sides: ¾-1 inch
Top: ¾-1 inch
The amount of margin I’ve left myself may seem excessive, but, through trial and error I’ve learned that if I leave myself extra space in the margins, if I mis-measure at some point and need more then it’s an easy fix. You can always cut off extra fabric when you’re done but you can’t add more if the fit is to snug.
Once I’ve figured out the spacing of the journal and the margins I then pin the sides in the approximate area I plan to eventually stitch. Once it’s pinned to test for a good fit I then slide my journal into the rudimentary pouch to test the fit.
If the journal fits but it’s snug I suggest moving the pins out slightly. As we all know journals expand as we use them so you want to make sure you have some extra space.
Once you’ve pinned your sleeve and you’re confident in the fit you’re ready for the next step…
Step 2: Cutting!
If I have a lot of excess fabric, at this step I will cut along the side at mu pre measured width as stated above (a ruler or measuring tape can be helpful here), but I’ll typically be extra generous at the top of the sleeve, in case I need more for the height later on.
- My next sub step is totally optional but at this point, with less fabric in my hands, I like to turn the sleeve inside out (like the finished product will be) and test that the journal will fit that way as well. Then I turn it back the right way and continue.
Now that I’ve removed a majority of the excess fabric I slide my journal into the pinned sleeve and mark where I want to cut off the top portion of the sleeve. You want this opening to rest just above the top of the journal. I like to mark the ideal spot with some pins before removing the journal to make the cut.

Now that you have the size sleeve you’re going to be making it’s time to do some decorating!
Step 3: Making Decorations
I love this part because you have complete freedom with what you can do. You can sew on patches, embroider, do some beading, even paint the fabric! For the sake of this tutorial I will be making some felt appliques to sew onto the outside which are fun and easy to make.
To help make your appliques you are going to want to grab that sheet of paper and the pencil and first draw out the design you want to create. For todays tutorial I’m make a moon and stars.
Next cut out those designs and use a pin to attach it to a small sheet of felt in a secondary color. I then use that paper as a guide to cut out my design from the felt. It works surprisingly well, even for more complicated designs!
If you want some guidance making appliques I did put together a prinatble featuring flower appliques you just have to cut and use (and you will see an example of how I used them later in this post)!

Step 4: Doing the decorating
At this point you want to remove all the pins from the sleeve and flip it “Inside out.” Before working on design placement I suggest putting a few pins as markers for where the bottom of the sleeve will be and where you expect the side edges to be, that way your hard work doesn’t get lost in an area that won’t be visible in the final product. I also like to make a mark a couple inches down from the top as that is where the flap and button will go later. Please note, onli put the pins through one side of fabric. These aren’t to hold anything together, just to mark your spacing.
Once the marks have been made you are ready to lay out our appliques and then sew them on!
For attaching my shapes I decided to use embroidery floss in a contrasting color because I like the fun, chunky look, but you can use whatever medium you would like, even fabric glue.

Step 5: Sewing the Sides of the Sleeve
Once the decorations have been placed, you want to turn the sleeve back to the inside out position and replace the pins a long the sides. At this point I like to slide my journal back it to double check the fit just in case.

Once you’re confident you have the measurements correct it’s time to sew! I suggest using embroidery floss for the side stitches. It’s thickness ensures that the seems will hold even the heaviest journal.
Now, start at the bottom of one of the lines of pins and start sewing bottom to top, removing the pins as you go along. You don’t have to sew to the tippy top of the line but get pretty close.

When done, repeat with the other side.
Once both sides have been stitched turn the sleeve right side out to double check the fit one last time. If everything fit well you can now turn the sleeve back inside out and trim any excess felt from the sides. I also suggest cutting the bottom corners off at a diagonal (outside of the stiches) just so that the corners fold evenly when you turn it right side out.

Step 6: Adding the flap
The final step is to add the top flap. This is what keeps your notebook in the journal sleeve instead of slipping out. You can make your flap any size you would like, I like mine to be about 4 inches wide.
You’ll also want to make sure to cut this piece so that you have enough overlap on both the back and front side. This will vary depending on the notebook size. For an 8x8 journal that overlap is about 3 inches on the front side and 2-3 inches on the back.

Once you have the correct measurements pin the flap in place (to the back) and attach it using embroidery floss. For the most secure flap I suggest sewing a full rectangle.
Finally, once the flap has been attached determine the button placement in the front, attach it (using embroidery floss) to the sleeve, then cut a hole for the button to come through on the front of the flap.
Voila! You have a journal sleeve!

What's so amazing about this journal sleeve template is that it can be adapted to fit almost any journal size. I recently made another sleeve for my B5 Archer and Olive Journal, which, admittedly took a bit more time to put the decorations together, but it turned out really cool.

NOTE: When it comes to (pre-sewing) measurements of fabric for each journal size, in order to allow yourself enough space to make mistakes I recommend a width 3 inches larger than the journal and a height 2-3 inches larger than the journal. For an 8x8 journal that would be 11x10 or 11.
If you would like to see a step by step process of making this sleeve I have also put together a youtube video for anyone who would like a little extra guidance.
I hope you all found this tutorial helpful! I know that a majority of us feel a pang of sadness when something happens to the covers of our beloved journals and a journal sleeve can be just another piece of armor to help protect it the from the elements. If you would like to see more posts from me and how I travel with my journals you can find me on Instagram @shenoteditall. Or if you would like to try creating a crochet style cover for your journal head to this blog here!


0 comments