


Hey friends, it’s Sarah from @essjay_florals and I’m going to share this fun Floral Lettering Tutorial. This was a fun little series I recently created in my blackout journal and I thought, why not share it with you all? It is really fun and easy to do and as you will see from all the colour combos I have used, you can use any of your Acrylograph pens to create it. And at the end of this tutorial don’t forget to download the printable with some fun little shapes that you can transfer into your journal to try it yourself.

As I mentioned I used a combination of Acrylograph’s from each of the different sets, I recommend picking 6 colours you want to try together and just give it a go. Now let’s get started.
Here are the materials you’ll need to recreate it:
- Your journal – I’m using an Archer & Olive A5 Crescent Blackout Notebook
- Pencil
- Acrylograph markers in size 0.7mm also available individually
1. Pencils are your Friends
Pencil in your letter (number, shape, whatever you want to use, really). I drew my letters in my book just by picking a rough size for each letter and drawing in a block style. But if you are less confident in doing this a few fonts that are good to use as an outline are: Helvetica in Bold, Avenir Black, Futura in Bold, or you could find something completely different to use.

2. Start with the Leaves
Pick a colour for your main leaves, and just pick a point and start. The fun thing is you can link all the leaves together with one branch/ vine or just create a few smaller ones, whatever you prefer. In the videos you can see I do a bit of each.

3. Get Sprouting
Pick your next colour for the little ‘sprouts’ (I’m not really sure what these are, haha!) add these little sprouts in wherever you feel there are open spaces. I like to start filling most of the gaps in here, but don’t worry if you don’t, you still have plenty of other chances to pad them out.

4. Add those Flowers
Start your flowers, draw little 5 petal flowers, then use another colour for the centres. The flowers are another great filler if you notice any holes, pop one in there.

5. Berry Time
Add berries randomly all along the branches (again, another filler).
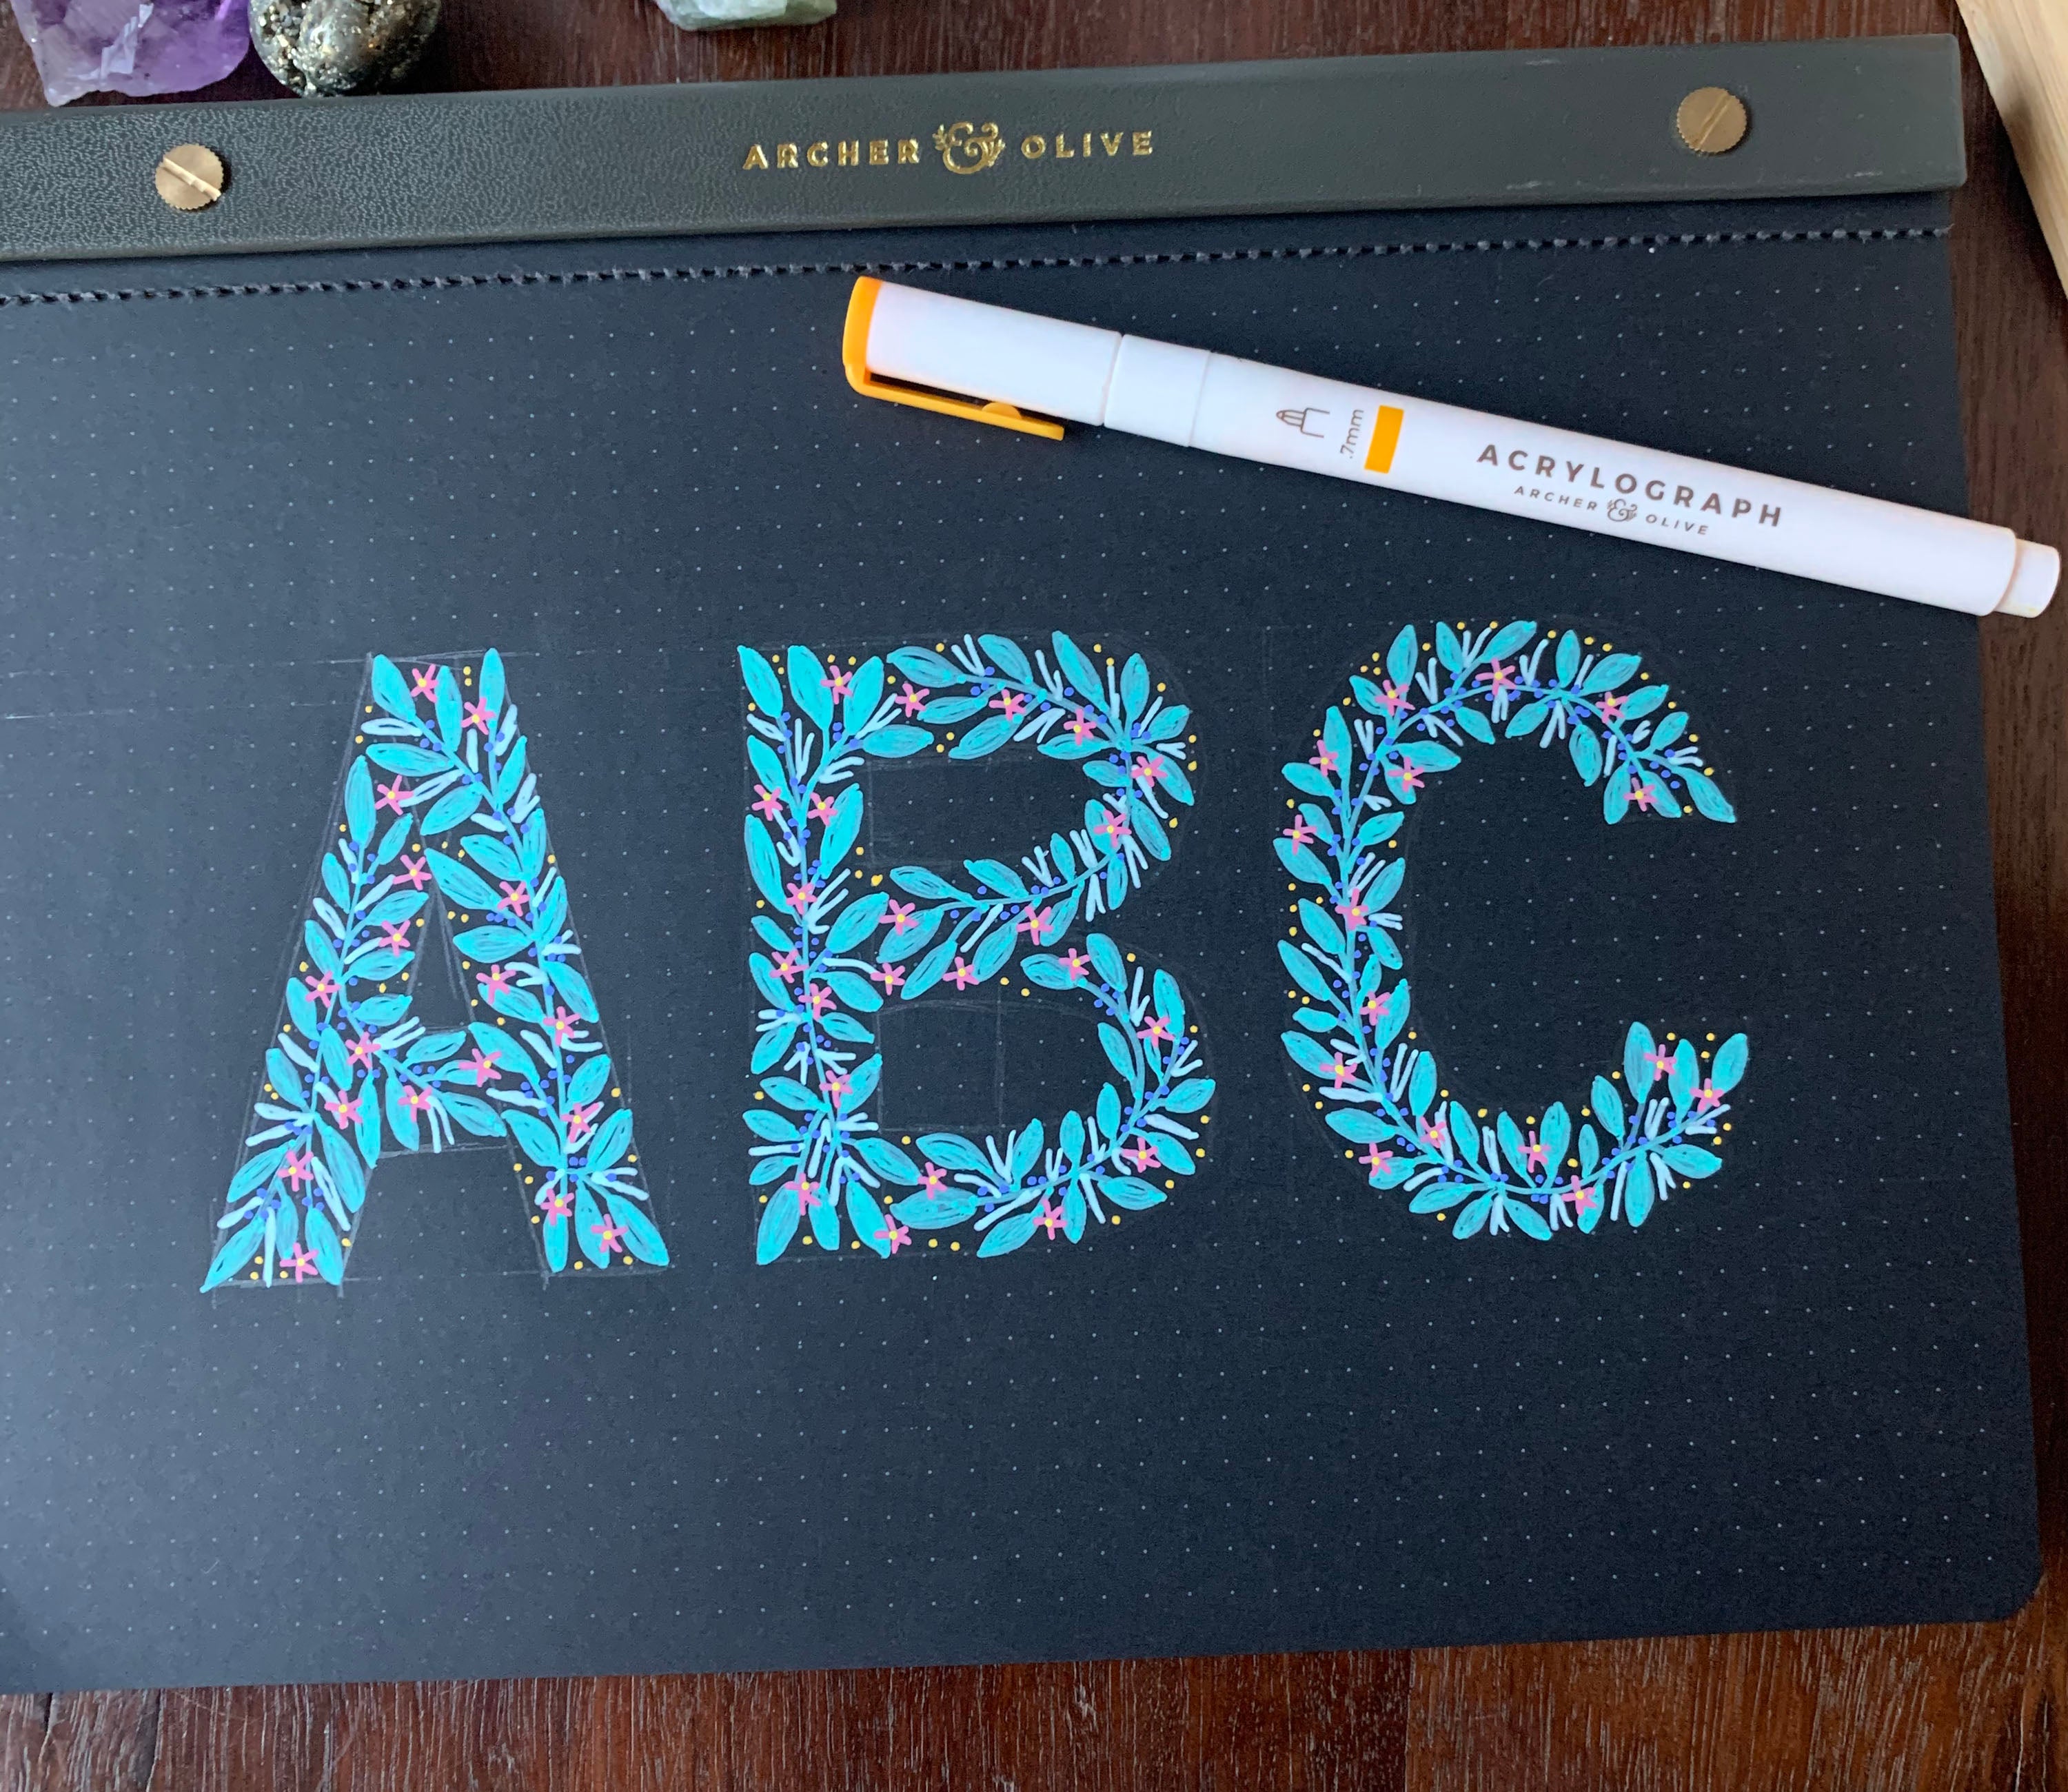
6. Fill those Gaps
Using your last colour add little dots to fill in any gaps. And then you are done!
The really fun thing about this tutorial is you can use different elements, colours and use this technique for any shape you’d like! So, get yourself some Acrylograph’s and get to it, don’t have any Acrylograph’s? No worries use my affiliate code “SARAH10” for a 10% discount on Archer and Olive products, that means you can grab a book and some pens and dive in!
Letter along with me
Want to give it a go? See this video on how I create every letter in the alphabet and come create with me!

Now for a fun printable! I created this template so you can trace some fun shapes into your journal and use my tutorial to create some fun floral shapes.
I hope you have enjoyed learning how to create this Floral Lettering and I hope you’ll give it a shot. Don’t forget to tag myself at @essjay_florals & @archerandolive if you’d like to share.


0 comments