


Hi friends! It’s Emily from Planned and Planted (Instagram and YouTube) here to show you how I made one of my favorite plant care bullet journal spreads - a watering tracker! Nothing hypes me up for spring like buying new houseplants, but it can sometimes be hard to keep track of caring for all of them. The digital plant care tracking apps never work for me, so I knew I wanted to make some spreads in a plant journal.

Supplies:
- Archer and Olive Journal - I'm using the A5 white dot grid journal from the December 2022 quarterly subscription box, but any A&O notebook will do just fine!
- Scissors - The one I used are also from the December 2022 subscription box
- Sketching pencil & eraser
- Black ink pen
- Calliograph brush pens and Acrylograph paint pens
- Alphabet stamps and ink pad
- Decorative elements - I'm using washi tapes, stickers, and clips from the April 2023 monthly planning kit
Make sure to use code PLANNEDANDPLANTED10 to save 10% on your Archer and Olive order!
This plant care spread is a little easier to make when you have some clear visuals, so be sure to check out this video tutorial below to help understand some of these instructions better.
How to Make the Watering Tracker
1. Measure, sketch out, and cut the dutch doors and index tabs


Measuring and cutting out the little dutch door booklet within the page is definitely the most time-consuming part of creating this spread, but I promise it’s worth it! Take your time measuring and sketching - it will save you more time than having to go back and correct an issue or start over.
The dimensions for these pages will be different if you’re using a different sized journal, but for mine, I cut below 6 squares down, and across 10 squares from the left and 11 squares from the right. The index tabs are each about 3 squares vertically. I left 1 square row on the bottom. Whatever you are doing, make sure you have space for at least 31 rows so you have space for every date.
While you’re cutting, it’s really helpful to clip the cut pages as you go so you stay in one place. The decorative clips that come in each monthly planning kit (link) are perfect for this!
If you need some more guidance on this step, check out these other helpful blog posts about creating dutch doors and index tabs in your bullet journal.
2. Color in and label the index tabs on the dutch doors


I used 4 different shades of green Calliograph pens to color in the tabs, both front and back. Then I went in with a white Acrylograph paint pen to label the tabs by the first letter of each month.
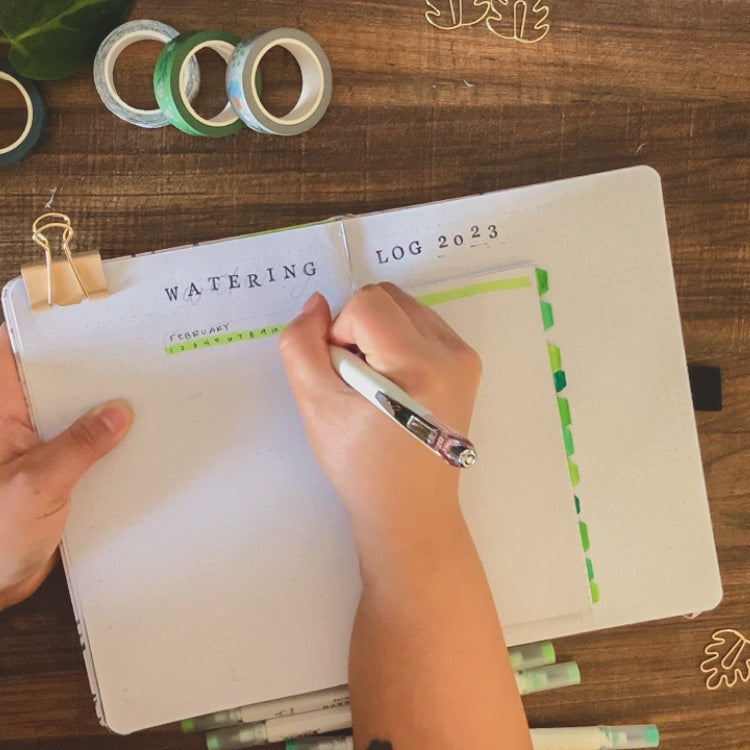
3. Add the title "Watering Log" at the top of the spread

I was originally going to letter this in calligraphy with the brush pens, but I decided at the last minute I wanted the look of the stamped letters instead. But lettering titles is one of the most fun aspects of making spreads (in my opinion), so get creative with this part!
4. Add the month onto each page of the dutch doors and add the dates
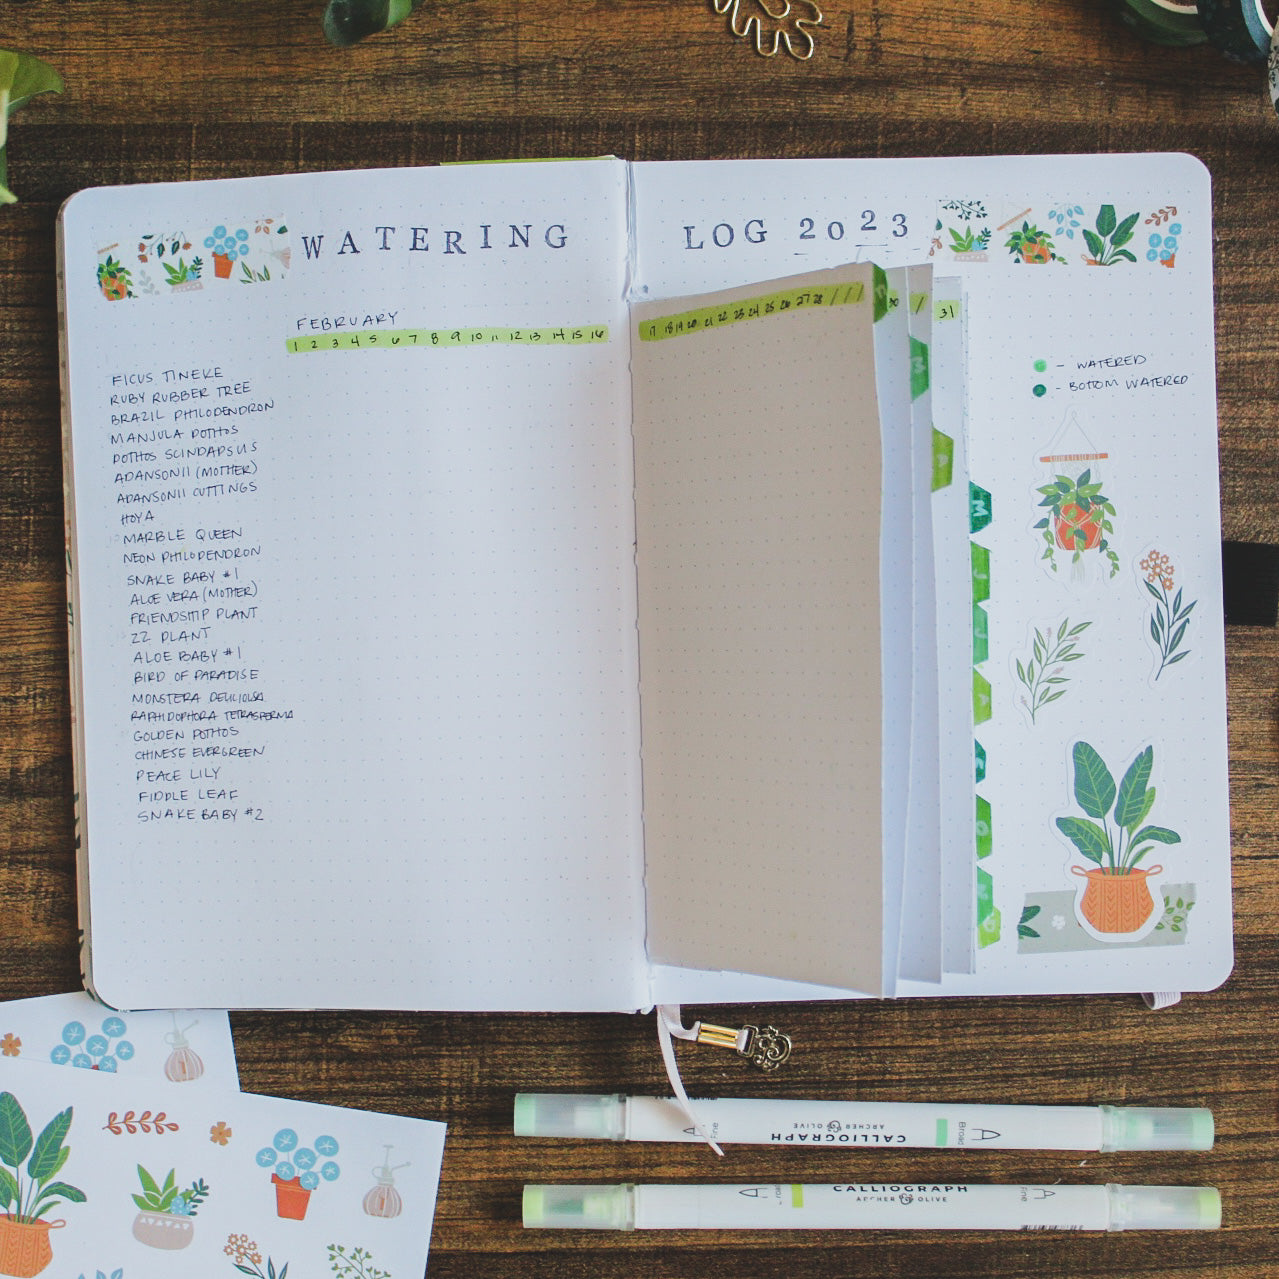
I wrote in the month in the top left corner of each booklet “page”, and then highlighted the row below with a green Calliograph marker. Then I went through and added the numbers for each day of the month. On shorter months, I just add a slash at the end to fill in the empty rows.
5. List the names of all your houseplants on the left side

Or at least all of the ones whose care you are wanting to track in your journal! For me it was basically all of my potted plants, but not my cuttings, since for those, I just add water when the jar is getting low (all of my cuttings go into clear jars with LECA).
I also left some blank space on the bottom to add any more plants I buy throughout the year, because we all know it’s going to happen. This plant journal is meant to last several years, so I don’t want to have to re-do things like this watering tracker more than once per year.
6. Erase the sketch marks and add in a key

Pretty self-explanatory! This is always so satisfying to me because as much as I need to sketch things out before I ink them in, the pencil lines can be distracting at times. Erasing the lines give you a realistic sense of what the spread will look like when it’s finished.
The key I add here is for "bottom watering" and "regular watering." I notice that when I bottom water my plants, they tend to stay hydrated for longer. So I know that if I bottom watered them last, I can wait a bit longer to water them again, but if they were only watered from the top, I'll have to do it again sooner.
7. Decorate with washi tapes, stickers, and/or plant doodles


And voila! Now you have a super cute dutch door plant care spread in your journal to track how often you water your plants. You could use a variation of this spread to track all kinds of other plant care related things as well! The printable below includes a variety of things you could track with a spread like this as well.

As always, thanks for reading. If you decide to re-create this spread, be sure to tag @plannedandplanted and @archerandolive.community on Instagram so we can see what you come up with! And let us know in the comments if there’s any other plant care spreads you would like to see in the future.
Happy planning and planting!
This blog post contains affiliate links.


0 comments