


Whether you’ve just started journaling, or been journaling a while, it’s always amazing to find new ways to keep organised. For me, this usually entails tweaking ‘olden but golden’ spreads to fit what I need that given month. But sometimes inspiration strikes and I create a new spread that completely changes up my journal for the better.
In this blog, I thought I would go over all (there’s a lot!) of the spreads that make my day to day life organised. I will go into detail about how I use and get the most out of the staple spreads we all use, and maybe there’s even something in there you haven’t tried out and looks like it will work for you!
Recommended Supplies:
- Archer and Olive Journal – The lovely and thick pages have no bleeding or ghosting, so you get a clean start for every spread! Also, it means you can decorate the spread without worrying about it.
- Pencil – To carefully plan out your ideas so you can make sure your spread has everything you need.
- Fineliners – My favourites are the Unipin fineliners as they’re waterproof, affordable and have a strong nib.
- Decorative Touch (optional) – This could be anything from washi to gouache, or of course, nothing! I usually like to add a personal touch to my spreads so they’re more fun to use and look at.
Collections
These are all spreads that I usually include at the start of my journal before planning each month, because I use them through the whole period of having the journal. When I’m starting a new journal, I always leave space for all the collections I know I’ll need. However, it is totally ok to set these up at any point, so if you’ve already started just put them in wherever. But next time you may want to save space in the beginning pages!
Future Log

Now this spread is a staple, and you probably use it already, right? But here’s exactly how I personally use it to keep organised on a daily basis:
- Put in anything that you would want to work around when making other plans. By this I mean appointments, birthdays, important dates, and any other day/time specific entries. That way you can use it when making new plans and easily see your current commitments.
- Have the ability to see everything that’s coming up in next few months/year. This is great for planning ahead and being organised for events.
Waiting On

This is another amazing spread for keeping organised, specifically being on top of whether parcels turn up! A lot of small parcels I buy sometimes take weeks to arrive, and sometimes it can take a while until you realise it never turned up. With this spread I can note down when it’s due so I know when to start contacting the seller if it’s not here!
School/University
Something I always find extremely useful is a few spreads dedicated to my semester at university.

The first spread shows me important information for all my modules, my weekly schedule, and a quick overview at the bottom. This really is a life saver. Instead of having to search online and through handbooks each time you need to check how much an assignment is weighted or for a phone number, it’s all in one spot!

The second spread I like to include is a deadline overview. In this spread I plot out the contact hours and assessments for each module, giving me a good overview of the semester. This could also be good for any work where you have deadlines!
Finances

This spread is a staple for me, and it really keeps me mindful of my finances. I won’t go into too much detail about it here, as I’ve written a big guide on just organising finances. If you want to read that, go find it here!
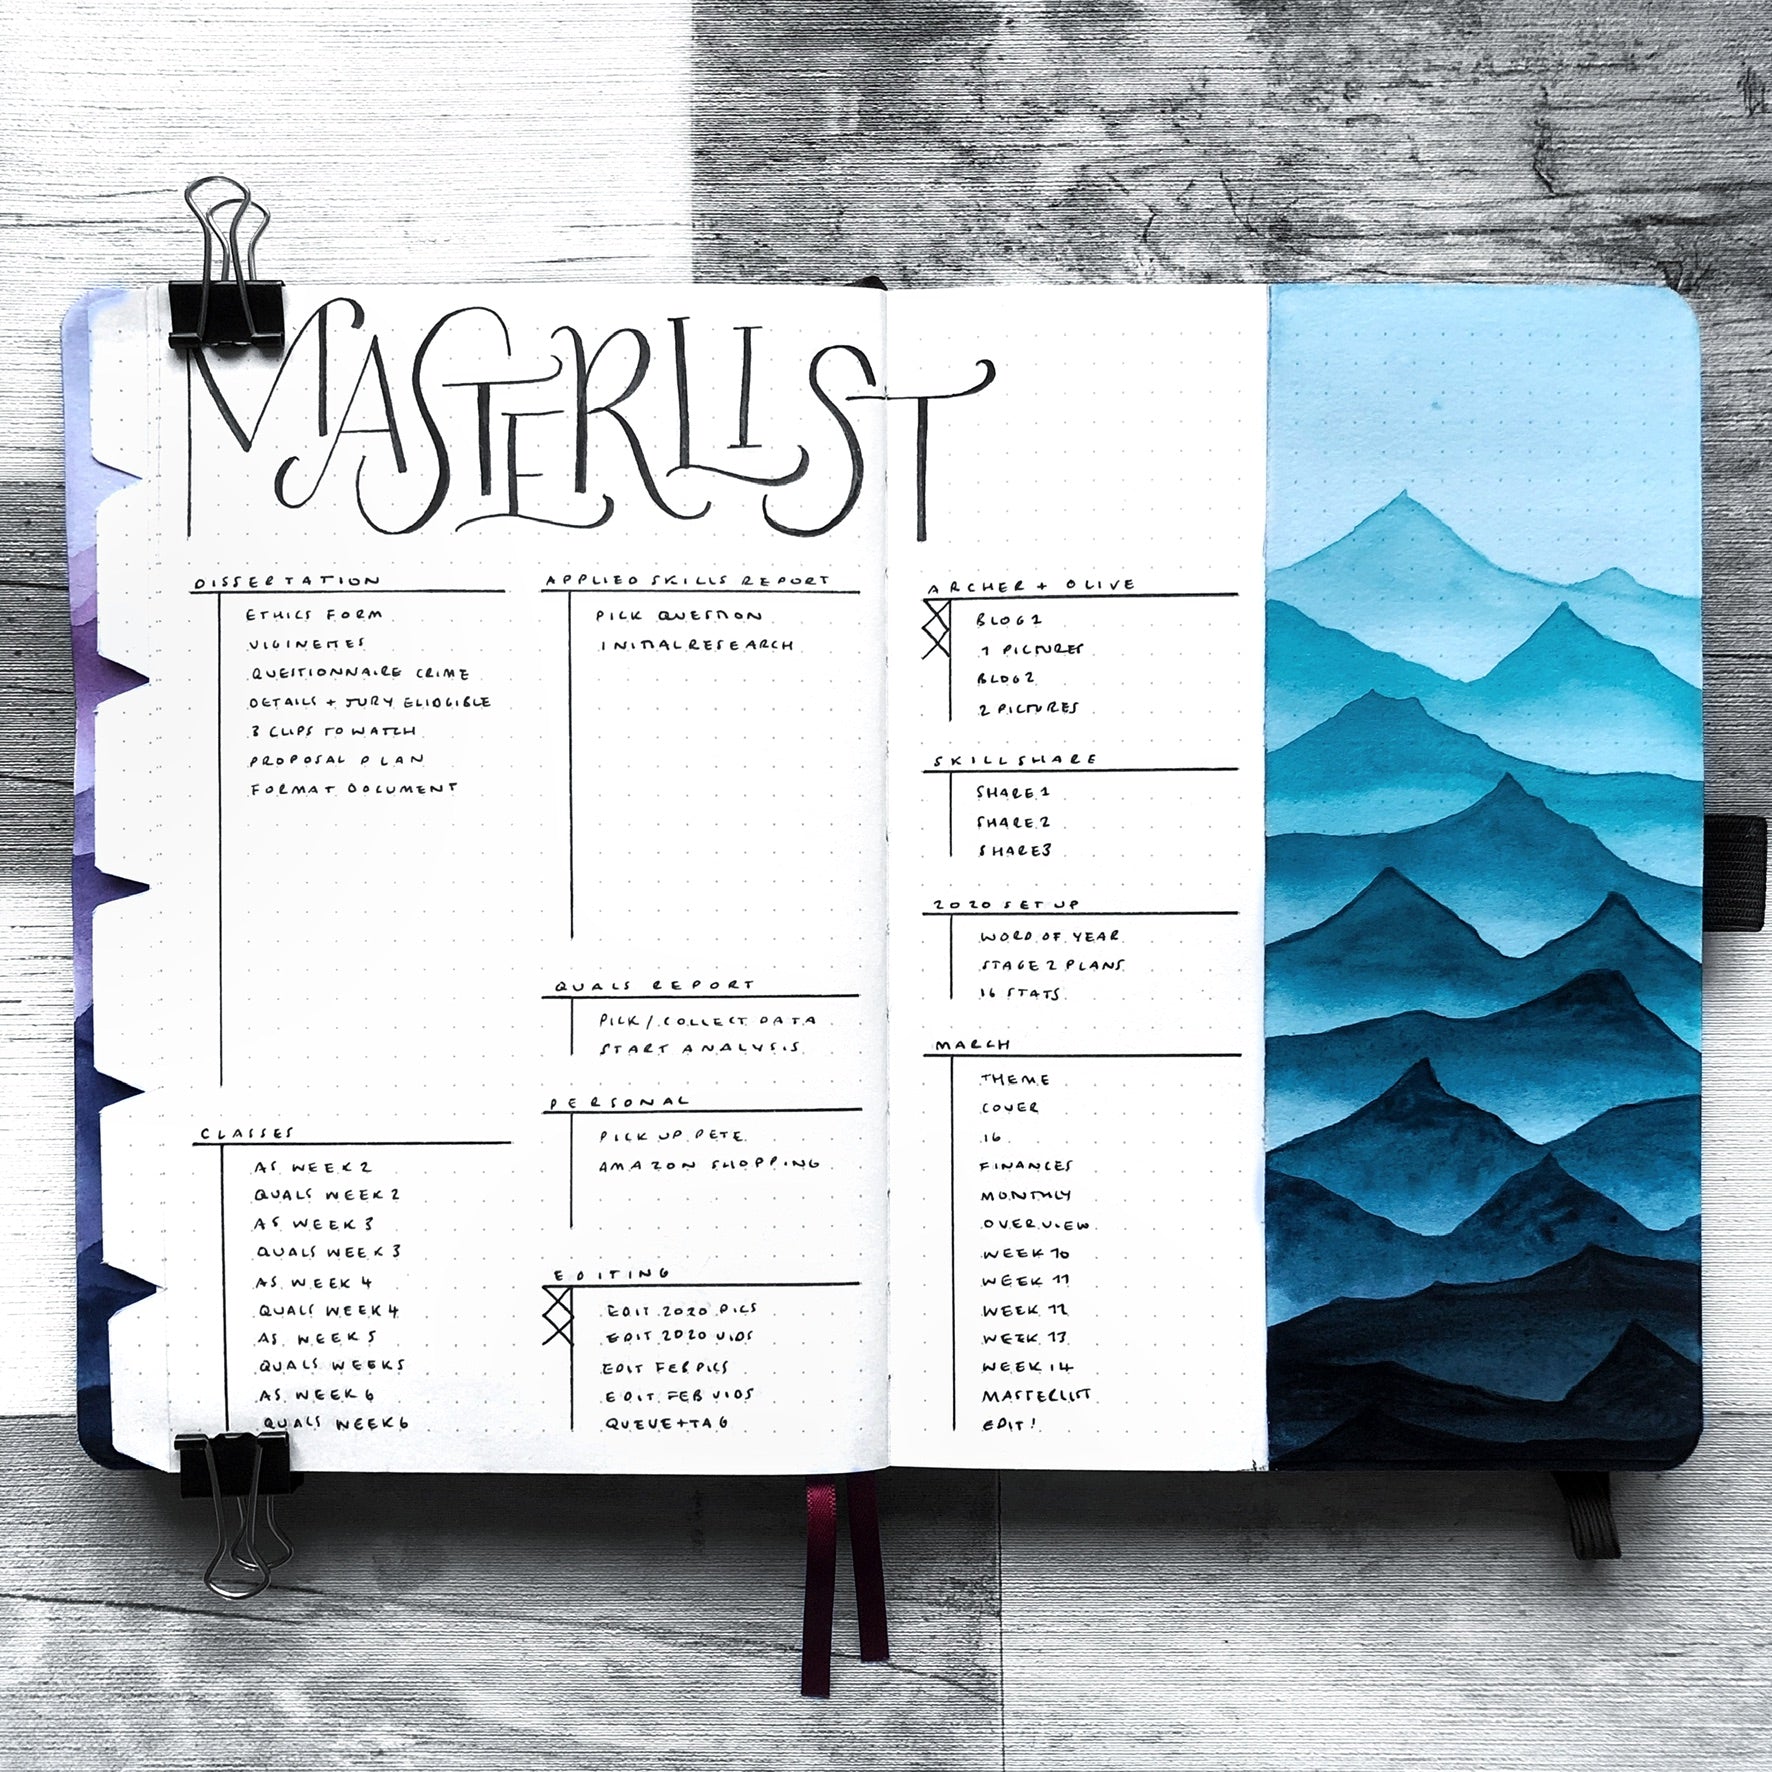
Masterlist

One of the best ways I keep organised is to have one place to list ALL my tasks for the month. I feel like sometimes I don’t want to jot things down in my journal that are reminders for later, as I don’t have that weekly set up yet, but it’s not a big enough event for my future log. This is the perfect place for all those things that just don’t fit into other spreads. Some people also call them ‘Brain Dumps’ for that reason.
Furthermore, just having all my tasks in once place makes me much more organised, as I can see everything I need to do, and start to migrate them to my weeklies in order of importance!
Overview

This is a layout I only recently included into my monthly set ups, and it’s a hybrid of a monthly log and future log. It differs from my future log, as I include more detail, and it allows me to see a snapshot of the upcoming months in my main monthly set up where I predominantly flick to more. I really recommend this to anyone who has a lot of other events/deadlines/work to plan around.
Monthlies

Another popular spread is the monthly. For me, this is a great place to put in all those time specific events for the month so you can see a good overview of all your commitments. For example, in mine I regularly include work hours, appointments, events, deadlines, and birthdays. This spread makes sure I don’t forget anything coming up in the month!
Weeklies

And finally, weeklies! Now these are definitely one of the most used spreads for EVERYONE, right? So how do I keep organised with mine? The main way I do this is by sitting down at the start of each week to migrate tasks, add in appointments/events, and plan out my days. This keeps me on track and means I’m never procrastinating because ‘I don’t know what to do’. If your schedule changes too much to plan the whole week, you can also just add tasks in the night before. But having a plan and checking I remember anything happening that day really keeps me organised and feeling less stressed.
Well, these are all my tips for keeping organised in with the help of my bullet journal! Hopefully I’ve given you some help and inspiration to get organised too! And if I have, I would love to see your creations, so tag me on Instagram (@hayleyremdeart) and use #hayleyremdeinspired to get the chance to get your creations featured in my stories!


0 comments