


Hello! Ericka from @Crafteinated here with an easy tutorial to aid your studies!
Utilizing the different colors from the gel pens and a simple printable, we will make a bookmark to assist you in your classes! I designed the printable so you can fill in whatever term you would like to use to reference. This DIY bookmark only takes a few minutes to complete and can be instrumental in your academic success!
Supplies used:

Any size Archer & Olive journal will work for this project! (I am using an A5 size!)
Scissors
Ribbon
Bakers Twine
Printable
Hole Punch
Optional:
Eyelet Tool
Eyelet
You can use code Crafteinated10 for 10% off most Archer & Olive products!
Getting Started
The first thing you will want to do is print out the printable found below. Also, if you want to watch the bookmark making, please check out the accompanying video!
I recommend printing the printable out on thicker cardstock. It does not need to be super heavyweight, but something that can withstand a bit of wear and tear since we are using it as a bookmark!
You will then want to gather your supplies.
Starting the Bookmark

I decided to label my bookmark first. I used several different categories for my bookmark. Leveraging the different colors of the gel pens, I decided to make quick work of having an easy way to distinguish which type was which. You could also use symbols or underline your notes while reviewing with the colored pens.
The categories I used were:
- Important!
- Example
- Definition
- Dates/Deadlines
- On Test
- Questions
- Side Comments
- Review
- Misc.

Once you have outlined your categories, you can cut out your bookmark. I just used scissors as it was a relatively simple shape; if you want to use a paper trimmer, that will also work.

I used my eyelet tool to punch a hole at the top of the bookmark and place an eyelet. If you do not have this tool, you can forego the eyelet or use something like a brad to hold your ribbons in place. I like the eyelet as it protects the punched hole and the overall integrity of the bookmark.
I have seen this method done by Lyric Lover Crafts, and I adapted her initial idea into a study key bookmark!

Next, you will feed the ribbon through the hole. I used three different pieces. I like to give myself some slack when I do this so that I am sure I have the length of ribbon I want in my final product.

Once the ribbon is in place, you must secure it with the baker's twine. I typically tie the string in a double knot and then use the tails to make a bow. I then trim all the access twine and ribbon. I usually cut the ribbon in a slant inward on either side of the midline of the bookmark.
Using Your Bookmark
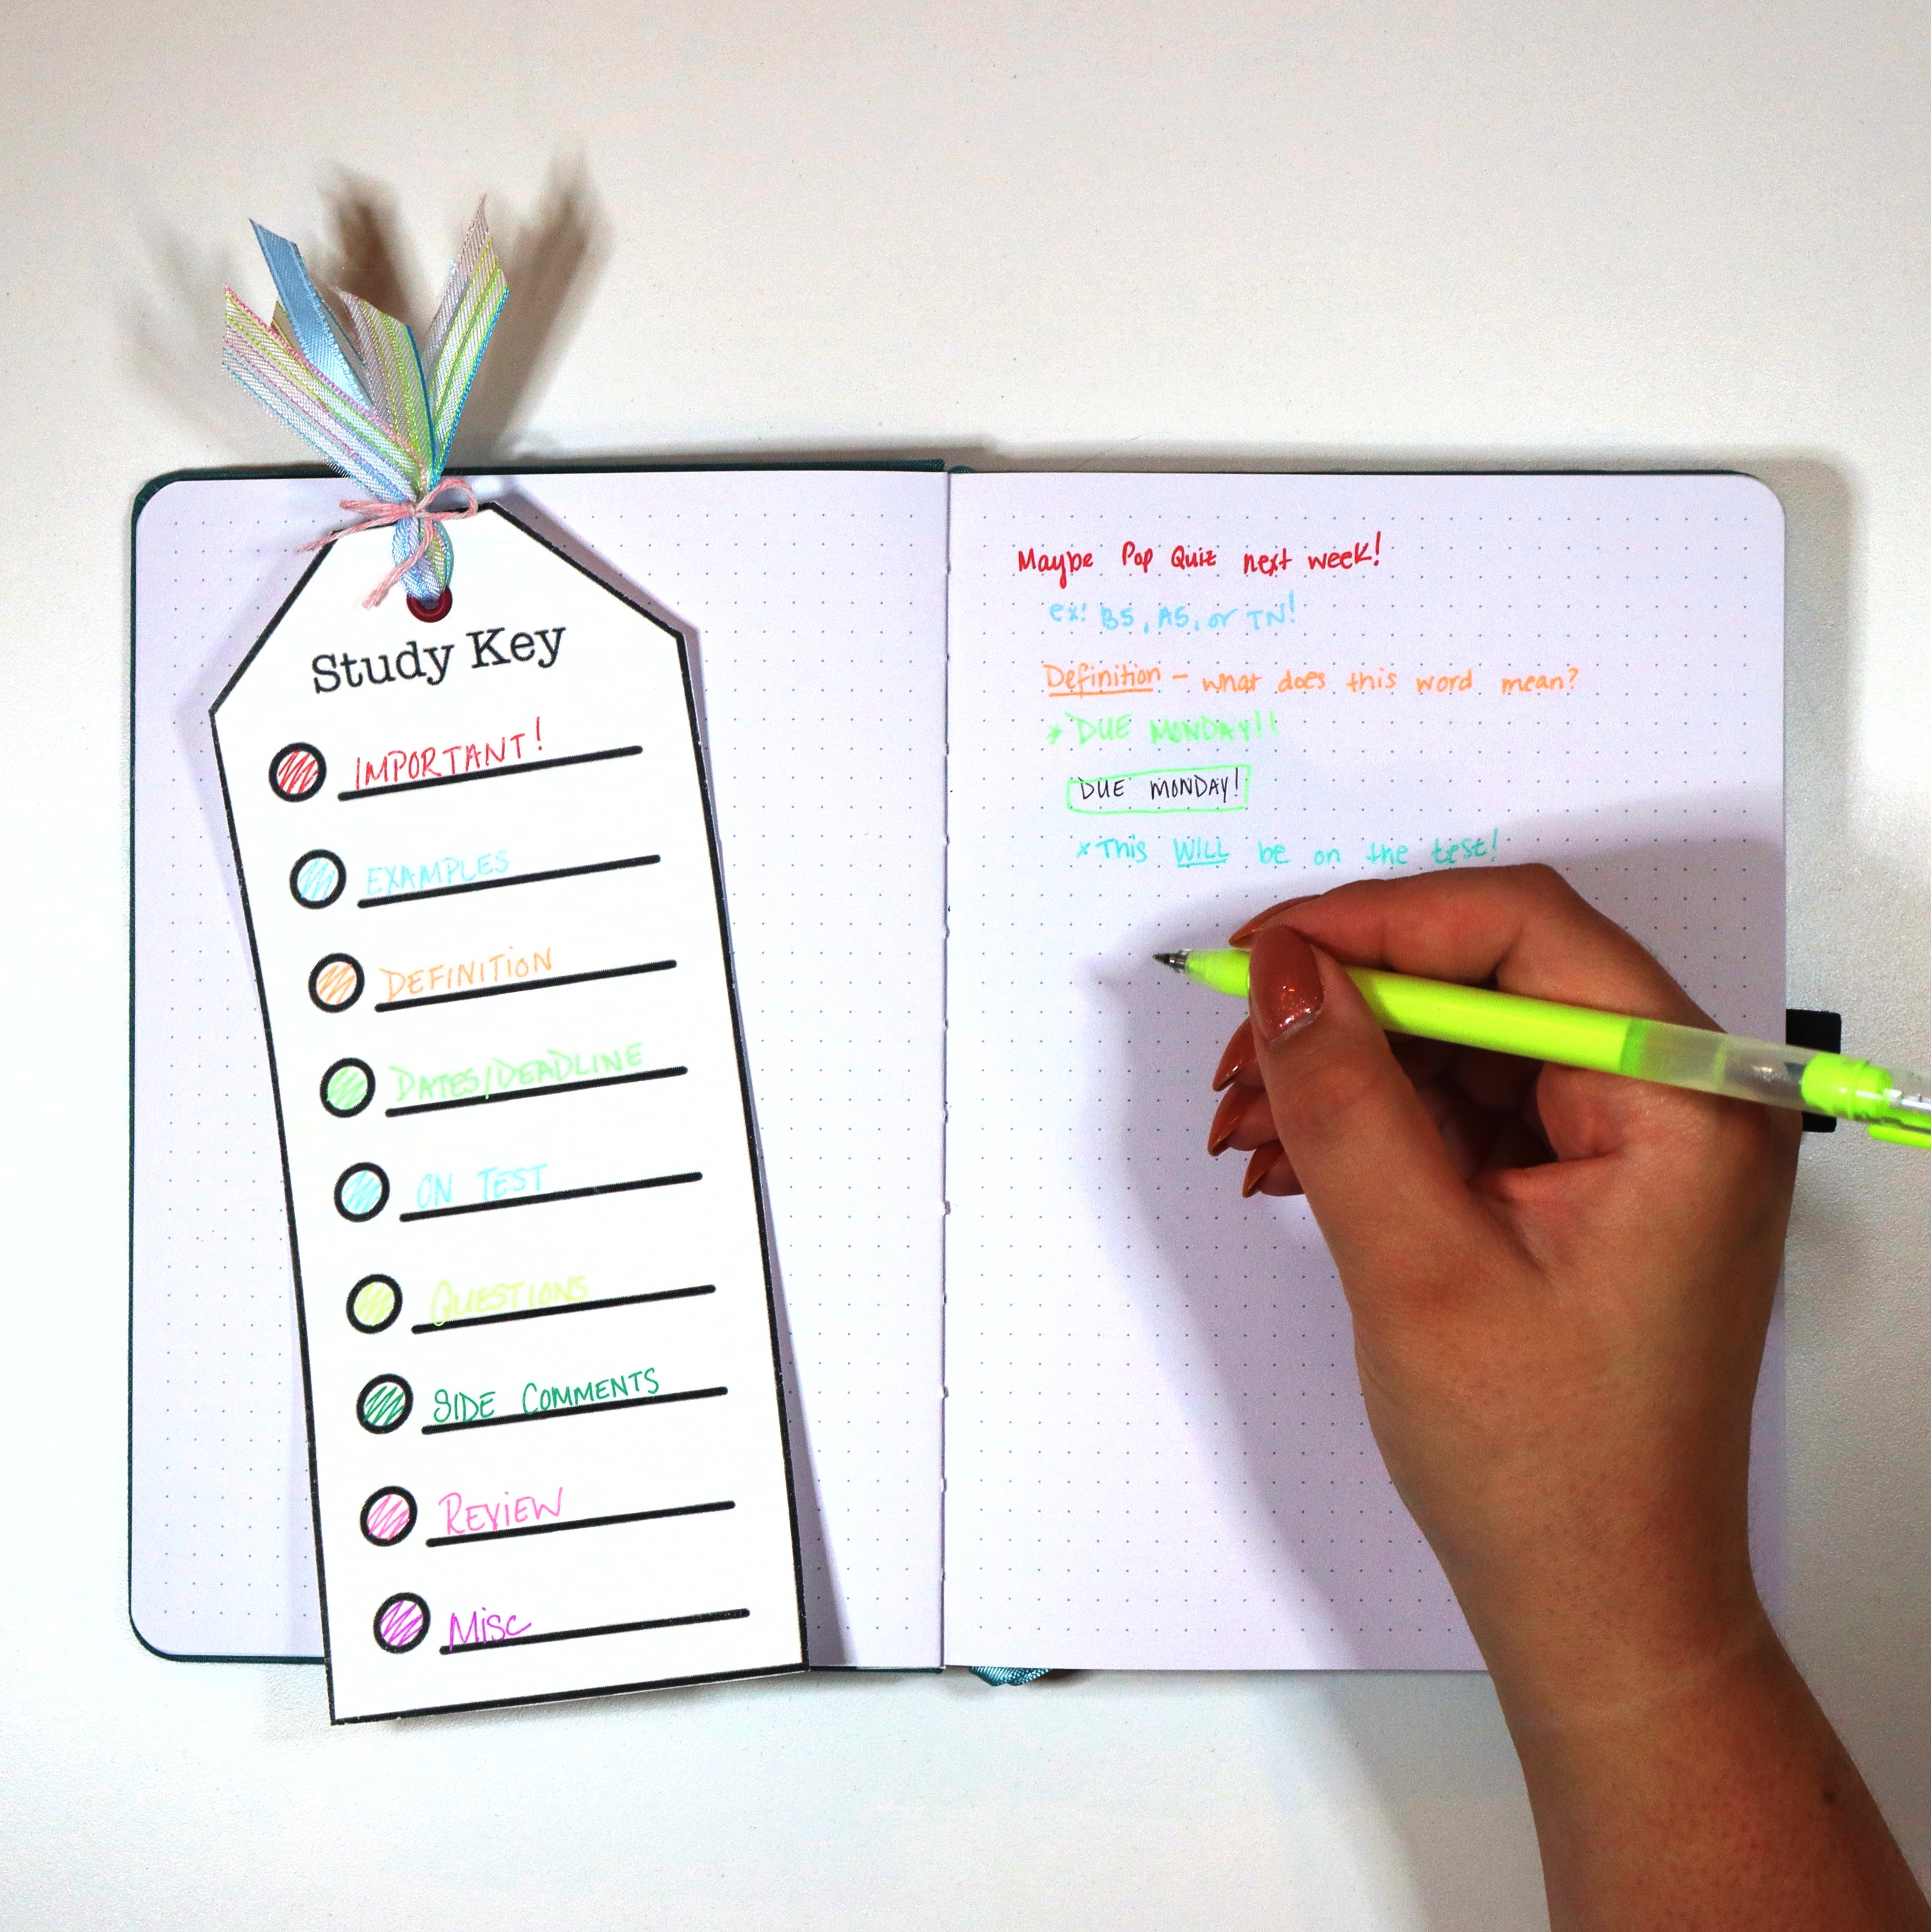
You have completed your bookmark! You can start using it in your journal! Since the back of the bookmark is blank, you could use it for dates, exams, due dates, formulas, or key concepts from your class!

While taking notes, you can bring your bookmark out to stay consistent and organized in your note-taking!
Finished product

The best part about these bookmarks is that the ribbon sticks out at the top of the page, making finding your place very simple. I used bright color ribbons to match the fun, cheerful vibe from the gel pens!
Printable
The printable that you can download is available below. You can use this printable as a template, or you can just cut it out! Each time you print, you can make two bookmarks!
Download and print the template here:

Video
Please check out the video below if you want to see me create the bookmarks and talk through my process:
I hope you enjoyed this tutorial! If you recreate this tutorial or use the printable, please share your creation using the #archerandolivecommunity hashtag! I'd love to see yours! Happy Studying!


0 comments