


Illuminated letters are most often seen in classic text with a very decorated or embellished first letter on the page. Since books were handmade, scribes called Illuminators used colored inks and gold and silver leaf to decorate the pages. It’s a beautiful art form. I was recently introduced to the art of Illuminated letters after reading a blog post from Lindsey Bugbee, aka ThePostMansKnock. After trying out her approach, using metallic watercolors, I was really excited to try to make one of these using the new Metallic Acrylograph Pens. So for today’s blog, I am going to take you step by step through creating your own illuminated letter.
Materials For Creating Illuminated Letters:
- Pencil
- Fineliner
- Archer & Olive Metallic Acyrlograph Pens
- Lightbox or bright window.
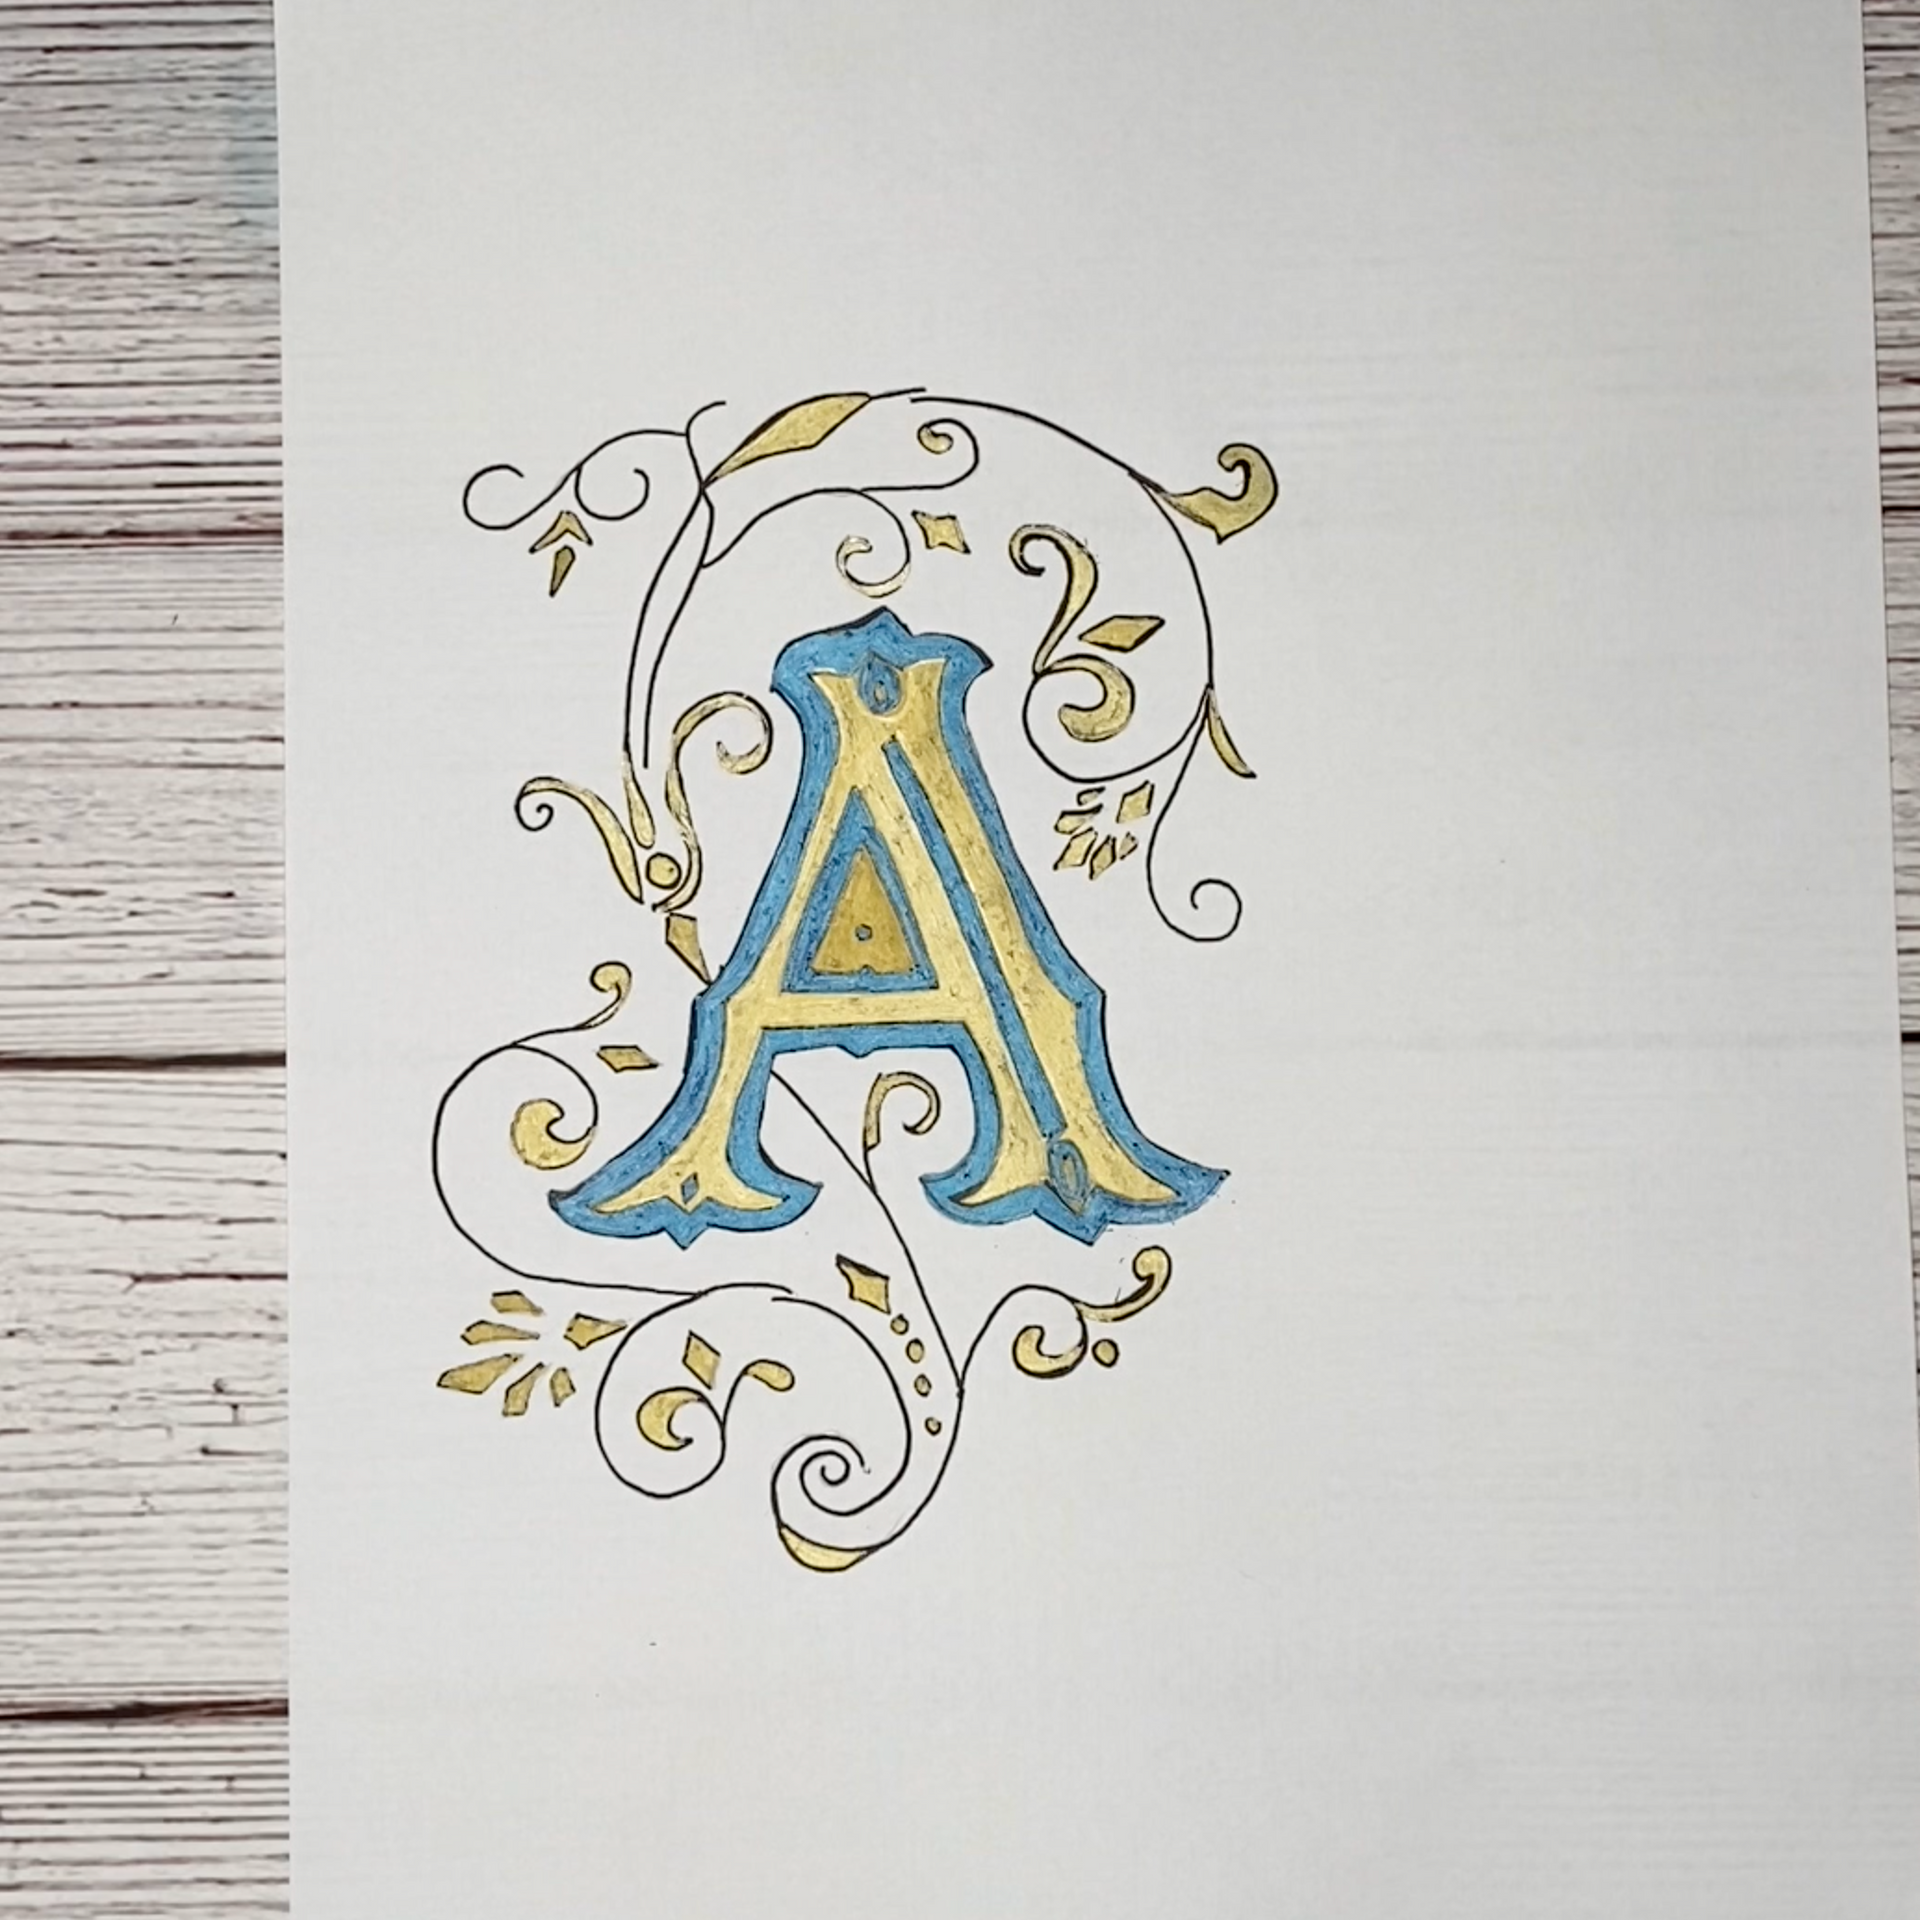
When creating your Illuminated Letter, you will want to choose 2 colors to use. Primary color and a secondary color. I am going to use Gold as my Primary and Lapris as my secondary.
Step 1 - Trace or design your letter

The first step is to get your letter on your piece of paper. The two main methods to do this are to freehand the letter yourself or use a lightbox to trace over a letter example. If you don’t have a lightbox, you can also do this using a bright window. I am going to use a lightbox.
Using your pencil, lightly trace over the letter and the flourishes from the example you are tracing.
Step 2 - Trace with your Primary Color

I like to start with my primary color and outline the spaces that I am going to use it in. In this case, I am going to outline the large inner part of the “A”.
Step 3 - Fill in the details

Still using your main color, fill in the small details around your letter in the flourishes. The small details and ornaments are a great way to add that extra flair and excitement around your illuminated letter.
Step 4 - Color if with your secondary color

Once you have your details and main color, it’s time to follow up with your secondary color. Because you have already outlined your main color, you shouldn’t have any problems knowing where you need to fill in your color. Fill in the space completely and go over any missed spots you see.
Step 5 - Outline with your fineliner

I love this step. I think it really helps bring your Illuminated letter to life. It accentuates the colors on the page without overdoing it. With your fineliner, go over your solid lines first. As you go around the page, outline your decorative shapes. The final step will be to outline your letter working your way into the center.

Now you have a really cool Illuminated Letter to frame or bring into your journal.
See how I did it in this video:
Give it a go yourself, and I've made this printable for you to help! Download it here!

Happy creating!!


0 comments