


Hi everyone, it’s Delphine (@delphinesjournal) from the Archer And Olive (@archerandolive) ambassador team. Today, I wanted to show you how to create a spread I’ve consistently been including in my monthly set up: a monthly overview. It’s a versatile spread that can easily be adapted to your theme, and as always with bullet journaling, it’s customizable to fit your needs.

Supplies
-
Fineliner
-
Decorative supplies, like washi tape, stamps or stickers.
Habits
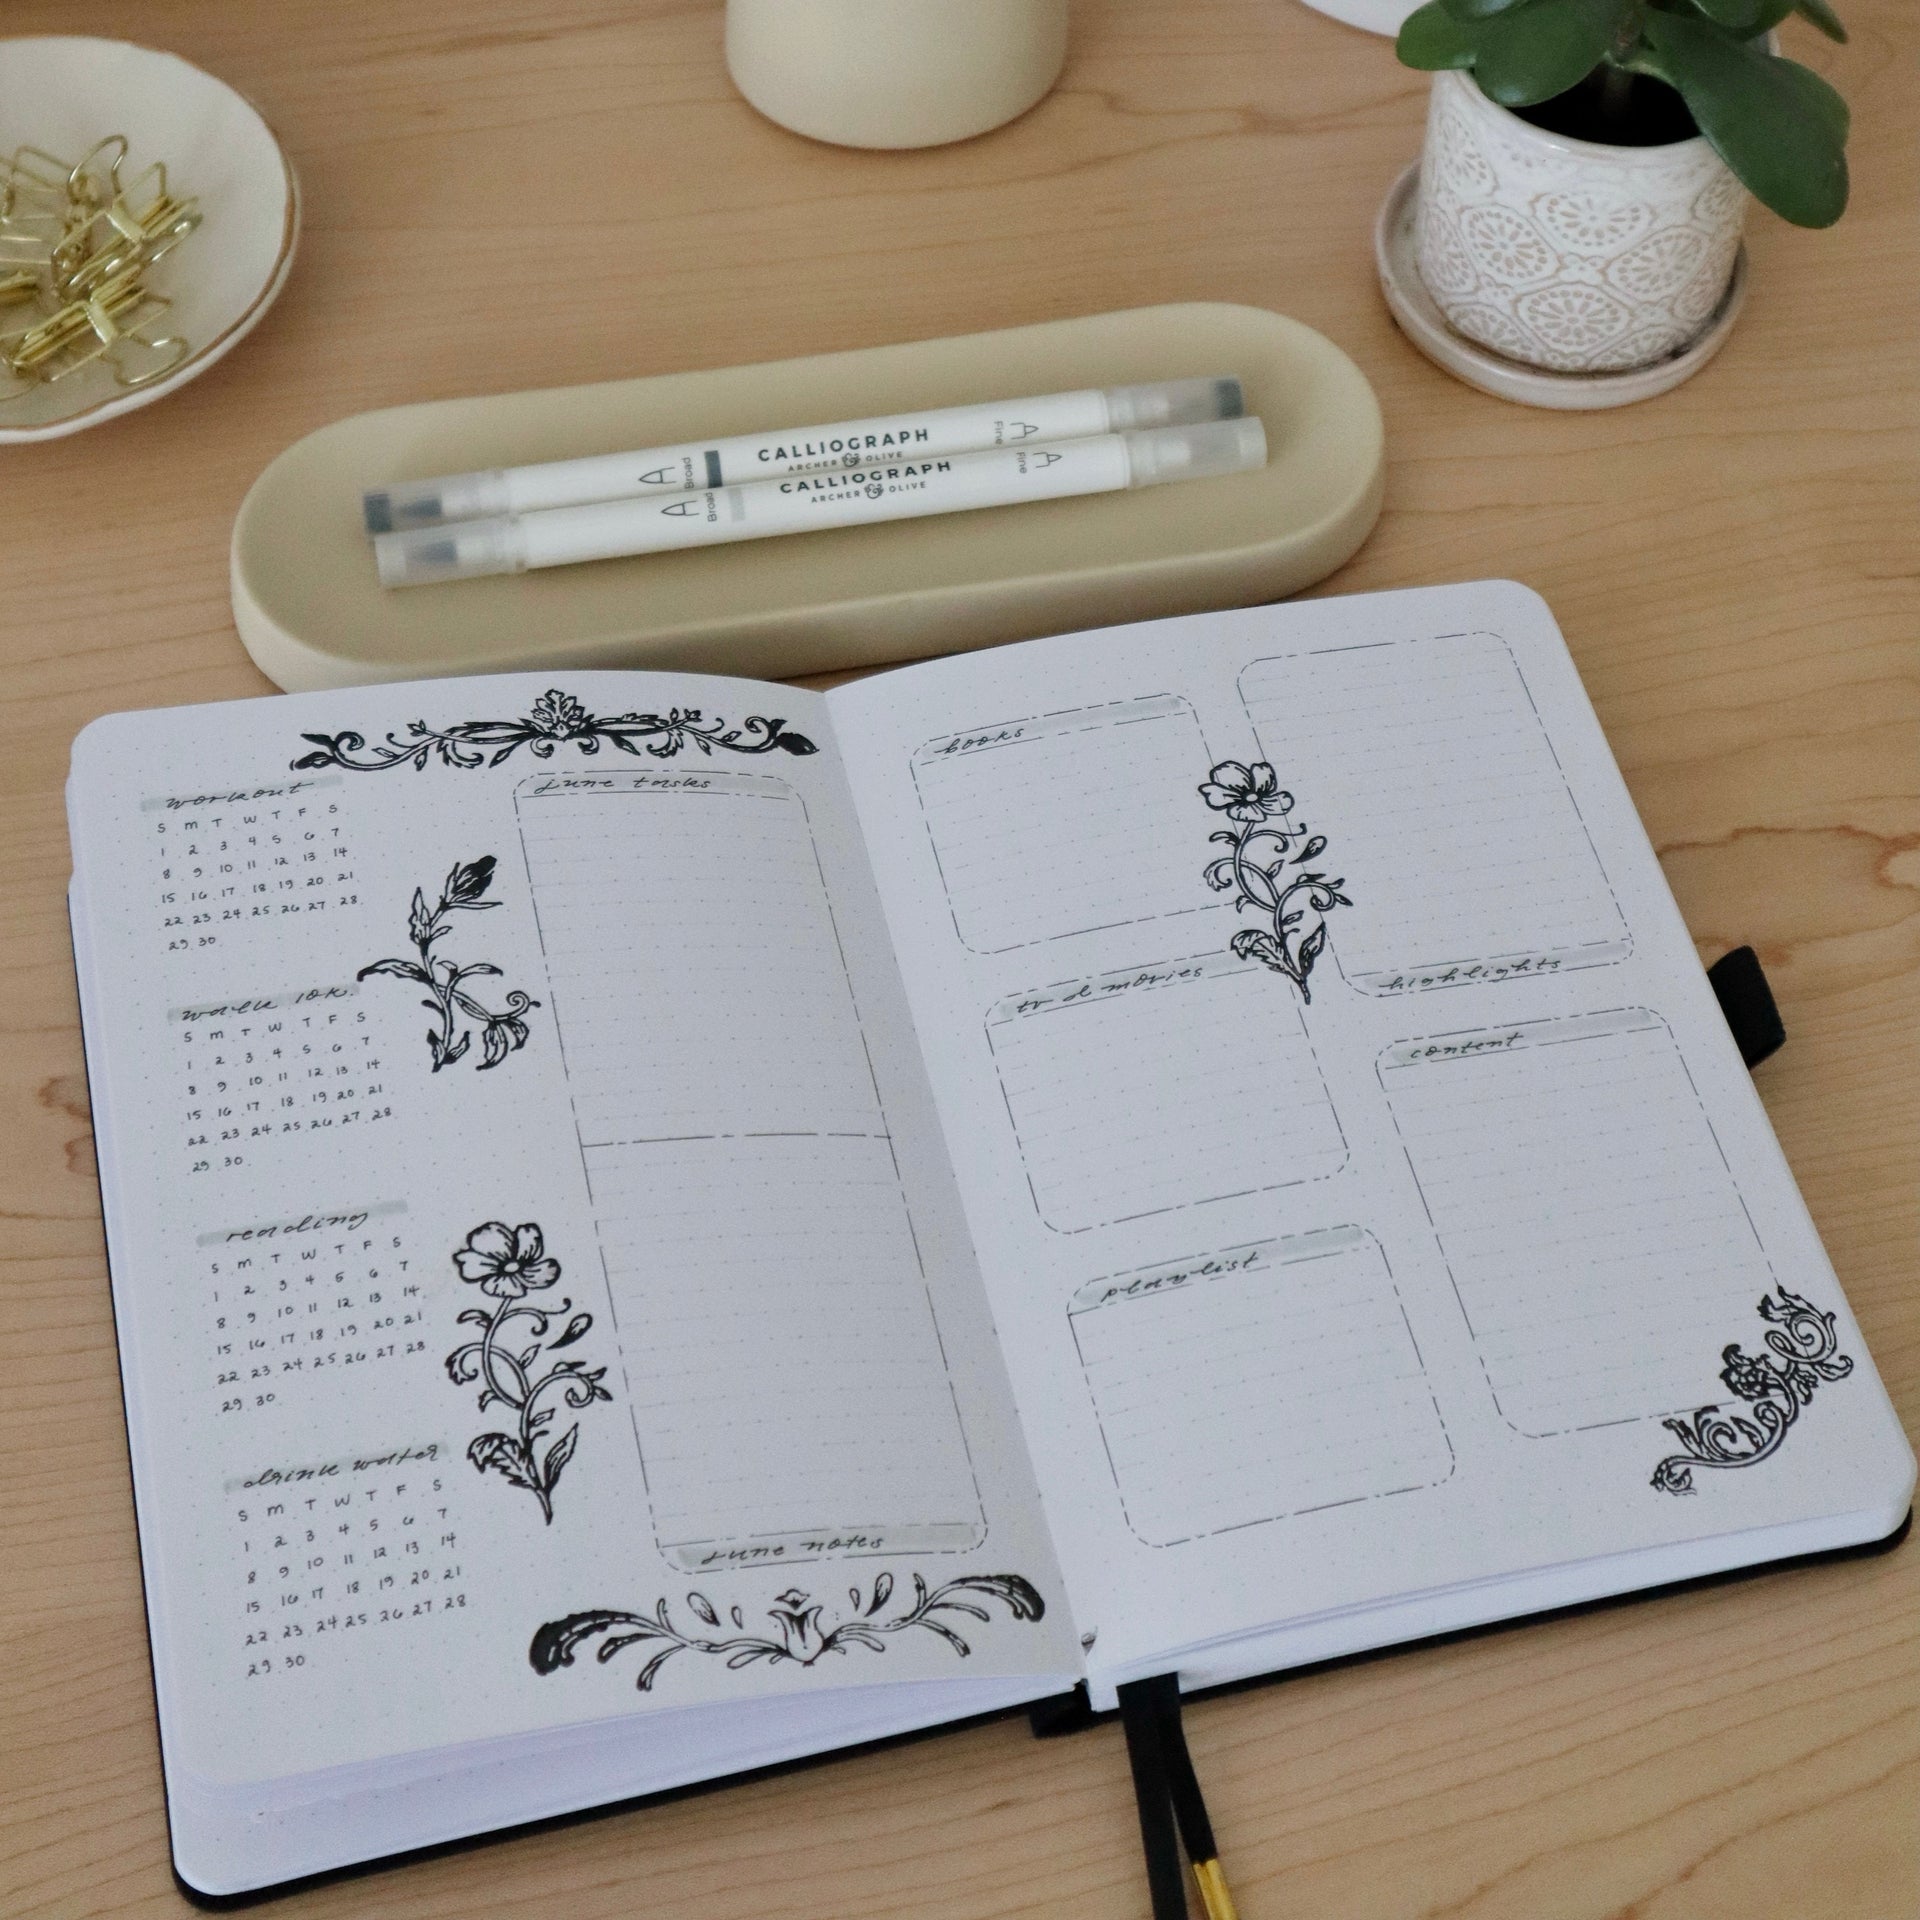
The first thing you should ask yourself when creating an overview is if you want to include your habit tracker in your spread, and if so, how many you’d like to track. I personally gravitate towards four habits because I lack accountability if I track more, and it also fits really nicely in this spread. Choose and prioritize the habits you’d like to track for this month. Would you like to track your workouts or yoga sessions, watering your plants, walking a certain number of kilometers or steps, reading, sleeping more than 8 hours, drinking a fixed amount of water, your skincare routine or social media posts?

As for the calendars, you can either draw them (which I tend to do if my theme revolves around doodles), use stickers or glue paper on your page. When I create a collage theme, I’ll usually make a batch of mini calendars using a black or a light grey fineliner, and I’ll use them throughout the month. This time however, I decided to create a full page of broken-lined grid as a printable - you can download it below if you wish to save a bit of time!

Get your free mini calendar grid sheet printable here:

Things to track
Aside from habits, you can use your overview to keep track of other areas of your life. I personally enjoy having dedicated space for monthly tasks and random notes, but also the highlights of my month, the books I’m reading, the movies or TV I’m watching, the music I’m listening to and content ideas for the future. You could also leave space for monthly goals, reflections or things you’d like to focus on - shoutout to @len.journals for those ideas!
Simply keep in mind that the more categories you’ll include, the smaller the space will be for your writing and annotations throughout the month.

Adapt your overview to your theme
If you have a minimalist approach to journaling, you could totally leave the spread as is !
On the other hand, if you enjoy creating a theme, you could switch the layout of your overview to fit your monthly theme, no matter if you’re painting, doodling, creating collages or using stamps. As you can see in the pictures below, there are many ways you can include this spread and mold it to your theme.


If you want to see more examples of the monthly overviews I’ve included in my bullet journal over the years, or if you’re more of a visual person, take a look at the YouTube video below, where I show you how I created this spread!
If you end up recreating this spread, please tag @archerandolive, @archerandolive.community, #AOShare and #archerandolive! You can also read this blog for more monthly set up ideas!


0 comments