

Hello! Valerie Sjodin here, and today I’m going to show you how to draw a Celtic knot on dotted paper. It's much easier than you might think once you know the keys. Included in this post is a how-to video demo of the process and a PDF showing the step-by-step process. There is also a bonus at the end of the video showing how to draw a single twist border. I hope you enjoy it. I find drawing Celtic knots are quite therapeutic, and a little addicting...
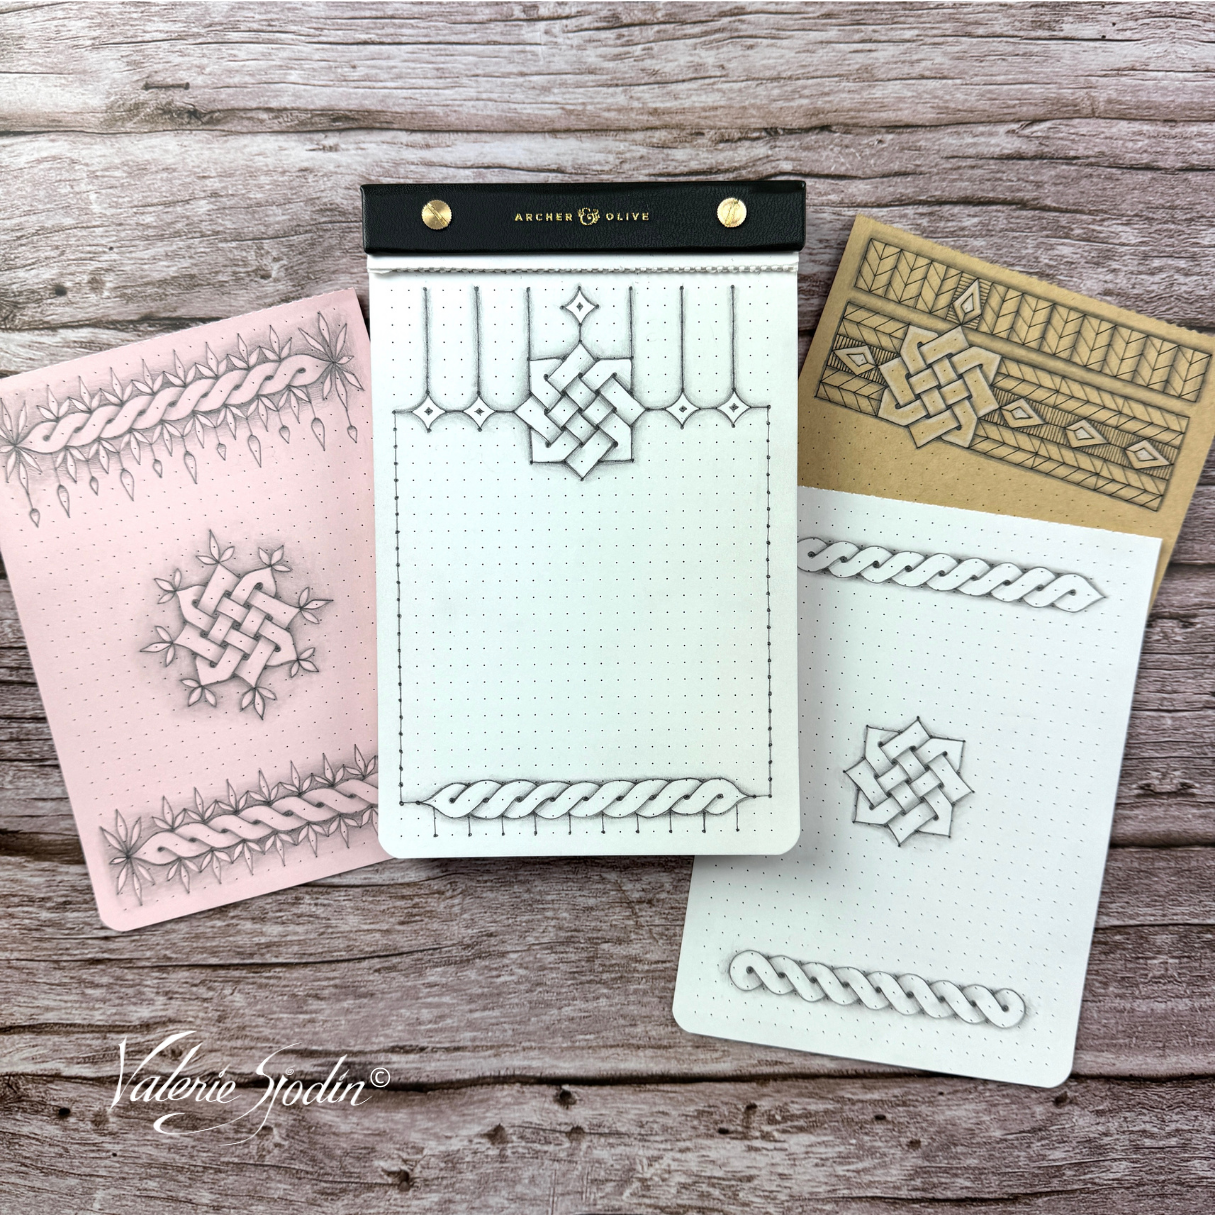
Here I am using a B6 size notepad from Archer & Olive. The paper if fantastic! Use this link and Code VALERIE10 to receive 10% OFF your order.
Celtic knots look difficult to draw but they aren't once you learn the step-by-step process. The other thing that makes it easier is the amazing dotted paper in Archer & Olive's notebooks and notepads. For this demo, I am using a B6 notepad. It's the same paper that's in the dotted notebooks, and it is wonderful for drawing knots that are drawn with a circle grid pattern.
Here is the knot demonstrated in the video and the steps are in the PDF. I suggest watching the video first, following on with the PDF.

Supplies:
- dotted paper
- pencil (I use both mechanical and regular HB pencils)
- eraser
- ruler (optional)
Steps to draw the Celtic knot
- Decide where you want your knot to be on the page
- Mark where you want the center of the knot to be and draw a small circle around the center mark.
- Skip the dots next to the center circle and on the following dots lightly draw small circles around the dots forming a square of dots, three rows of three
- In between those dots on the center dots, lightly draw circles around those dots. See diagram below.


2 comments
Fun drawing ‘along with you’ again!