

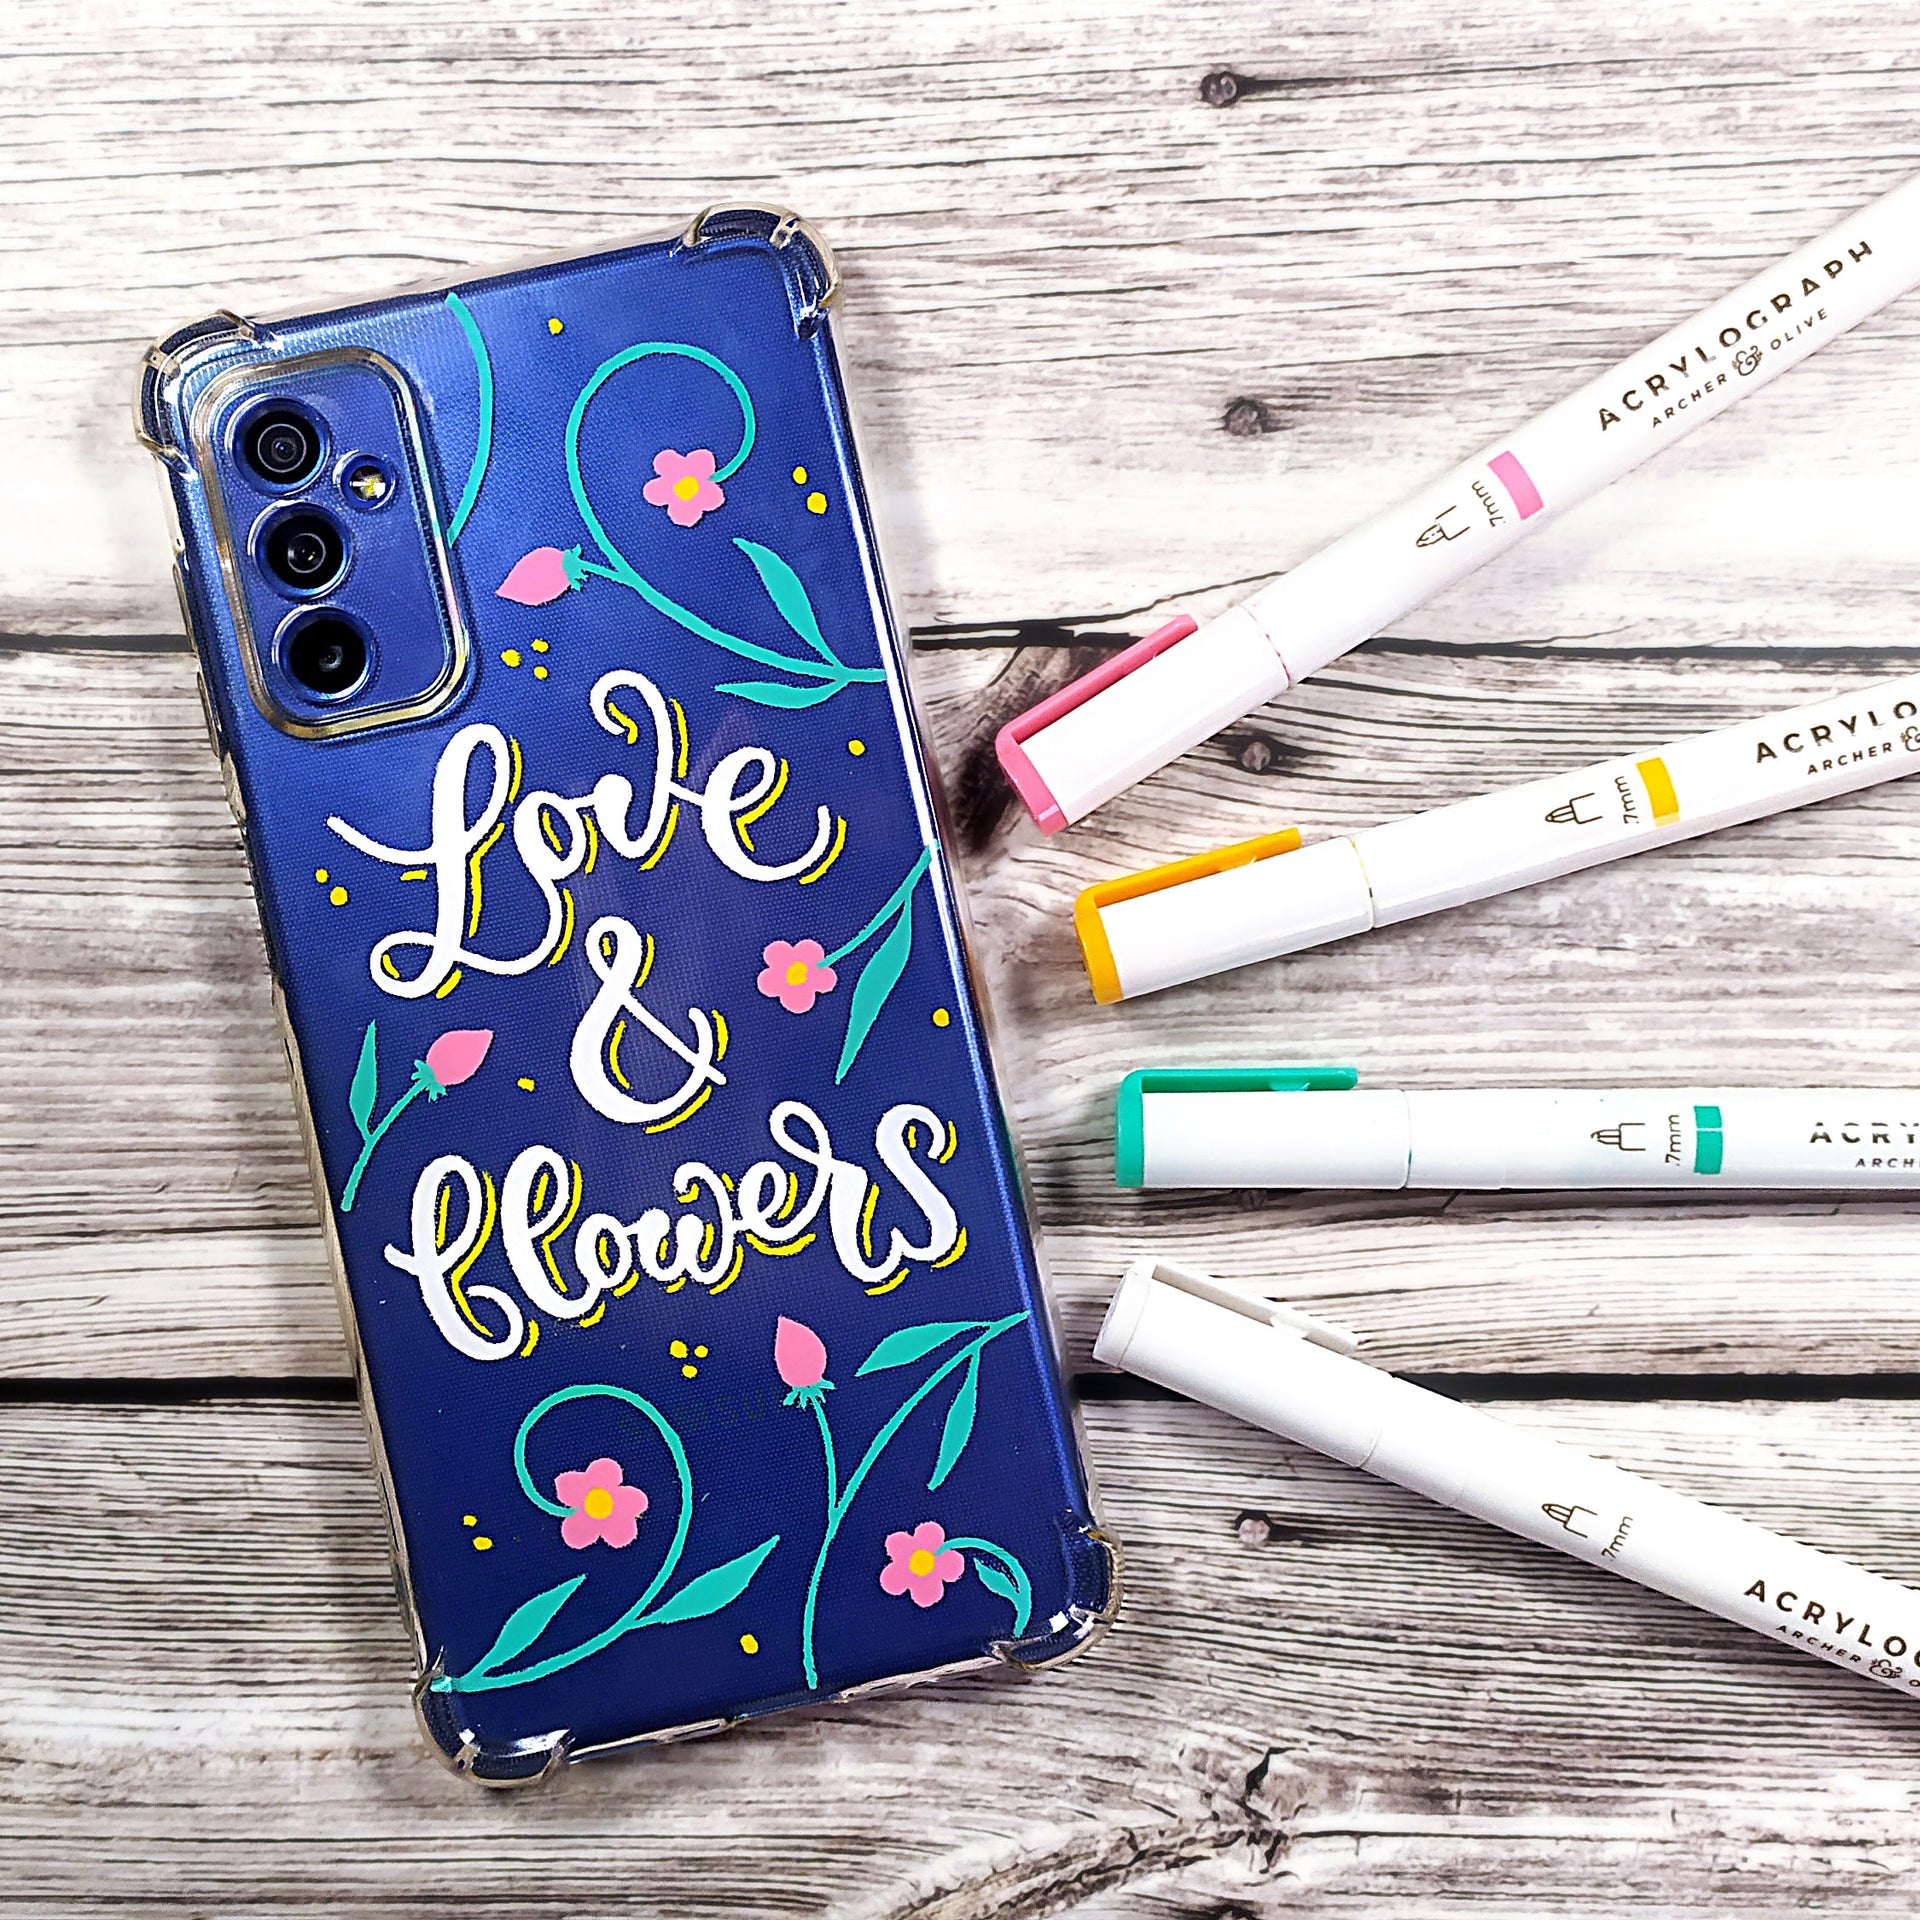

Hi, Neus @miss.meissa here, and today I’m going to be showing you how to decorate a clear phone case using acrylograph paint pens. If you are looking for creative ways to decorate your phone case or you have a clear case and want to turn it into an original and aesthetic phone case, read on for an easy way to make your very own custom phone case.
Supplies For Decorating A Phone Case
- Archer & Olive acrylograph paint pens. I’m going to use some colors on the Tropical collection (0.7 mm).
- Archer & Olive notepad or any sketch paper.
- Clear phone case (of course!)
- Pencil, eraser, scissors and ruler.
(Please feel free to use my affiliate code MISSMEISSA for a 10% off at archerandolive.com).

Sketching
The first thing I’m going to do is measure my phone case to make the sketch on paper.
There are different ways to do this. I'm going to place the case on the paper along with the dots. And with the help of these dots I will mark the size of the inside of the case.
Then I just have to connect the marks I made and use the ruler to join them together to create the shape of the phone case.
You can also trace the case on the outside, but since the inside is a bit smaller I prefer to do it this way.

Don't forget to draw the camera space of your cell phone because you don't want important parts of the drawing in that camera space. I'm actually going to leave that space empty.
Once you have the shape of your phone delimited, you can make the drawing that you want to paint on your case. If you don't know what to paint, you can also use one of my sketches at the end of this blog and adapt it to the size of your phone. In my example, I’m painting a lettering and some flowers.
If you want to draw something different, there's plenty of doodle inspiration on Archer& Olive's blog. These are two of my favorites:
How To Create Cute Sushi Doodles In Your Bullet Journal by Masha Plans and Welcoming Autumn (or Spring) in Your Bullet Journal by Sarah Eliz.
I am using a clear case because I want to paint on the inside. This way the paint will be protected and will last much longer than if I paint it on the outside.
But since the drawing has lettering on it, if I use it as is, the letters will be backwards when I put the case on, because I will be seeing them from the other side. So what I have to do is to paint it backwards. And the easiest way to do that is to turn the sketch backwards before transferring it to the case. Unless you are great at writing backwards 😜
If, like me, you are not so good at that, all you have to do is trace your drawing on the other side of the paper. To make it easier, use a light box or a window with good lighting.

Once you have done this, I recommend cutting out your sketch and attaching it to the phone case (on the outside) using washi tape. Be careful to put it in the right place and check that everything is correct before starting to paint.

Painting the lettering
The first thing I'm going to paint is the lettering because it will be the central part of the design.
In this example I have made a faux calligraphy on my sketch, which I am going to follow and fill using a white acrylograph. It's a bit strange to do a lettering in reverse and that is why I recommend you to sketch before, although if you are going to do only flowers or drawings you can also do it directly.
This is the fun part, so don't try to rush, just take your time and relax painting. The shape of the case may bother you a bit when painting, so turn it and move it around as much as you need to paint as comfortably as possible.

Don’t worry if you do not cover the drawing perfectly or if the lines are a little thin or uneven, because we will paint a second layer in which we will correct all the details. If the paint doesn't come out right you just have to shake the acrylograph. It's also good to have a piece of paper nearby to unload the paint a little or squeeze the tip if you need it.
If at some point you make a mistake or get out of the drawing you can wipe it off with a q-tip or a little bit of damp paper towel. If it's just a tiny bit, you can also let it dry for a few seconds and remove it carefully with your fingernail. Just be really careful.
Painting the flowers
Before starting to paint the flowers, which will have different colors, you have to be aware that we are going to paint backwards too.
And by this, what I mean is that once you paint something, whatever you paint over it will not be seen. So if you're going to paint in different layers, you have to do it the other way around from the way you would normally do it. Painting at the beginning the detail you would paint at the end and so on.

Or you can paint in a single layer leaving empty spaces that you will fill later with another color. I have done it this way, painting the stems first and leaving the central space of the flowers to fill in at the end.
Although after done, I may recommend you to start by painting the center of the flowers, then the petals and finally the stems and leaves because I think it’s easier 😉

Once you have finished tracing all your drawing with the acrylograph pens, you can remove the sketch.
I recommend that you do this before going on because this way you will be able to see better how everything is looking from the right side and if there is anything to improve or modify.

So, check it and apply a second layer where needed to improve strokes, correct lines or make them thicker until you like the result.
Adding detail
Once the drawing is finished, you can leave it this way or paint some details to add some color. In my case, I like to add lines under the lettering as a shadow.
This is a bit tricky to do backwards, so I recommend you to add them to your sketch and trace them to make it easier and better.

I am also going to add some yellow dots in the empty spaces to fill in and to have more yellow on the final composition.
And that’s all folks! 😊

I hope you liked this phone case decoration idea. If you want, you can see the process in this video:
And you can also use my sketches to decorate yours.
Click to download now:

Thank you for following this article, I hope you liked it. If you post yours on your socials, you can tag me @miss.meissa, @archerandolive and @archerandolive.community so we can see them. And don’t forget to add #AOShare and #archerandolive 😊
And you may also like this two amazing articles on craft ideas to use your acrylograph pens:
Aesthetic Decoration Tutorial With Wood Slices by Kate from @stick.with.kate
and 10+ Ways You Can Use Acrylic Paint Pens.


0 comments