


One of the superpowers we humans have been given is to convert moments to memories. The moments are then gone and memories remain with us. I am personally very conscious about preserving these precious memories. Scrapbooking is one of my favourite ways to not only preserve the memories but also recall them deeply whilst scrapbooking them. I like to spruce these creations up with pictures, a favourite quote, reaction of my cat, and names/pictures of other places or people it reminds me of. Let me now share a layout with you along with some other inspirations and colour themes to get you started with your scrapbooking journey in your journals. Trust me, it's super fun!
Hello again friends, I am Naina, also known as @twitcherwrites on social media. You can also find me and my work at www.twitcherwrites.com. Now regarding some scrapbooking ideas for the journal. I am sure you will engage in these easy-to-make scrapbooking layouts for your journal. It will be simple when you follow the below step by step instructions. As always, please feel free to tweak and explore more while you create :) Trivia: This theme is a nostalgic one for me - so much for working on memories but you can go ahead and pick any theme of your choice, which is more to your liking, but I am sure you will enjoy the one we are creating today.

Let us first start with the supplies you will need!
SUPPLIES
- Journal
- Washi Tapes
- Stickers
- Paper
- Stamps and Acrylic Blocks
- Stamping Ink Pad
- Basics- Pencil,Eraser, Scissors and Glue
- A memorable picture you want to use
INSTRUCTIONS
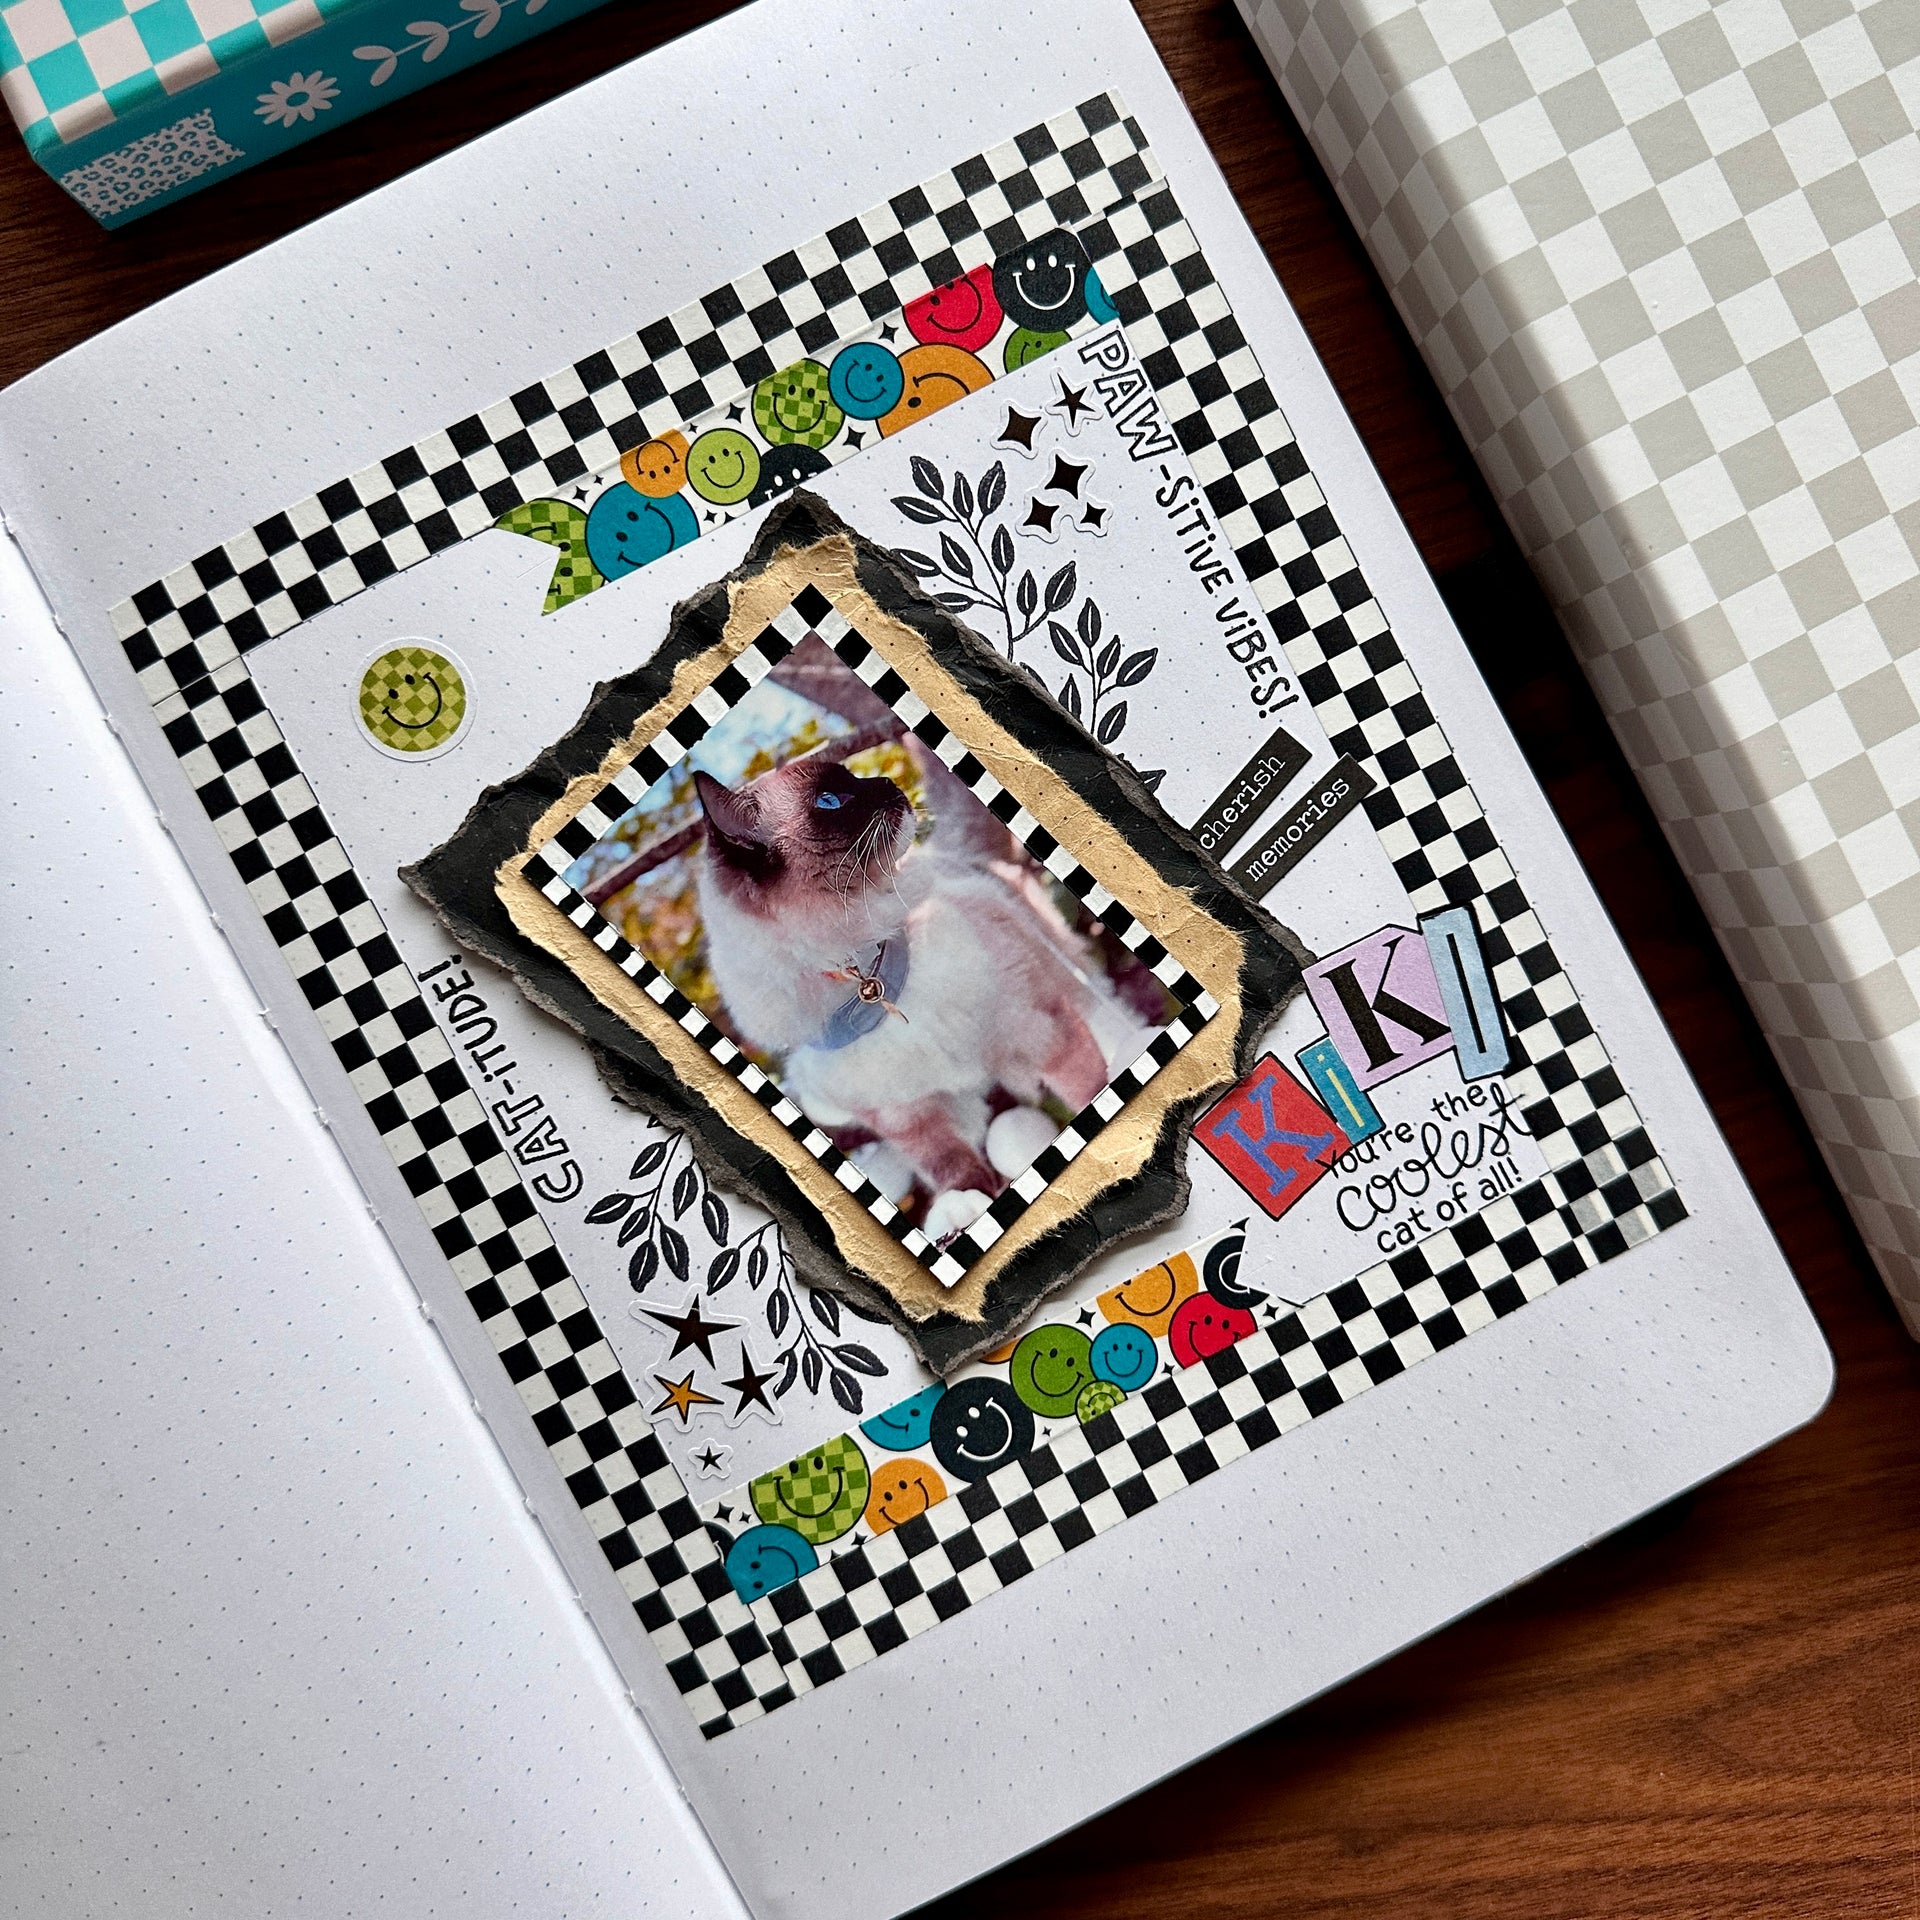
Step 1 : Making the frame using the washi tapes.
I used two washi tapes from the same theme to create the border and to add some colours, I used a second washi tape to create some banners on the top and the bottom corner.

Step 2 : Printing your picture and finding the right size and placement.
I used a small photo printer, but you can use any normal printer for your picture. Find the best position for the picture.

Step 3 : Adding details to the picture.
I used some paper from my Archer and Olive dot grid notepads to add a bit of dimension to my picture. I used three layers of paper under the picture, starting with black, khaki and another black piece right under the picture and on that, using a white Acrlograph, I mimicked the washi tape pattern we used for the border. And there you go, now the base of the picture is ready. Note: Do not stick your picture on the journal page before “Step 4”.

Step 4 : Using stamps and stickers
Next, I used the stamps and some stickers that will go under the picture. You can stamp your preferred stamps, and place the stickers of your choice. When you are happy with the whole look, stick your picture on the top at your desired position.

Step 5 : Final touches and you are done!
Now as we go towards the end, I added a few more stamps and stickers to complete the page a bit more. And with that, we are done!

How easy and fun was that? And yet filled with cheer and wonder of reliving our memories while creating art :) As you would have noticed, this can be done with many different washi tapes, stickers, stamps and some basic supplies. Let me also sharie a few more layouts from my journal with different placements of the same supplies, creating a whole different look. I used different themes and ideas, made use of some gradient washi tapes, for quick and easy pages, combined with some other itsy bitsy elements for vibrant and happy layouts. I really hope this inspired you to start your own scrapbooking journal with memories worth keeping forever.


Thank you so much for reading this today, I thoroughly appreciated the opportunity to share, inspire and create along with you.
Here's the detailed video with instructions and a flip through of other projects.
For more journaling inspiration, you can checkout these other amazing posts below-
Keeping A Daily Creative Journal As A Companion And Creative Portal + Free Lettering Worksheets
Creating A Yearly Memories Spread In Your Bullet Journal
A Minimalist Guide To Travel Journaling Supplies & Journaling On The Go
Gratitude Journaling - What Is It? What Are The Benefits? And How To Get Started Today!
Spread Ideas For Your Self Care Journal
Hope you had fun learning, creating and finding inspiration with me today. I will see you next time with more creative projects.
Love,
Naina


0 comments