


Hello everyone! It is Erin Floto from @erinflotodesigns here. I don’t know how 2023 left us so quickly but it is the end of the year which means it is time to reflect on the year that was and document our memories. The spread that I chose to do is a collage of pictures of my memories throughout the year in my blackout journal. For those who don’t know, I decided to do every other month in a different journal. January, March, May, July, September, and November were in my white notebook, while February, April, June, August, October, and December were in a blackout notebook. I decided to hand letter important memories in my white dot grid notebook and do a photo collage in the blackout notebook.
But first, here are the items you will need:
- Archer and Olive Notebook - Any color and size will do! I used a blackout notebook for mine and that really made the rainbow paper pop!
- Rainbow Paper - To recreate this particular style, the bright rainbow paper notebook from Archer and Olive is an amazing touch. You can also use the pastel rainbow paper!
- Sticker Paper/Double Sided Tape/Scissors - I used sticker paper to print out my photos, scissors to cut paper to size, and double sided tape to stick the rainbow paper to the notebook
- Any Pen/Decoration/Washi Tape - If you don’t want to go the rainbow paper route or you want to add extra pizazz, try adding extra decorations with a pen, with scrap paper, stickers, washi tape, or anything else you can think of. The sky's the limit for this spread.
Picking Your Photos
In this spread, I just went through my phone pictures starting in January and I gathered so many amazing options. For me, I love documenting even the most mundane things that happened and I definitely wasn’t able to pick all the photos I would like but I did have some highlights of the year included in my photos, as well as some everyday life photos.
Some ideas for picking your photos include:
- At least one photo from every month of the year
- Photos from trips that you took
- Photos from significant family moments
- Pet photos
- Firsts for you or a family member
- Things that make you smile when thinking back on them
- Memorializing a lost loved one
- Things you are proud of
In my spread I included a ton of funny photos of my animals, a photo of my first ever tattoo, a photo of the tattoo my partner got for his birthday, going to baseball games (Go Mets! Even if you had a tough year), hiking, painting the house, learning to golf, and highlighting my weight loss journey. While some of these things would be insignificant for others, seeing my cat in a bag is a memory I would love to be able to look back on, as well as more significant things like losing weight.

Printing and Cutting The Photos
I have sticker paper on hand so I arranged all of my photos on Adobe Photoshop (you could also use Google Sheets, Microsoft Word, Canva, etc.) and printed it on the sticker paper. Photos could also be printed on regular printer paper and use double sided tape or glue onto the paper or a background.
I was very particular about which background I wanted to go to each photo that I was memorializing this year. I wanted the rainbow background to match some aspect of the photo, so if my partner was wearing a green shirt, for example, I used a green background.

I cut the photos to size with the paper using my Archer and Olive scissors, originally from the December 2022 subscription box, peeled the backing off of the sticker, and stuck it to the background I had chosen.

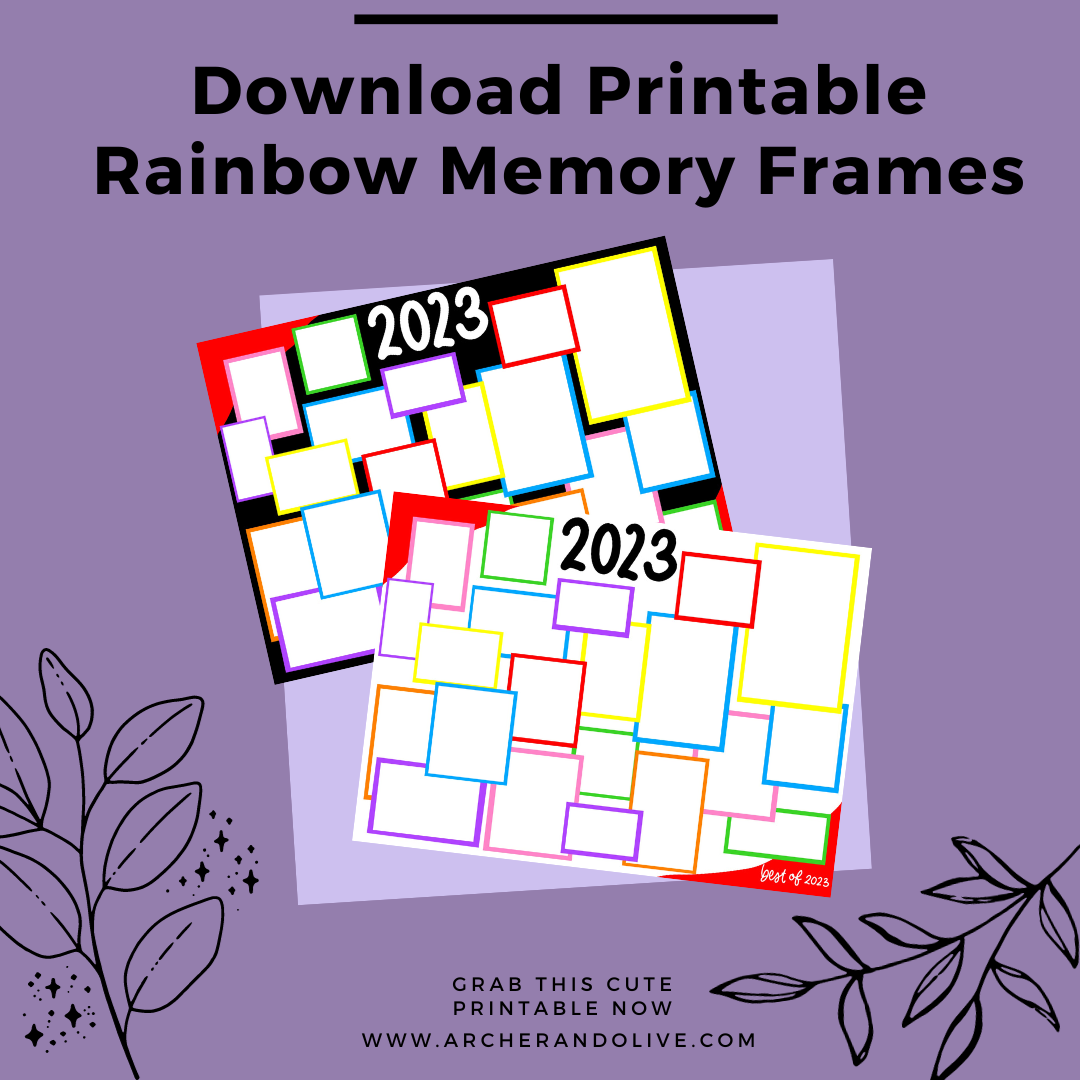
If you want the framed sections in a pre-arranged printable, check out my rainbow downloadable below! It is as easy as printing your photos and sticking them in the rainbow frames that I have drawn out!
Arranging The Photos
I started off using the double sided tape to stick individual photos to the page to get an idea of the layout I wanted. After a few were placed down, I began layers and mocking up where each of the photos should sit based on their size and the background color. I didn’t mind two photos with the same color being near each other but I did not want those to be layered on top of each other or touching in any way.

Once I found a layout I was happy with, I put all of the photos down before adding a little extra silver metallic acrylograph pen to the page. I think that extra sketching and framing really brought a lot out and made the spread feel a little more lived in. It also helped me fill in some of the negative space where no photos could fit.

If you are more visual and auditory learner I’ve included a video of the set up of this page.
I hope this blog, video and printable helps you revisit all of your cherished memories throughout the year! Thank you so much for joining and please tag @erinflotodesigns and @archerandolive and #aoshare on Instagram with your memory spread from this year!


0 comments