


Hi there! I’m Neus from the ambassador team (and I go by) @Miss.Meissa on Instagram, YouTube and TikTok and today I'm going to show you some super easy Christmas card ideas.
I love DIY cards because to me they have a higher personal value than any Christmas card you can buy. If you like to design cards, I hope you like these easy ideas for Christmas cards and follow them to create your own homemade Christmas cards.
Supplies
(Depending on the idea)
- Cardstock or Notepad paper.
- Acrylograph paint pens and/or Calliograph brush pens.
- Washi tape.
- Brush or waterbrush.
- Fineliner.
- Scissors.
- Pencil, eraser, ruler.
(You can use my affiliate code MISSMEISSA for a 10% off at archerandolive.com. Thanks!).
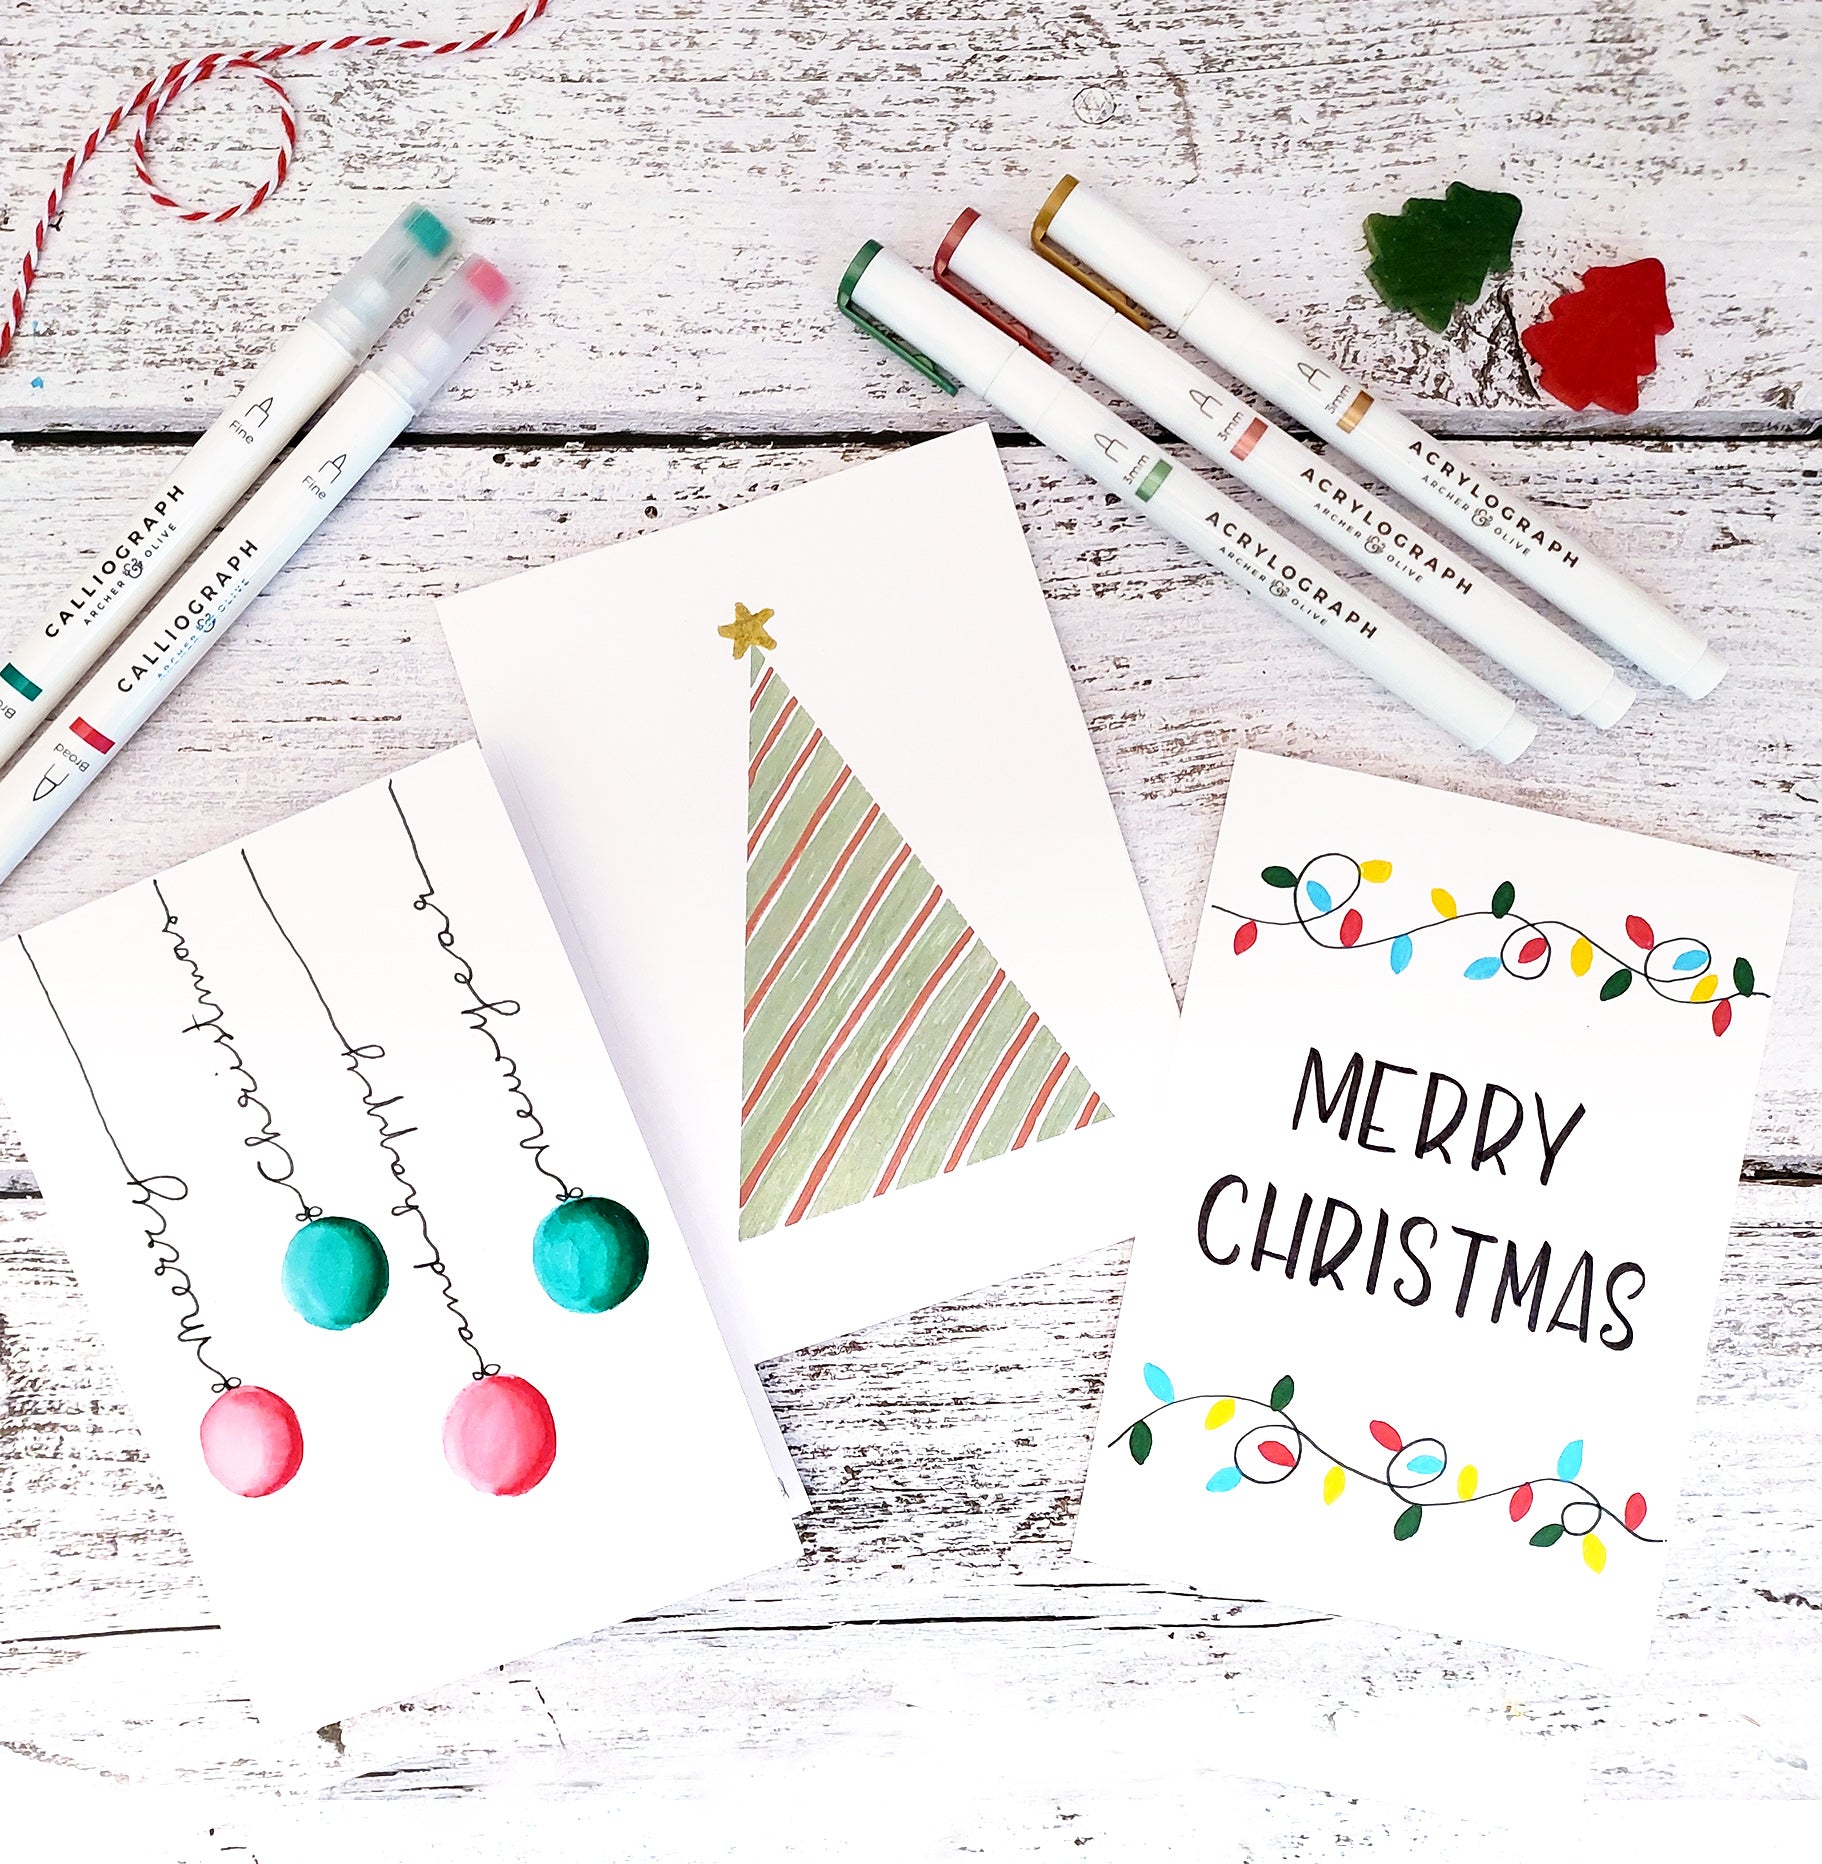
1. Easy Christmas tree card
For this first idea you will need some washi tape. Start cutting out three strips and stick them to the card creating an elongated triangle, as you can see in the picture.

This washi tape triangle will serve as a paint reserve, so we can paint quickly and keep a perfect triangle. So, once this is made, we paint thick lines diagonally with a green marker, leaving a little space between them. I am using a metallic Acrylograph for this because I love how festive the shimmer is, but you can use a regular one.
Try to make the lines more or less equal and to draw them at a parallel distance. They don’t have to be perfect, so don’t stress at all!

Once we have all the green lines painted, we are going to paint red ones in the space we had left blank.
Take your time and, if necessary, draw in pencil first. You can also use a ruler if you want them perfect, but I’m trying to embrace imperfections and I think uneven lines are pretty and have a certain charm.
Wait for it to dry well and carefully remove the washi tape strips.
Now we have already painted the shape of the tree and we just need to draw a star on the tip to finish our Christmas tree card.
You can add a lettering with a Christmas greeting or leave it this way.

2. Christmas lights card
For the second idea, we start by drawing some lines with a black fineliner at the top and bottom of the card, tangling them as you can see in the picture.
Do this in a relaxed way and take your time.

Once this is done we are going to use four different colors to add some colored lights to these lines, alternating them. You can alternate the colors one by one or calculate more or less the distance and paint all the lights of each color at once.
Don't worry too much about trying to make the distances perfectly equal because when they are all painted it won't be noticeable. And it doesn't matter if you skip a color, the result will be just as much fun.
Try to distribute the lights so that there are some at the top of the lines and some at the bottom.

Once you are done decorating this card, we are going to write a Christmas greeting in the center. I’m doing it with a Calliograph so I can get thin and thick lines in my calligraphy, but you can also use an Acrylograph or any other type of marker and write whatever you want in your favorite calligraphy or lettering style. You can take a look at my previous posts on the Archer & Olive blog; I have one on beginners calligraphy with brush pens and another to learn how to do the complete lowercase alphabet. I also have one with header ideas that you might find useful for this.
By the way, I recommend that you draw some guidelines with a ruler and sketch it in pencil first, so it is easier and less stressful.

3. Christmas balls card
For this idea it is important to use watercolor brushpens or markers so I’m using Calliograph pens instead of Acrylographs.
We start painting half moons with a red Calliograph and we will paint two more crescents with a green color, or the color you prefer. Try to paint more intensely on the outside, because we are going to create some volume.

Once they are painted, you will need a brush or a water brush to drag the pigment and create a complete sphere with a volume effect like a Christmas ball would have.
Just drag the pigment, trying to create a round gradient and leave untouched the outside part.
After painting the balls, turn the postcard to make it easier to write and draw the strings of Christmas balls with a fineliner while writing some Christmas texts. I’m writing Merry Christmas and Happy New Year.
Please, don't rush this and, again, sketch it if you need to.
And this is it, you have finished a third super colorful card.

Thanks for reading this article, I hope you liked all these ideas. If you want, you can also watch the video I recorded with the whole process:
And here is a printable that may help you.
Click to download now:
If this blog post has inspired you and you post some of your creations, you can tag me, @miss.meissa, and @archerandolive so we can see them (we would love that!). Don’t forget to add #archerandolive and #AOShare 😊
And if you want to see more Christmas ideas, don’t miss my Easy DIY Gift Tag Ideas For The Holidays that you can also use to make Christmas cards.
More greeting cards ideas on the blog:
Easy Christmas Card Tutorial With Archer And Olive Acrylograph Pens by Sarah from @essjay_florals
Five Steps For Creating A Handmade Greeting Card by Lisa @nolalettering
You can also check my resources or see more of my creations and videos on my Instagram and Youtube accounts.
I found inspiration for this article on Pinterest, so I also invite you to visit it to discover many more ideas.


0 comments