


Are you looking for a word of the year activity? You’re in the right place! Shawna Clingerman here (@shawnaclingerman) and today I’m going to share a word of the year journal spread idea, along with some free printable word of the year journal prompts to help you connect with your own personal word of the year!
Whether you are new to picking a word of the year, or you have been choosing a word of the year for years now, this simple journal spread can help you dive deeper into what your word means to YOU! It is amazing how choosing one meaningful little word of the year can really have an impact on your life!
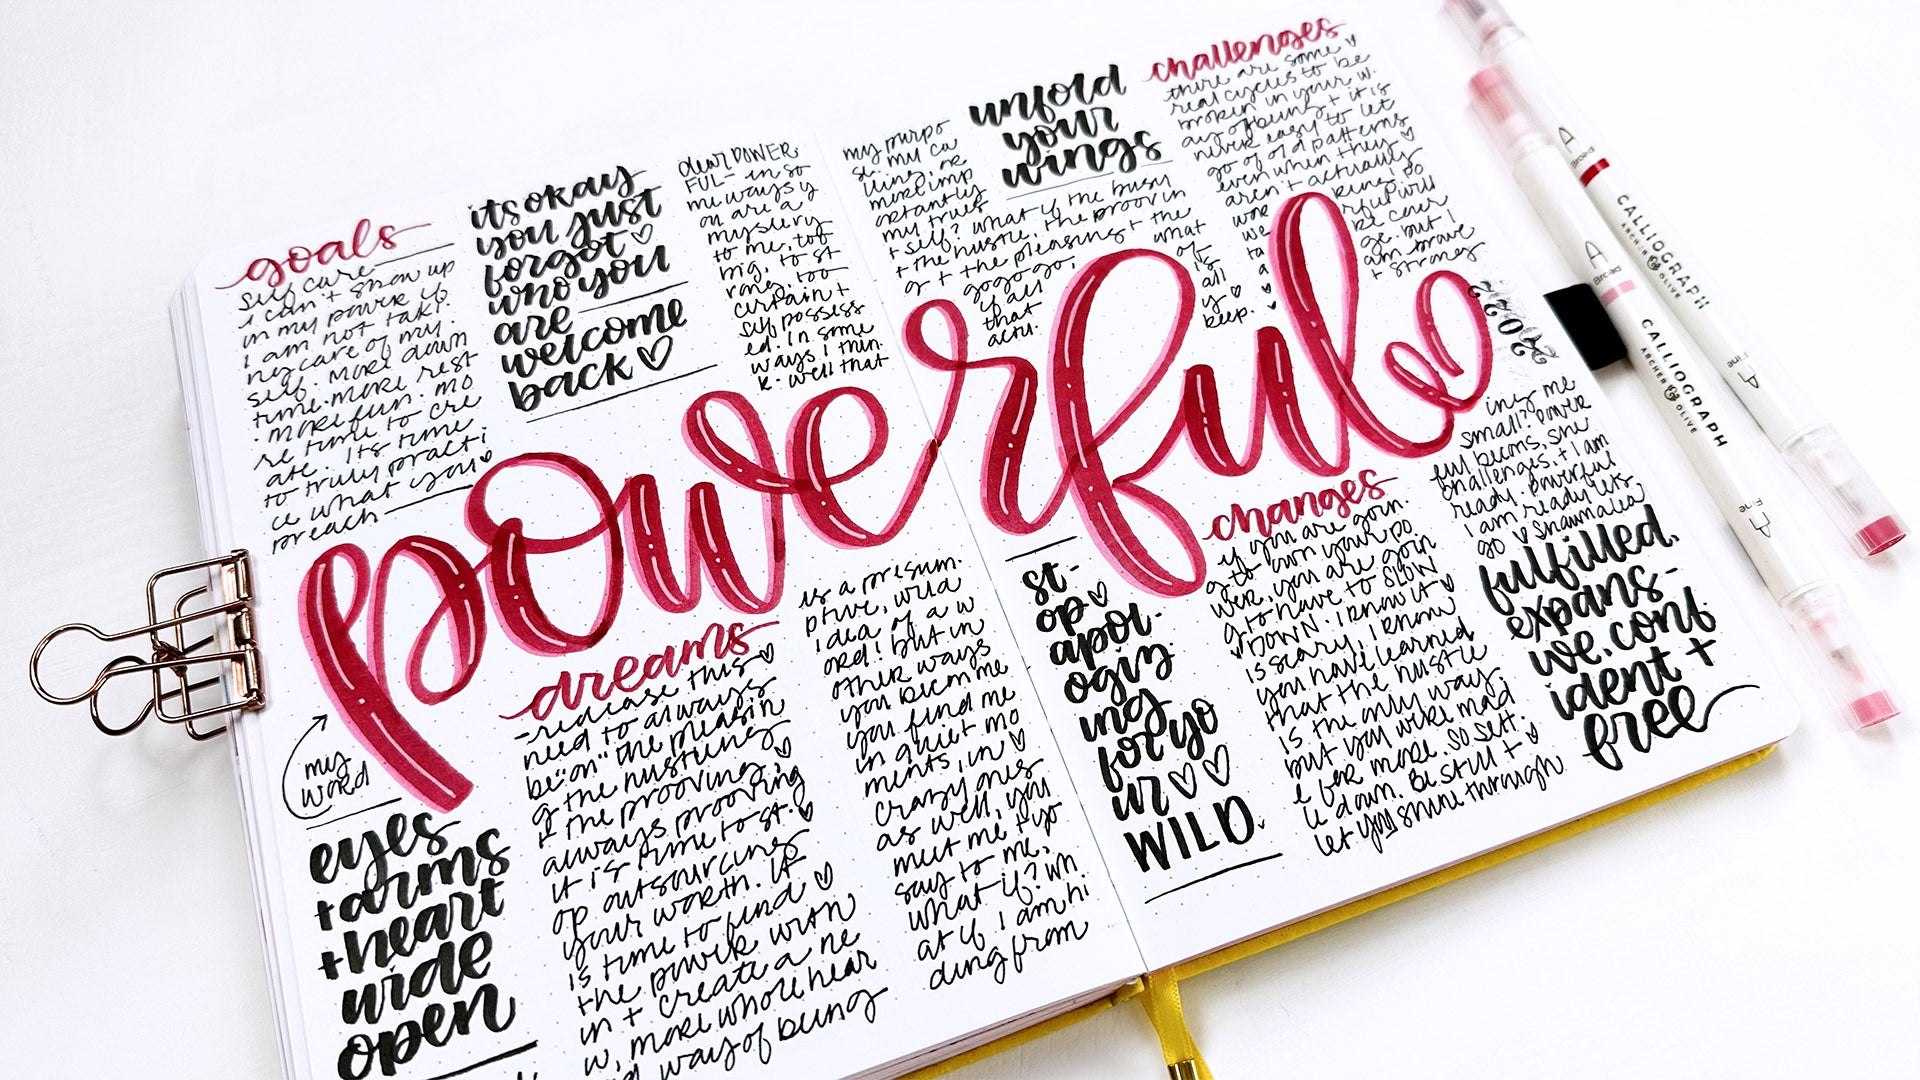
Supplies Your Word For The Year Spread
For today’s project, we will be using:
- Archer & Olive A5 Journal (I'll be using the white dot grid pages for this project)
- Archer & Olive Calliographs (I will be using the colors Magenta and Cotton Candy from the Flourish Collection)
- Archer & Olive White Acrylograph Paint Pen (in the 0.7 size)
- Any regular pencil and an eraser that works well
- Tombow Fudenosuke Brush Markers in black
Don’t forget! You can save 10% on your purchase at Archer & Olive using coupon code Shawna10!
Note: Some of the links in this post are affiliate links - this means if you go through them to make a purchase, I might earn a small commission at no cost to you!

Now, before we start creating, let’s talk a little bit about words of the year…
What is a Word of the Year?
Friends, I can’t even tell you how important choosing a word of the year has been in my life over the past 8 years! Although claiming a word at the new year might seem like a simple thing,in practice, it can mean SO much more!
Choosing a word of the year has really been such a powerful practice for me. I’m not overstating things when I say that it has been really life-changing! I have learned so much about myself, found new ways of being, and really created a practice of self-growth - all of it centered around one word.
Why A Word of the Year Instead of Resolutions:
Personally, I choose a word each year instead of setting new years resolutions. The beauty of focusing on a word instead of a resolution is that your word of the year can evolve with you!
For me, resolutions always feel like a bit of a setup - something that I can either succeed at (maybe if I can stick with a goal for an entire year) or something I fail at spectacularly. This used to leave me feeling frustrated and disappointed in myself, usually by mid-March!
Instead of the sense of “pass/fail” that resolutions tend to bring me - a word of the year is like a supportive friend to me! My words meet me where I’m at, come hell or high water. That means that even if my world turns upside down I can still always come back to my word. In my word there will always be a new meaning, a deeper understanding, and a new avenue for personal growth - perhaps one even more beautiful and powerful than any new years goal or resolution I could have set!
My Experience with Choosing a Word of the Year:
In my life, choosing a word of the year over resolutions has served me again and again. When I started this past year I chose the word Powerful.

I thought I knew what powerful was going to mean for me: Being stronger, tackling business goals, and stop playing small. However, 2022 unexpectedly hit me hard. Due to serious mental health issues, I had to take a six-month sabbatical from my work. I was struggling to function, all of my plans were halted. Honestly, I was feeling anything but bold and strong.
Had I set resolutions instead of choosing a word, I would have had to accept defeat. In a matter of weeks, all of my goals were wiped out.
But Powerful wasn’t done with me!
Because words are multi-layered, your word can actually meet you wherever you are at!
Instead of setting the world on fire, Powerful taught me that I am stronger than I know. I found a different kind of powerful, a deeper power within that says: You can do hard things. You are enough even when you are at your weakest. All year long, even on my worst days, Powerful kept whispering in my ear, “Your power is in your presence. You are powerful simply because you ARE.”
This is the magic of a word of the year! If you allow it, your word can work it’s way into any stage of life: challenges AND opportunities! Personal growth isn’t only for when we have it all together! Actually, if you ask me, growth is especially for those times when life is not at all going as planned!
(I could go on and on, but if you are interested in reading some more stories about my previous experiences with words of the year, I have them on my blog HERE)
How to Choose your Word of the Year
There is a lot of info out there about how to choose your word, and even some free quizzes floating around online…. But honestly, I would wholeheartedly recommend that you choose a word thoughtfully and intentionally.
Because a word can have such an amazing impact, it is definitely worth taking some time to really intentionally choose your word. Is there a word that helps encompass all of your goals and intentions, that will also nurture you and give you more of what you need in your in your life right now??
Although I’m not going walk you through the process of choosing your word in this post, I do have a post on my blog that has more info on that! Check out: how to choose your word, for more!
Connecting with Your Word of the Year
Today, what I really want to focus on is the importance of connecting with your word of the year. Once you have chosen your special word of the year, you have to start putting it into action if you really want to see an impact! I believe that working your word into all parts of your life, including your creative practices is key!
Today, let’s start with creating a journal spread all about what your word means to you!
Creating a Word of the Year Spread in your Journal:
Alright! Who’s ready to start creating? Let’s take our word of the year and create a spread around it, all with the intention of clarifying why we chose our word, and what we want to see in the new year!
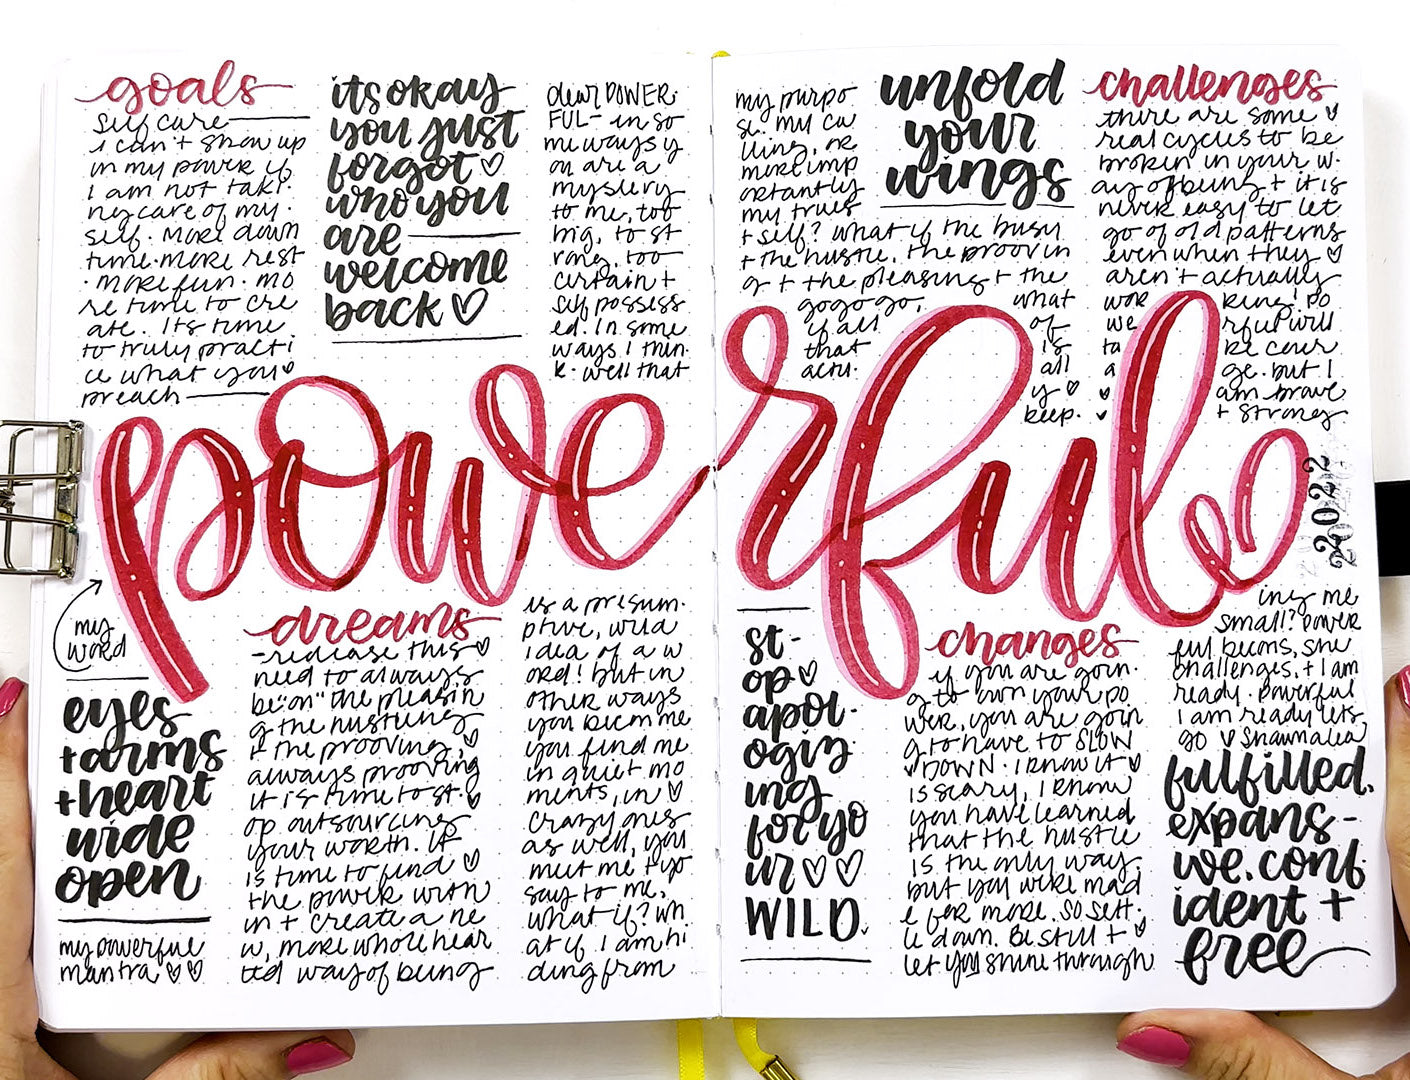
For my spread, I am using my word from this past year: Powerful. But I want you to create this spread using your own word of the year!
Follow along with me in the video below, or if you would like, read through the step-by-step instructions below the video:
Step By Step Instructions:
1) Start with a pencil:
I always recommend starting any lettering project with a pencil! It is so much easier to get a beautiful, well-placed word on your page if you just give your pencil and eraser a little time to play!
Place your word, in large letters across the center of your spread, making sure to watch your spacing on both sides so it feels nice and balanced!

Now, before you pull out your marker and move on to the next step, be sure to go over all of your pencil lines and erase erase erase! You want your word to be barely there, just as a guide, but not dark enough that the lines will show through when you letter your word!
2) Use a Calliograph brush marker and letter your word:
Brush lettering is a very specific technique, you press down for a thick line when you are on a down stroke, and you lift your pen for a thinner line on the upstroke.
I used the Magenta colored Calliograph for this step:

A quick note about brush lettering:
If you are NOT comfortable or familiar with brush lettering I highly recommend choosing a different way to fill the middle of your page with your word! This should be a fun and soul-feeding activity and you can totally get the same effect with lots of other tools - for example:
- Stamp your word with a large alphabet stamp
- Use letter stickers or letter ephemera to spell out your word
- Cut out the letters in your word from titles in magazines and glue them down in your book
- Use an alternative type of font, like a simple chunky uppercase or maybe something else you know and love like bubble letters
- You could even use faux calligraphy! (Check out THIS POST here on the Archer & Olive blog for to learn more about this easier way to hand-letter!)
If you would like to use a different method for your word, go ahead and do so, then you can skip steps 3-5 below, and meet me over at step 5!
(oh and if you would like to learn more about brush lettering you can check out this post here on the Archer & Olive blog: Brush Lettering Tips for Beginners)
3) Add some shadows
One great way to add dimension and interest to your brush lettering is to add a shadow!
For this step I use the small tip on the Cotton Candy colored Calliograph to add a slight pink shadow to my word:

As you are adding a shadow the only important thing to remember is to always keep your shadow on the same side of each line, in my example here it is always on the left. I also chose to put my pink line RIGHT on the edge of my darker magenta letter, overlapping slightly just so there wasn’t any extra space in between.
4) Make it pop with some Acrylograph highlights!
This step is fun and really packs a punch!!!
Using a white Acrylograph (This is the 0.7 size here) add highlight lines in the middle of your thickest lines on each letter. These will be your downstrokes from when you did the brush lettering step.

On my word, I used two shorter lines with a dot in the middle for each highlight. This is my personal favorite way to add highlights!
5) Pencil in some boxes:
Ok friends! Now we are on to the important part. Let’s create some spaces on our layout for getting to know our word!
When I’m considering the layout for a text heavy page, I like to think about my section of text in boxes. For this layout, I started with sketching for separate rectangles, spread between the four quadrants of my page:

6) Add headers to your boxes
Now we are going to add the prompts to the top of each of our boxes. I will be using this space for 4 main prompts:
- Goals
- Dreams
- Challenges
- Changes
You might want to use the same, or you might have some of your own in mind!!! (If you aren’t sure what you have in mind, be sure to check out the free word of the year journal prompts printable I have for you at the bottom of this post.)
For my layout I used the smaller end of my magenta Calliograph to add my headers:

7) Sprinkle in some quotes
Ok, all of this white space is making me a little twitchy! Before I pull out my favorite trusty pen to start filling in the 4 boxes, I want to fill up some of that extra space!
Using my two Tombow Fudenosuke brush markers (soft tip for bigger words, hard tip for smaller words) - I added a few hand-lettered quotes to my spread.

(once again, if you are uncomfortable with brush lettering you can use another tool! Mini alpha stamps, printables, or even some stickers!)
For my page, I wanted to have quotes sort of scattered throughout, so I ended up lettering a quote in 4 different places (and then I decided to sneak one more in later at the end of my project!)

8) Start journaling!
Now I’m going back to my 4 boxes with the titles and filling them in. Depending on your prompts and your personality, you could journal long-form like I did, or you could do something a little more streamlined like a list!

As you are filling out your boxes, here are some tips that can make all the difference when it comes to filling up the visual space:
- Break your words up if you need to - the goal is to fill in your box, edge to edge, or somewhere close to it - so if you can’t fit a long word on a line, just finish it on the next! No one is checking your grammar here, so let your words trail from line to line if it helps you keep those margins consistent!
- Use some hearts - seriously - I end lines with hearts ALL of the time, a quick little handwritten heart at the end of a line of text that falls a little bit short of the box edge makes a word of difference in your final page!
- Keep writing…. If you run out of things to list or say and you haven’t filled in the box you are writing in, just say more things. Like this: Just say say say and let it be wordy or repetitive or long or rambling and keep on keeping on until you are all the way to the bottom… (see what I did there??? It’s not beautifully articulate, but it does the job visually!)
- Finally, use a line. Sometimes if I get to the end of a paragraph and it still doesn’t quite hit that right margin line, I just use a line to draw the eye back to that block shape that I’m aiming for!

9) Journal your way through the rest of the page
Now that our quotes are added and our boxes are full, we really don’t have that much space left!!!
This means it is time to really intentionally choose what you want to reflect on for the rest of this page! Perhaps you want to browse the journal prompts from the free printable below, OR you could follow one of my own time-honored traditions and use the space that is left to write a letter to your word!
Before I start to write, once again I block out the space - here is our space all penciled in so that we can see what we are working with:

Now I’m going to use this space as margins, just as I did with my other boxes, only this time I’m going to let my text flow from one space to the next, until I get to the very bottom of my page and my journaling is all done!

10 - Finishing touches
Technically we can call this layout done! But I always like to finish a spread by just visually looking it over for any empty spaces that are distracting me from what matters!

This page had just a few spots. First: there was a bit of space below my quote on the bottom left, so I added a few words saying “this is my mantra” to fill in those lines.

Next. I added a date stamp on one side of powerful (this is a vintage stamp from a local antique shop)...

Finally, I simply jotted down “this is my word” and added a little arrow to the space before the word “Powerful.”
Finished Word of the Year Journal Spread:

There you have it! A powerful page for a powerful word if you ask me, and now I have my intentions and my hopes for my word all collected together, and my heart is extra full because every moment I spend with this word makes me love it more!
Free Printable:
Are you ready to start journaling your own word of the year? Download this free printable with some journaling prompts to get you started!!!

Also, check out my Word of the Year playlist Youtube to see me hand lettering all sorts of words of the year!!
It’s your turn!
Friends, thank you so much for following along with me as I share my love for choosing a word of the year! I hope this tutorial and these prompts inspire you to build a connection with your own word of the year!
What do you think? Do you have a word of the year yet for this year? What is it? AND what are YOU doing with your word of the year?
I would LOVE to see what you are creating!!! Definitely find me over on the socials and tag me in whatever you create! I’m @shawnaclingerman on Instagram. You can also check out my Website and my Youtube channel for more word of the year inspiration!
And definitely make sure to tag @archerandolive, @archerandolive.community, and use the hashtags #AOShare and #archerandolive. So that we can see all the lovely spreads you create!
Happy journaling, friends!


1 comment
“ Persevere”, is my. Word of the year! With the difficulties I have had to live through for the least year, and the things that are happening this year already it will be the perfect word for me.